


Product Information (cont.)
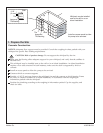
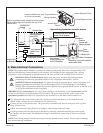
NOTICE: Provide generous, unrestricted service access to the pump. You must provide access for
servicing the pump and controls. The access must be located immediately next to the pump. Study the
roughing-in information packed with the whirlpool.
Table of Contents
Important Information .............................................................. 2
Product Information ............................................................... 2
Electrical Requirements .......................................................... 2
Product Notices ................................................................ 2
Features ..................................................................... 2
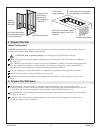
Connections and Service Access ................................................... 2
Tools and Materials ............................................................... 3
Before You Begin ................................................................. 4
Prepare the Site ................................................................. 5
Prepare the Site ................................................................. 6
Prepare the Whirlpool ............................................................. 6
Secure the Whirlpool to the Subfloor .................................................. 7
Cut the Pump Banding Straps ....................................................... 8
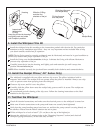
Install the Plumbing ............................................................... 8
Install the Optional Pillow - For Models Without Neckjets .................................... 8
Make Electrical Connections ......................................................... 9
Install the Whirlpool Trim Kit ........................................................ 10
Install the Neckjet Pillow (″-N1″ Series Only) ............................................ 10
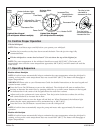
Test Run the Whirlpool ............................................................ 10
Install the Optional Apron .......................................................... 12
Complete the Finished Wall/Deck .................................................... 12
Complete the Concrete Installation ................................................... 12
Clean-Up After Installation ......................................................... 12
Confirm Proper Operation .......................................................... 13
Operating Sequence ............................................................. 13
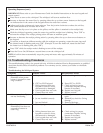
Troubleshooting Procedures ........................................................ 14
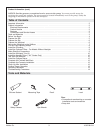
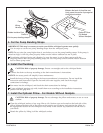
Tools and Materials
• Conventional woodworking or concrete
installation tools and materials
• Drop cloth
Plus:
Silicone Sealant Measuring Tape Pencil Level
Safety Glasses Pipe Wrench
Kohler Co. 3 1019749-2-H