FLEX HITCH ROTARY MOWER ASSEMBLY INSTRUCTIONS
STEP 1
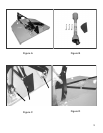
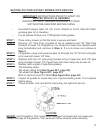
Place rotary mower on a flat, level surface. (See Figure A)
STEP 2
Remove the wired on PTO shaft. Remove the(2) bolts that are on the lift arm
lugs, and the bolt holding the pivot shield on. (See arrows Figure C) Place the
(3)bolts, the pivot shield and the PTO shaft to the side (See Figure B) you will
replace these items as you put the unit together for service.
STEP 3
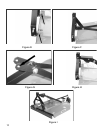
Rotate arms up to a standing position (See Figure D) and replace the (2) two
bolts once you get arms to full forward position with the swivel links below the
bolts (See Figure E on page 10).
STEP 4
Then raise brace arms up and through where they bolt to pivot bar (See Figure
F & G on page 10).
STEP 5
Install the pivot shield with bolt, through shield and through lift arms and out
other side of shield. (See hole Fig G on page 10). NOTE: Be sure long side of
shield is towards tractor. Once you get the bolt in place it should look like
(Figure H on Page 10).
STEP 6
Be sure and tighten all nuts and bolts. (Figure I on page 10 is complete unit
assembled)
CONTINUE TO INSTRUCTIONS ON PAGE 11, BEFORE PUTTING
UNIT INTO SERVICE
8


