


4
ASSEMBLY
TOOLS REQUIRED FOR ASSEMBLY
(2) 7/16" Wrenches
(1) 1/2" or 9/16" Socket Wrench
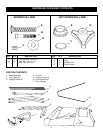
REMOVAL OF PARTS FROM CARTON
• Remove all parts and hardware packages from the
carton. Lay out all parts and hardware and identify.
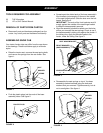
ASSEMBLING SNOW CAB
Your tractor fender style may differ from the one shown
in the drawings. These instructions apply to all fender
styles.
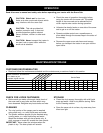
• Raise the tractor seat, unscrew the seat spring bolts
and remove the springs from the rear fender. See
figure 1.
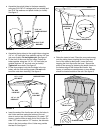
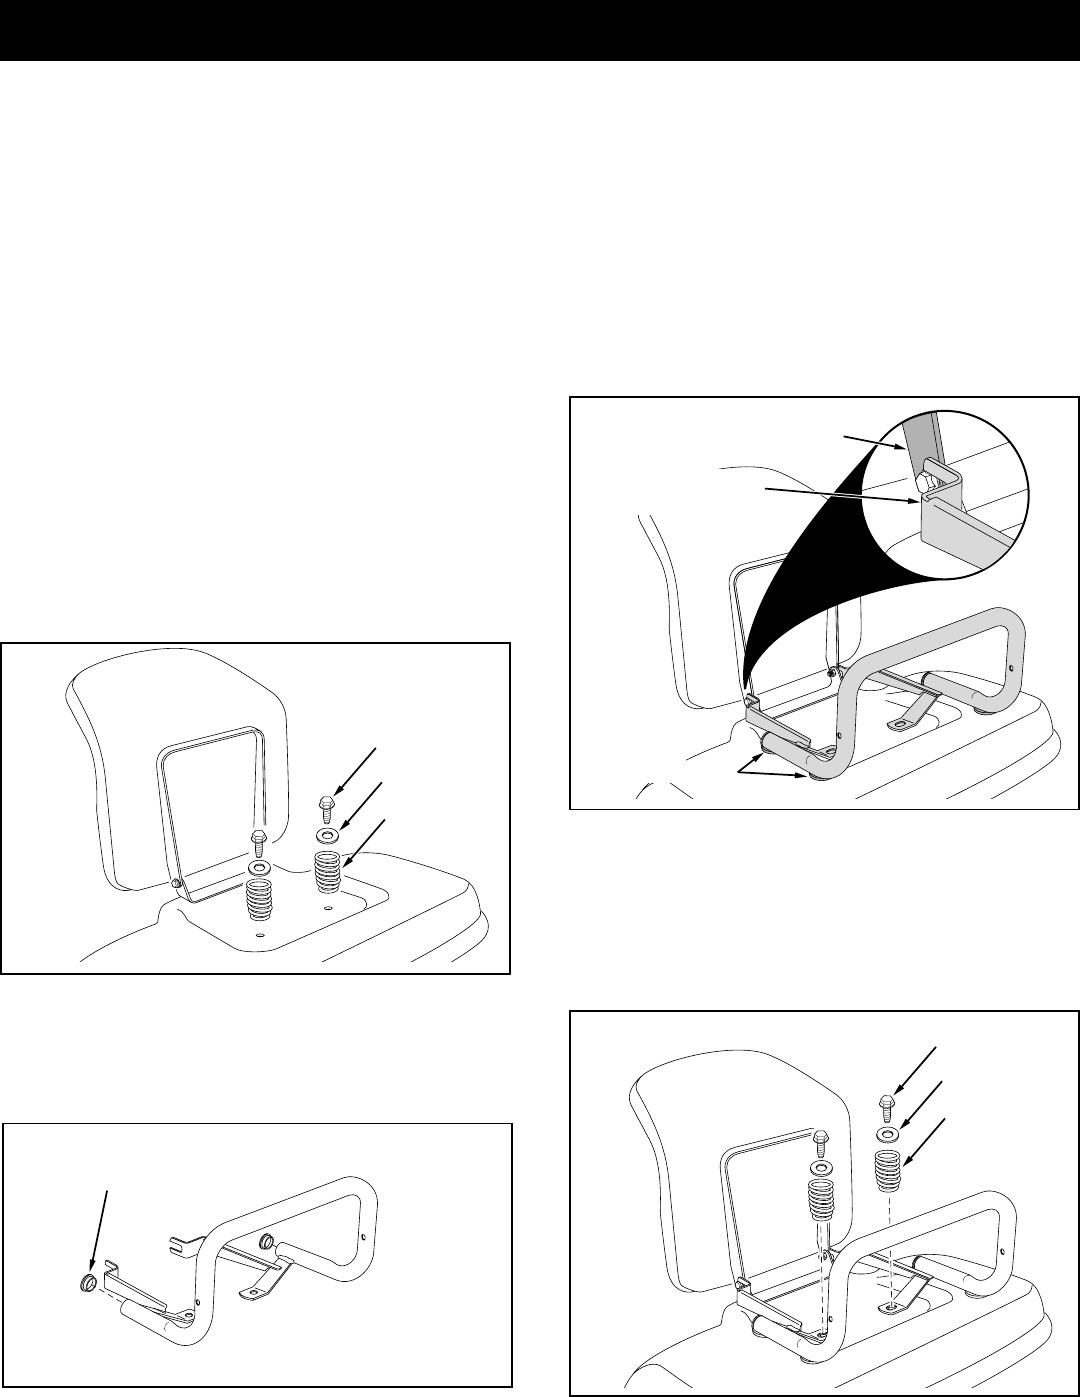
• Spread apart the slotted ends of the base assembly's
front brackets just enough to fit them on the outside
of the seat hinge bracket. Slide the slots over the bolt
heads. See figure 3.
IMPORTANT: The ends of the front brackets must fit
snugly against the outside of the seat hinge bracket
to keep the base assembly secured.
• Align the assembly's bottom brackets over the holes
where you removed the seat springs. Check to see if
the base assembly's tubing rubs against the fender. If
the tubing rubs, apply the adhesive pads to the
fender, under the tubing. See figure 3.
FIGURE 1
• Reassemble the seat springs on top of the base
assembly's bottom brackets using the bolts and
washers that you removed. Tighten securely, but do
not to overtighten. See figure 4.
FIGURE 2
FIGURE 4
FIGURE 3
BOLT
SPRING
WASHER
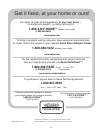
• Push the plastic plugs into the ends of the base
assembly tubes. See figure 2.
PLASTIC PLUG
SEAT HINGE BRACKET
FRONT BRACKET
(BASE ASSEMBLY)
ADHESIVE PAD
BOLT
SPRING
WASHER