8
English
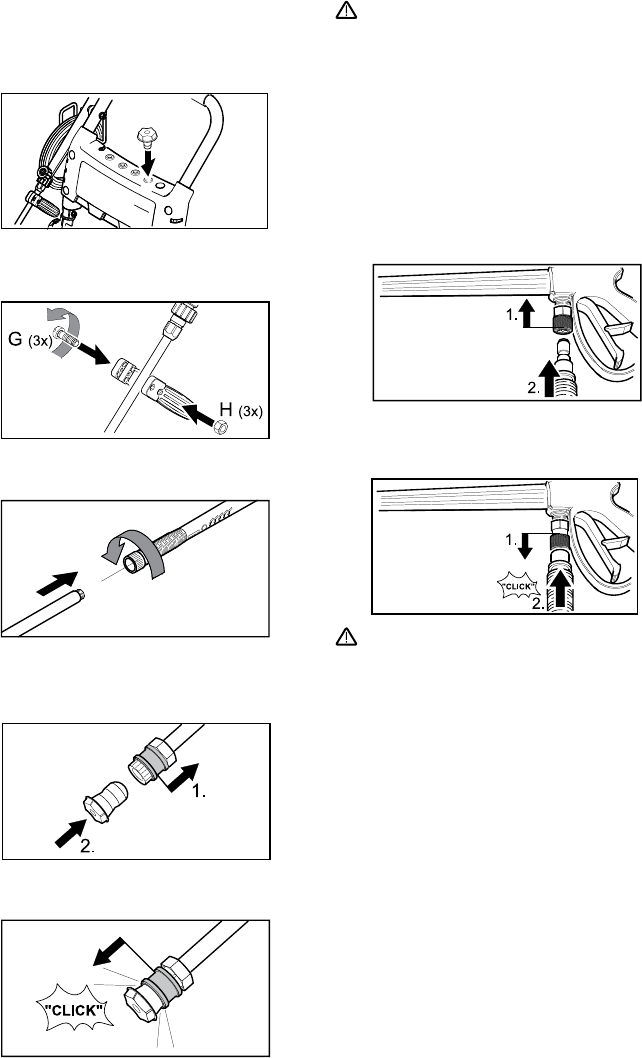
STEP 6:
Place the quick connect nozzles in the nozzle
holder.
Release the collar and push the nozzle until
the collar clicks.
STEP 9:
Pull the spring-loaded collar of the wand back
to insert your choice of quick connect nozzle.
STEP 8:
Attach the wand to the trigger gun.
STEP 7:
Assemble Hand grip to the spray lance.
WARNING
High pressure in nozzle area.
Risk of injury caused by improperly locked
nozzle.
Make sure you hear a ‘click’ when inserting ■
the nozzle tip into the wand.
Pull the nozzle to make sure it is seated ■
properly before operating your unit.
STEP 10:
Pull back the springloaded collar at the spray
gun and insert the high pressure hose.
Release the collar and push the high pressure
hose until the collar clicks
WARNING
High pressure in quick connect area.
Risk of injury caused by improperly locked
high pressure hose.
Make sure you hear a ‘click’ when insert- ■
ing the high pressure hose into the quick
connection.
Pull the high pressure hose to make sure ■
it is seated properly before operating your
unit.


