


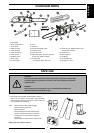
ENGLISH
15
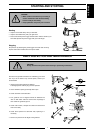
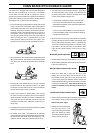
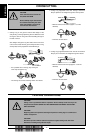
Danger zone
A danger zone surrounds the tree to a distance of
2 1/2 times the height of the tree. See to it that no one is
standing within this zone while you are felling the tree.
Felling direction
When felling a tree, one always aims to place it where neither
objects nor diffi cult terrain will hamper limbing and cutting.
Unobstructed movement and secure footing are essential.
It is also important to avoid lodging the tree against another
tree. A lodged tree is extremely dangerous.
After determining where you want the tree to fall, you must
also consider the likely unaided direction of fall. This is
affected by the straightness and lean of the tree, wind direc-
tion, concentration of branches and any snow that may weigh
the tree down.
After assessing all these factors, you may fi nd you have no
choice but to fell the tree in its natural direction of fall because
your preferred direction of fall is likely to fail.
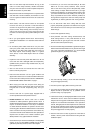
Another important factor affecting your personal safety, though
it has no bearing on the direction of fall, is the presence of any
dead branches which could fall while you are felling the tree.
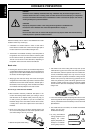
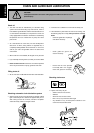
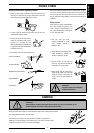
Clearing branches/Line of retreat
Remove any branches from around
the base of the tree which may in-
terfere with your work. It is safest to
work from the top down and to keep
the tree trunk between you and the
running chain. Never cut branches
above shoulder height. Clear under-
growth around the tree and identify
your line of retreat or escape, taking note of any obstructions
(stones, branches, holes, etc.).Your line of retreat should be at
an angle, around 135° behind the direction of fall.
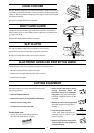
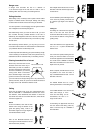
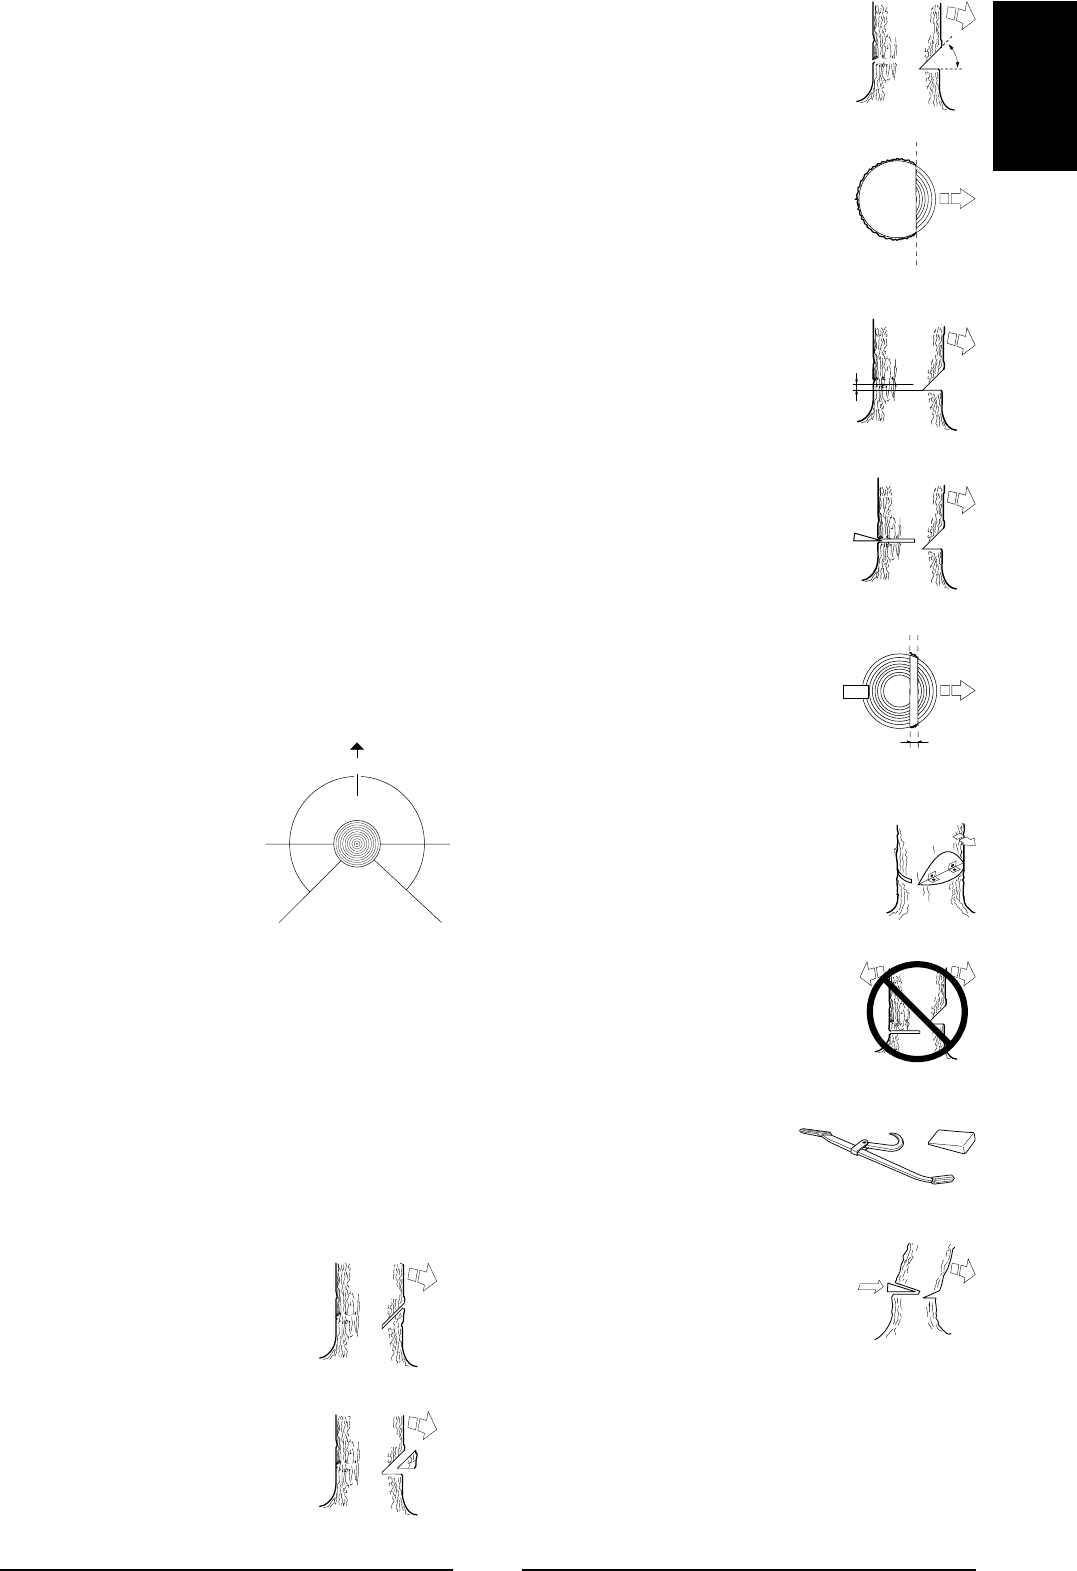
Notch depth should be around 1/4 of the
diameter of the tree and the angle should
be around 45°.
The line defi ned by the inside angle of the
notch must be precisely horizontal and
at a precise right angle to the direction
of fall.
Felling cut
The felling cut is done from the opposite
side of the tree and must also be
horizontal. Stand with the tree to your left
and cut with the bottom of the guide bar
(pulling chain).
Place the FELLING CUT approximately
3-5 cm (1 1/2 - 2”) above the BOTTOM
NOTCH CUT.
Cut at full motor speed, feeding the saw
slowly into the tree. Watch out for tree
movement opposite to the intended direc-
tion of fall. Insert a WEDGE or FELLING
BAR in the FELLING CUT as soon as the
depth of the cut permits.
When complete, the FELLING CUT must
be parallel to the notch and leave a
strip of HINGE WOOD at least 1/10 the
diameter of the tree.
The HINGE WOOD acts as a hinge,
steering the direction of the falling tree.
If the HINGE WOOD is too small or has
been sawn through, or if the
notch and the felling cut are
mismatched, the tree is no
longer under control.
As the felling cut approaches the notch,
the tree should start falling, either by
itself or with the help of a WEDGE or
FELLING BAR.
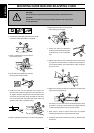
Felling
Three cuts are made to fell a tree. The «TOP NOTCH CUT»
and the «BOTTOM» or «HORIZONTAL NOTCH CUT» forms
the «NOTCH», which determines the direction in which the
tree will fall. The fi nal cut is the «FELLING CUT», which allows
the tree to topple over.
Notch
To form the NOTCH, start with the TOP
NOTCH CUT. Using the bottom of the
guide bar (pulling chain), make a 45°
downward angled cut at right angles to
the intended direction of fall.
Next do the BOTTOM NOTCH CUT,
ensuring that it meets the bottom of the
TOP NOTCH CUT precisely.
Planned Direction of fall
Danger zone
Retreat
Retreat
Danger zone