


ENGLISH
10
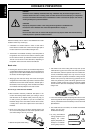
6. Replace the chain drive cover and screw
the mounting nut hand tight.
7. Tension the chain by screwing the
tensioning screw clockwise using the
screwdriver tip on the combination
tool.
8.
Tighten chain fi rmly but not so hard that it does not turn easily
by hand force. Push the button to release the chain brake. To
avoid contact between your hands and the chain, use gloves
to turn the chain.
9. Tighten the mounting nut with the combination tool while hold-
ing the tip of the guide bar up.
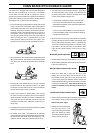
The tension of a new chain must be checked frequently until it
is broken in. Continue to check the tension at regular intervals
to ensure good performance and a long service life.
• Wear causes a chain to become looser with use. Regular
t ensioning is important to compensate for this wear.
• Check the chain tension at least every time you refi ll the chain
oil reservoir.
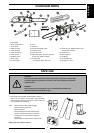
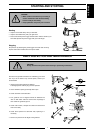
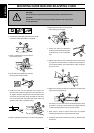
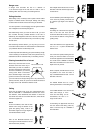
1. Pull kickback guard back against the front handle
to ensure that the chain brake is not applied.
2. Screw out the guide bar nut and remove
the chain drive cover.
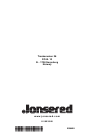
3. Fit the chain around guide bar nose with
the top cutters facing forwards.
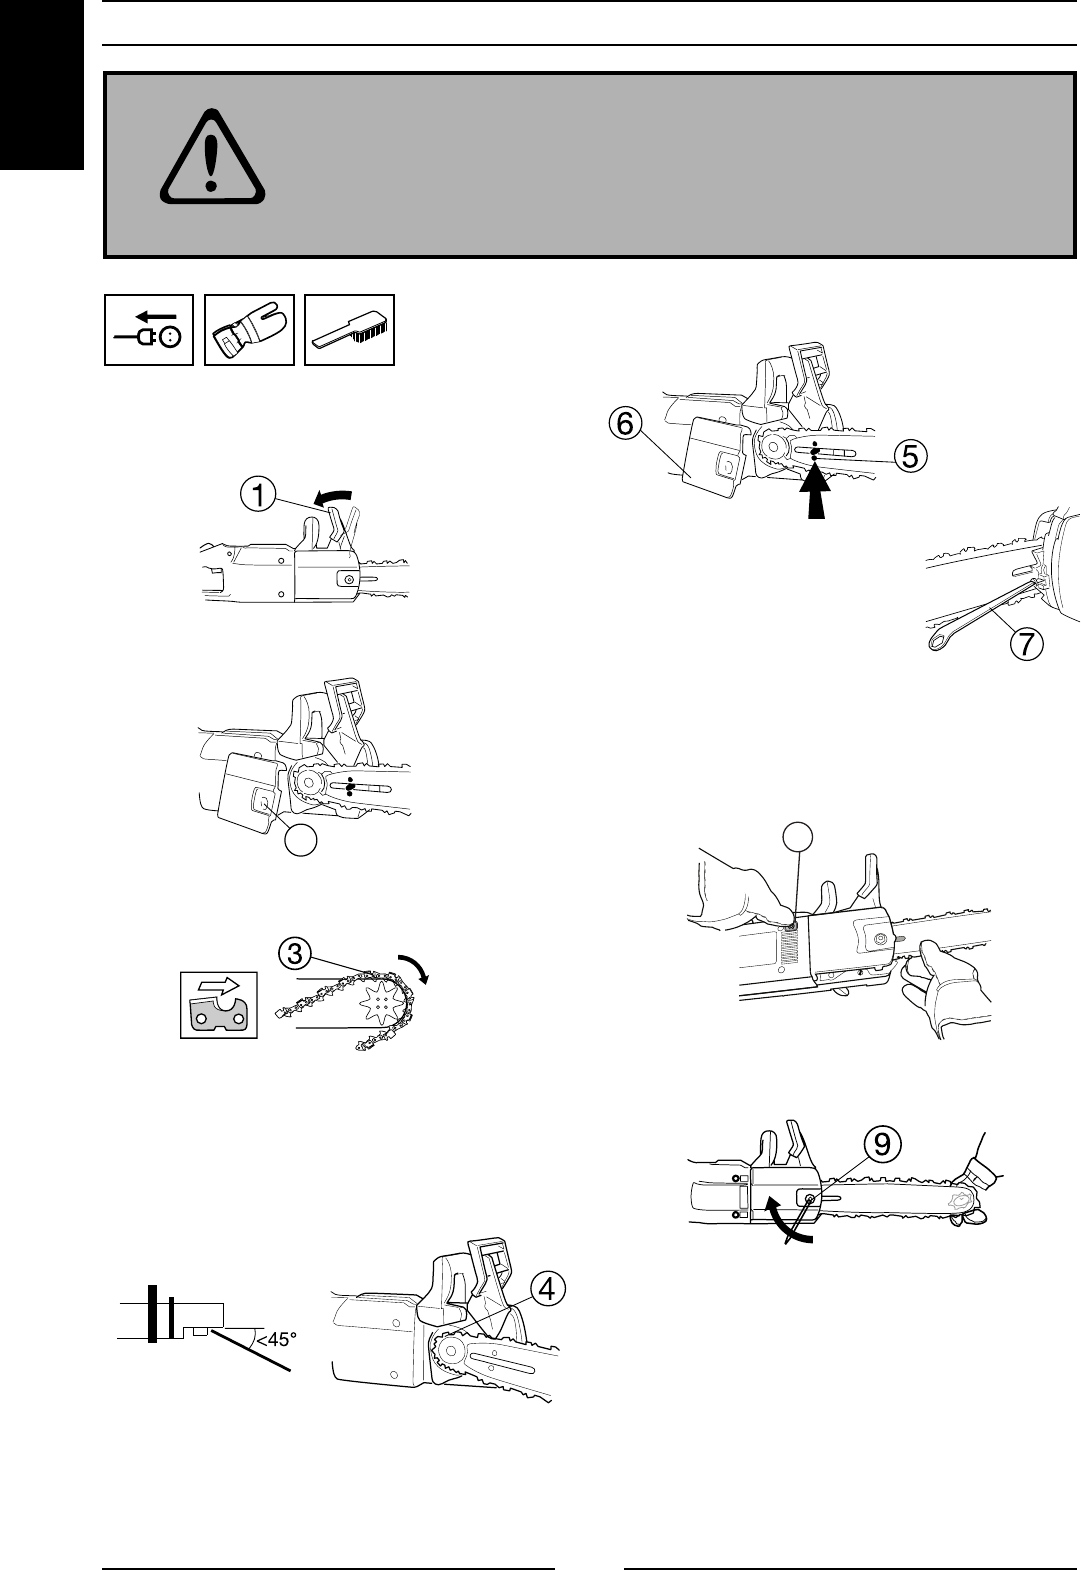
4. Holding the chain over the guide bar nose, position the
back end of the guide bar against the drive sprocket at a
45° angle to the power head. Pass the free end of the chain
around the drive sprocket, swing the guide bar into place
over the mounting bolt and against the power head, and
guide the chain into the guide bar groove.
5. Seat the guide bar tensioner pin in its hole in the guide bar.
MOUNTING GUIDE BAR AND ADJUSTING CHAIN
CAUTION!
Always disconnect power before performing cleaning or maintenance work.
CAUTION!
A loose chain can jump out of its groove during operation and cause serious
or even fatal injury.
2
8