


Having trouble setting up or making it work? Email us at 900X70@ioptron.com We’ll be glad to help!
5
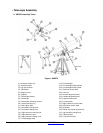
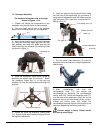
1.2. Telescope Assembly
The numbers in brackets refer to the keys
shown in Figures 1 & 2.
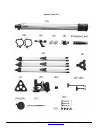
1. Unpack and identify the components of your
telescope using the list shown in previous page.
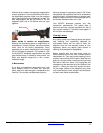
2. Take the tripod legs (2) out of the package.
Make sure the locking knobs (31) are tightened.
3. Mount three tripod's legs (2) to the tripod base
(4) using the three long tripod leg bolts (32) with
their washers and wing nuts. Make sure that the
three hinged leg lock brackets (3) are facing inside
(as shown in figure. 1 )
4. Stand the telescope's tripod mount upright by
spreading the tripod's legs out uniformly. Attach
the accessory holder tray (1) to the leg lock
brackets (3) using the short screws and wing nuts
supplied.
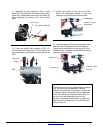
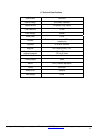
5. Unlock the tripod leg extension locking knob
(31). Extend tripod legs to desired height and lock
the leg locks afterwards.
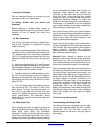
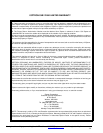
6. Insert the base of the equatorial mount head
into the hole of the tripod base (4) and secure it
using azimuth adjustment knob (23). Make sure the
right ascension (R.A.) gear (21) is below the R.A.
setting circle (13).
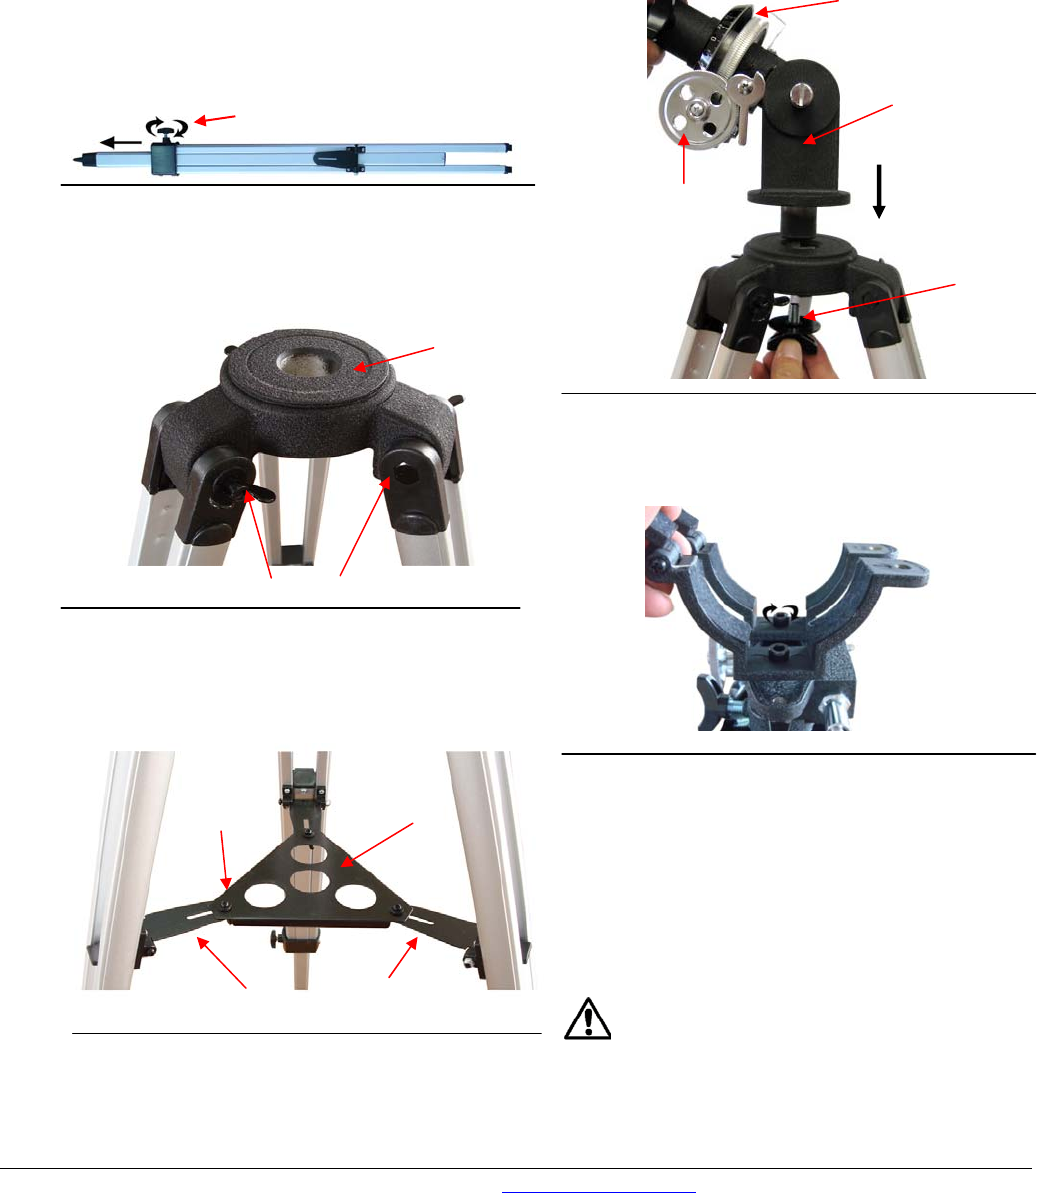
7. Put the optical tube mounting (10) onto the
equatorial mount and secure it using 2 supplied hex
head screws.
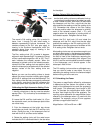
8. Slide counterweight (18) onto the
counterweight shaft (17) and secure the
counterweight by tightening the counterweight
locking knob (20). Screw counterweight shaft (17)
onto the base of the declination (Dec) axis on the
equatorial mount. Once this shaft is firmly in place,
release the locking knob (20), adjust the
counterweight up some 50 mm from the end of the
shaft and retightening the locking knob (20).
Counter weight is heavy. Please handle
with care to avoid injury!
(31)
Tripod base (4)
Tripod leg bolts and nuts (32)
Accessory tray (1)
Short screw
Leg lock brackets (3)
R.A.
g
ear
(
21
)
R.A. setting circle (13)
Equatorial mount
Head (15)
Azimuth Adjustment
knob (23)