


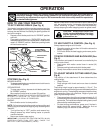
7
ASSEMBLY
NOTE: You may now roll or drive your tractor off the skid.
Follow the appropriate instruction below to remove the
tractor from the skid.
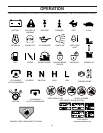
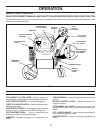
TO ROLL TRACTOR OFF SKID (See Opera-
tion section, page 10, for location and func-
tion of controls)
• Press lift lever plunger and raise attachment lift lever to
its highest position.
• Release parking brake by depressing clutch/brake pedal.
• Place freewheel control in freewheeling position to
disengage transmission (See “TO TRANSPORT” in the
Operation section of this manual).
• Roll tractor forward off skid.
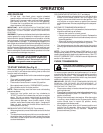
TO DRIVE TRACTOR OFF SKID (See Opera-
tion section, page 10, for location and func-
tion of controls)
WARNING: Before starting, read, understand and follow
all instructions in the Operation section of this manual. Be
sure tractor is in a well-ventilated area. Be sure the area in
front of tractor is clear of other people and objects.
• Be sure all above assembly steps have been com-
pleted.
• Check engine oil level and fill fuel tank with gasoline
• Place freewheel control in "transmission engaged" posi-
tion.
• Release parking brake.
• Slowly move the motion control lever forward and slowly
drive tractor off skid.
• Apply brake to stop tractor, set parking brake and place
motion control lever in neutral position.
• Turn ignition key to "OFF" position.
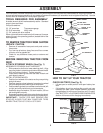
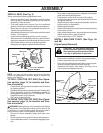
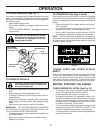
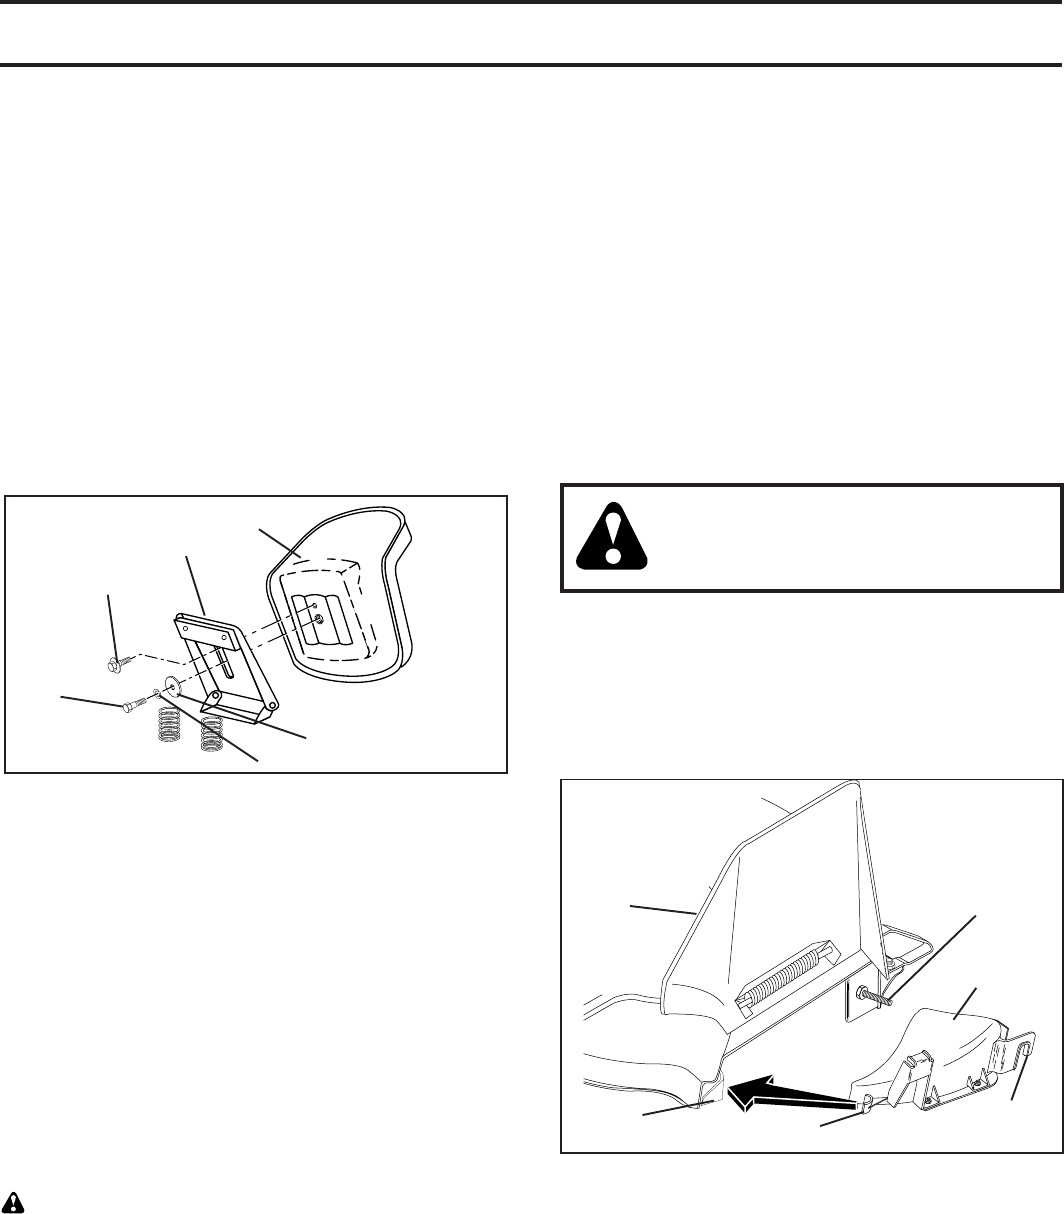
FIG. 3
ADJUSTMENT
BOLT
FLAT WASHER
LOCK WASHER
SHOULDER
BOLT
SEAT
SEAT PAN
INSTALL SEAT (See Fig. 3)
Adjust seat before tightening adjustment knob.
• Remove adjustment bolt, lockwasher and flat washer
securing seat to cardboard packing and set aside for
assembly of seat to tractor.
• Pivot seat upward and remove from the cardboard
packing. Remove the carboard packing and discard.
• Place seat on seat pan and assemble shoulder bolt.
Tighten shoulder bolt securely.
• Assemble adjustment bolt, lockwasher and flat washer
loosely. Do not tighten.
• Lower seat into operating position and sit on seat.
• Slide seat until a comfortable position is reached which
allows you to press clutch/brake pedal all the way down.
• Get off seat without moving its adjusted position.
• Raise seat and tighten adjustment bolt securely.
• Sit on seat in operating position, depress clutch/break
pedal and set the parking brake.
• Place motion control lever in neutral (N) position.
• Press lift lever plunger and raise attachment lift lever to
its highest position.
• Start the engine. After the engine has started, move the
throttle control to idle position.
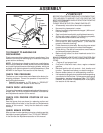
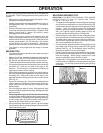
INSTALL MULCHER PLATE (See Figs. 4A
and 4B)
(If previously Removed)
CAUTION: Do not remove discharge
guard from mower. Raise and hold guard
when attaching mulcher plate and allow
it to rest on plate while in operation.
• Raise and hold deflector shield in the upright position.
• Position alignment cup over rear baffle.
• Pivot mulcher plate forward and hook on mounting bolt.
Be sure hang tab hooks top of deck opening.
• Assemble flat washer, lock washer and wing nut to
mounting bolt and tighten securely.
REAR
BAFFLE
ALIGNMENT
CUP
DEFLECTOR
SHIELD
MOUNTING
BOLT
MULCHER
PLATE
FIG. 4A
FASTENING
TAB SLOT