


ASSEMBLY
7
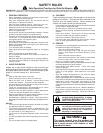
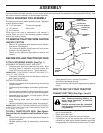
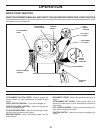
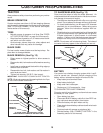
• First connect RED battery cable to positive (+) terminal
with hex bolt, flat washer, lock washer and hex nut as
shown. Tighten securely.
• Connect BLACK grounding cable to negative (-) termi-
nal with remaining hex bolt, flat washer, lock washer
and hex nut. Tighten securely.
• Close battery box door.
Open battery box door for:
• Inspection for secure connections (to tighten hard-
ware).
• Inspection for corrosion.
• Testing battery.
• Jumping (if required).
• Periodic charging .
DISCARD
TERMINAL
PROTECTIVE
CAPS
POSITIVE
(RED) CABLE
NEGATIVE
(BLACK) CABLE
HEX
NUT
LOCK
WASHER
FLAT
WASHER
HEX
BOLT
FIG. 2
BATTERY
BOX DOOR
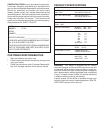
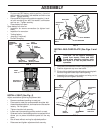
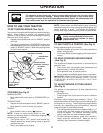
SEAT
PAN
FIG. 3
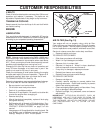
INSTALL SEAT (See Fig. 4)
Adjust seat before tightening adjustment bolt.
• Remove cardboard packing on seat pan.
• Place seat on seat pan and assemble shoulder bolt.
• Assemble adjustment bolt, lock washer and flat washer
loosely. Do not tighten.
• Tighten shoulder bolt securely.
• Lower seat into operating position and sit on seat.
• Slide seat until a comfortable position is reached which
allows you to press clutch/brake pedal all the way
down.
• Get off seat without moving its adjusted position.
• Raise seat and tighten adjustment bolt securely.
ADJUSTMENT
BOLT
FLAT WASHER
LOCK WASHER
SHOULDER
BOLT
SEAT
SEAT PAN
FIG. 4
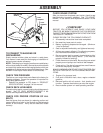
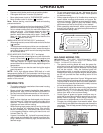
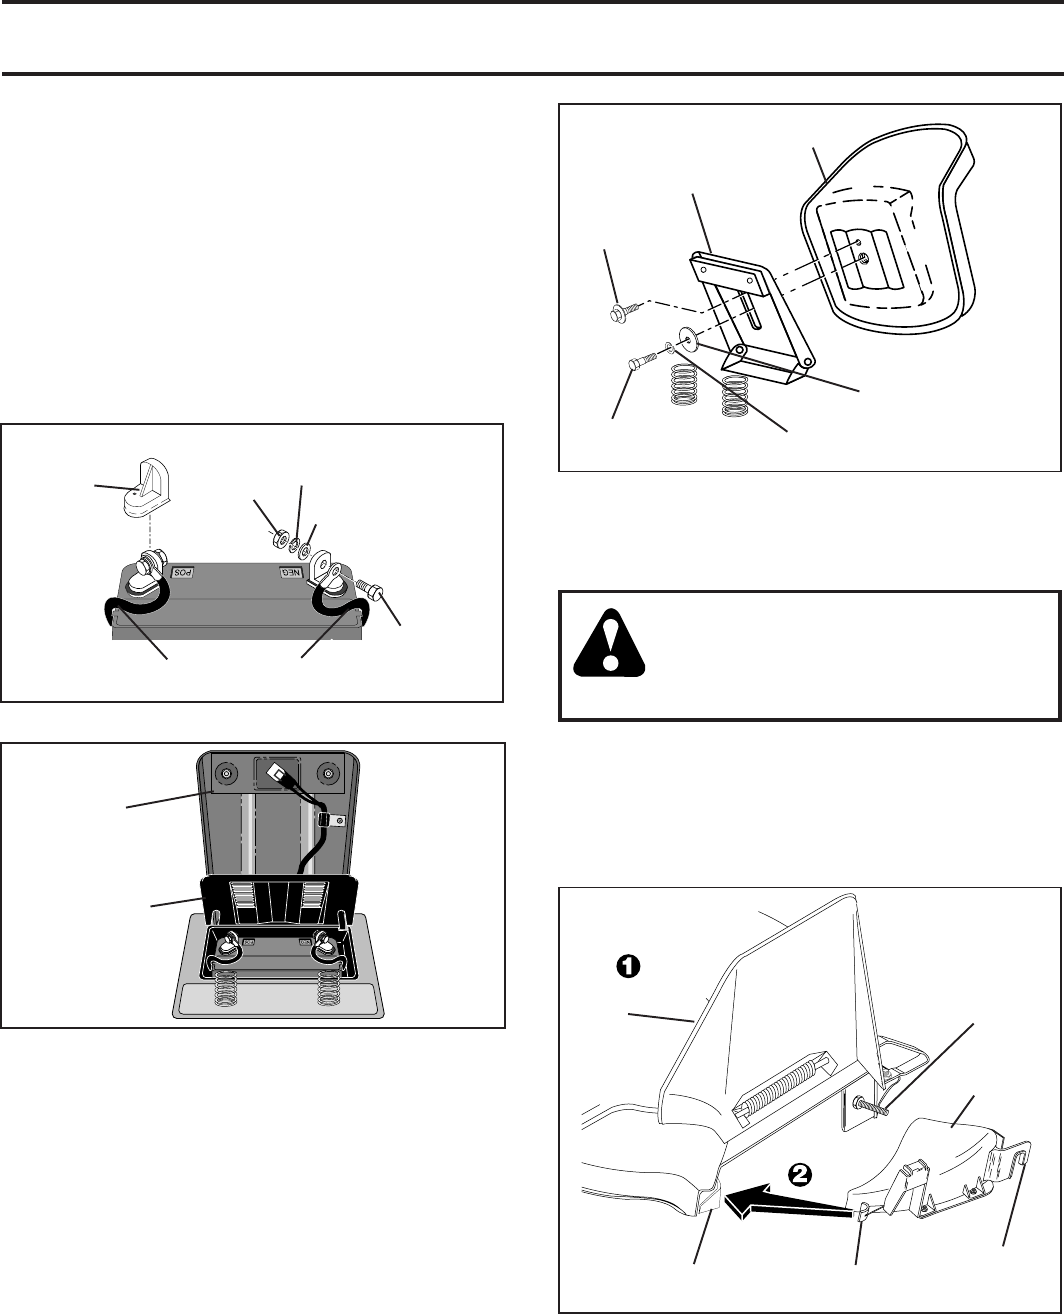
INSTALL MULCHER PLATE (See Figs. 5 and
6)
CAUTION: Do not remove discharge
guard from mower. Raise and hold
guard when attaching mulcher plate
and allow it to rest on plate while in
operation.
∂ Raise and hold deflector shield in the upright position.
∑ Position alignment cup over rear baffle.
∏ Pivot mulcher plate forward and hook on mounting bolt.
Be sure hang tab hooks top of deck opening.
π Assemble flat washer, lock washer and wing nut to
mounting bolt and tighten securely.
REAR
BAFFLE
ALIGNMENT
CUP
DEFLECTOR
SHIELD
MOUNTING
BOLT
MULCHER
PLATE
FIG. 5
FASTENING
TAB SLOT