23
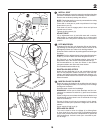
TO ASSEMBLE BAGGER
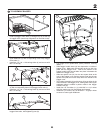
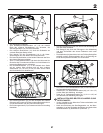
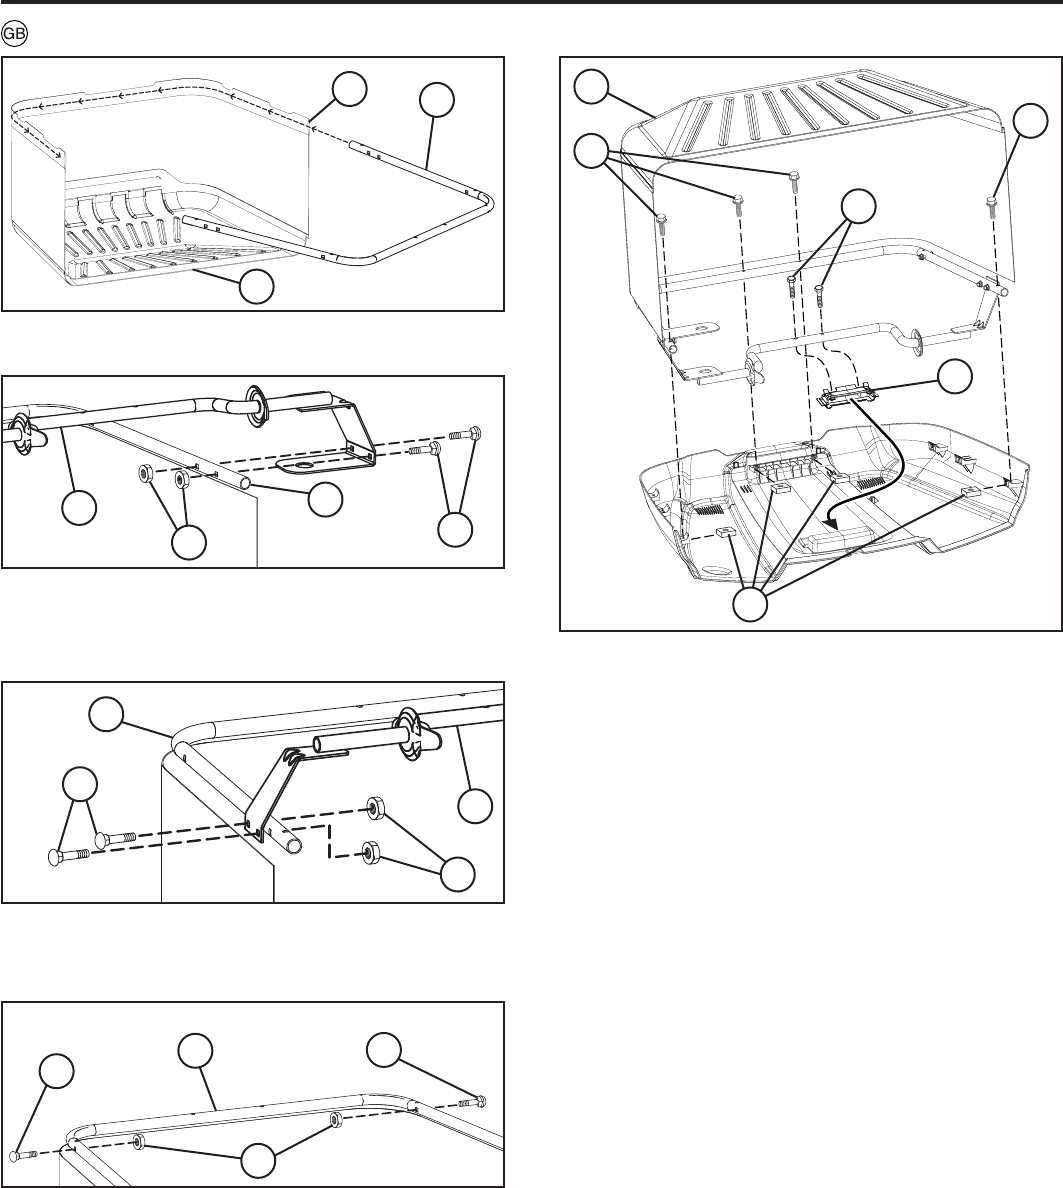
• Feed top bagger frame tube (1) through loop (2) at the top
of bagger fabric (leave loop segments on the ends loose).
• First, align two holes as shown on side of bagger frame
upper weldment (4) with corresponding holes in top bagger
frame tube (1).
• Install two 1/4"- 20 x 1.25 carriage bolts (5) and secure with
two 1/4" nuts (6).
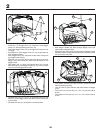
• Align two holes on opposite of bagger frame upper weldment
(4) with corresponding holes in top bagger frame tube (1).
• Install two 1/4"- 20 x 1.25 carriage bolts (5) and secure with
two 1/4" nuts (6).
3
2
1
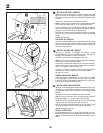
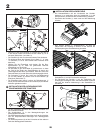
• Install two more carriage bolts (7) rearward on sides of top
bagger frame tube, hand tightening nuts (8).
6
5
4
1
5
6
4
1
7
7
8
1
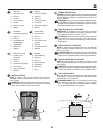
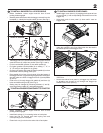
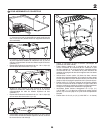
• Lay bagger cover upside-down (leave protective covering
intact).
• Slide bagger handle insert (9) into depression on inside of
bagger cover. Make sure the two tabs at the top lock into
place with the bagger cover. Teeth at the bottom of the
bagger handle insert should slide into place in between the
teeth on the bagger cover.
• Slide two square nuts (10) into the two square slots at the
front of the bagger cover and two square nuts into the two
square slots (one slot on each side) at the rear handle of the
bagger cover.
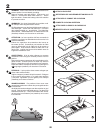
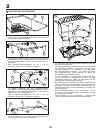
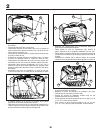
• Turn bagger assembly (3) upside-down, lining up holes in the
frame to holes in the bagger cover, making sure frame upper
weldment tubing is seated in plastic cradle in the bagger
handle insert (9).
• Install four 1/4” hex bolts (11) (1/4-20 UNC x 1.15) in holes
with four square nuts (10) and tighten until seated.
• Install two 1/4” screws (12) (1/4-20 UNC x 1.15 gold) in holes
at center of frame upper weldment.
11
11
10
12
9
3
2


