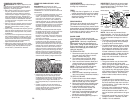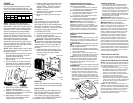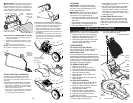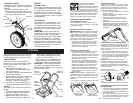
6
ASSEMBLY / PRE-OPERATION
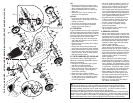
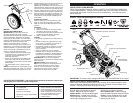
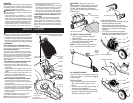
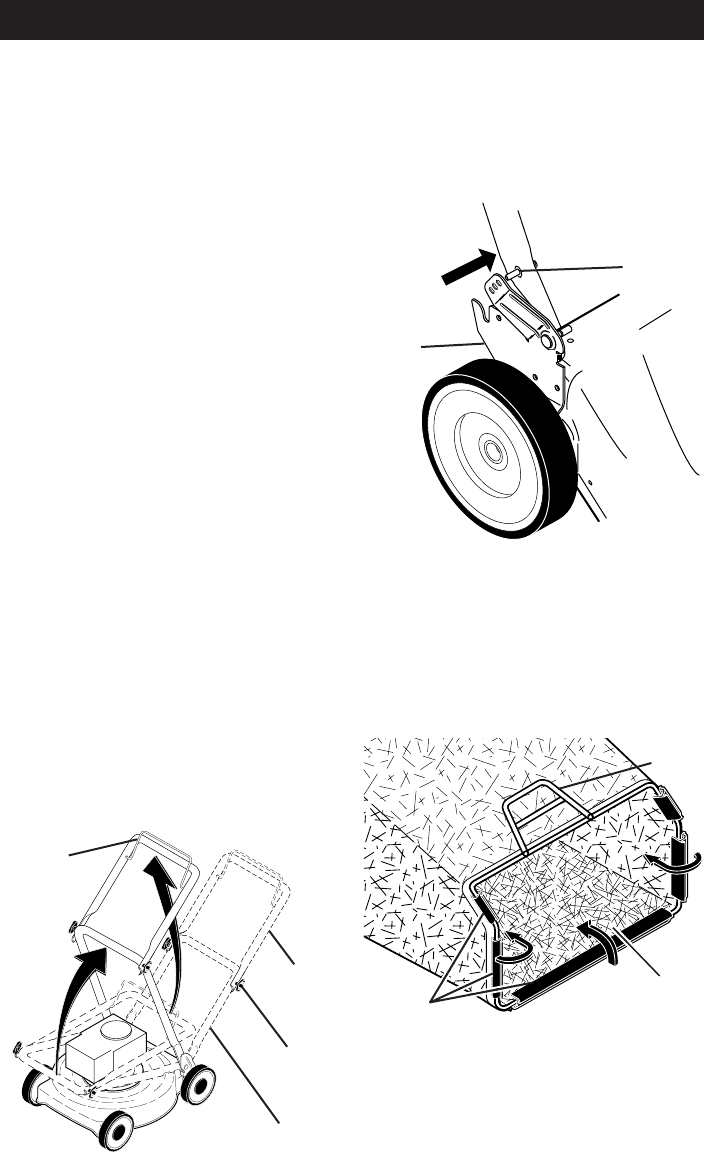
TO ASSEMBLE GRASS CATCH ER
1. Put grass catcher frame into grass bag
with rigid part of bag on the bottom.
Make sure the frame handle is outside
of the bag top.
2. Slip vinyl bindings over frame.
NOTE: If vinyl bindings are too stiff, hold
them in warm water for a few minutes. If
bag gets wet, let it dry before using.
TO INSTALL ATTACHMENTS
Your lawn mower was shipped ready to be
used as a mulcher. To convert mower to
bagging or discharging, see “TO CON-
VERT MOWER” in the Operation section
of this manual.
Frame
handle
Frame
opening
Vinyl
bindings
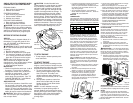
MOWING
POSITION
Lower handle
LIFT
UP
Operator
presence
control bar
Upper
handle
LIFT
UP
Handle
knob
Read these instructions and this man u al in its entirety before you attempt to assemble
or operate your new lawn mower.
IMPORTANT: This lawn mower is shipped WITHOUT OIL OR GASOLINE in the engine.
Your new lawn mower has been as sem bled at the factory with the ex cep tion of those
parts left unassembled for shipping purposes. All parts such as nuts, washers, bolts, etc.,
necessary to com plete the as sem bly have been placed in the parts bag. To ensure safe
and proper operation of your lawn mow er, all parts and hard ware you assemble must be
tightened se cure ly. Use the correct tools as necessary to ensure proper tightness.
Handle
bracket
Handle pin
SQUEEZE
TO RE MOVE MOW ER FROM CAR TON
1. Remove loose parts included with
mower.
2. Cut down two end corners of carton
and lay end panel down fl at.
3. Remove all packing materials ex cept
padding be tween upper and lower
handle and padding holding operator
presence control bar to upper handle.
4. Roll lawn mower out of carton and
check carton thorougly for ad di tion al
loose parts.
HOW TO SET UP YOUR MOW ER
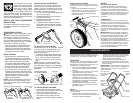
TO UNFOLD HANDLE
IMPORTANT: Unfold handle carefully so
as not to pinch or damage con trol cables.
1. Raise lower handle section to operat-
ing position and squeeze the bottom
ends of lower handle towards each
other until the pin in handle can be
inserted into one of the three height
adjustment holes.
2. Remove protective padding, raise up-
per handle sec tion into place on lower
handle and tighten both handle knobs.
3. Remove any packing material from
around control bar.
Your lawn mower handle can be adjusted
for your mowing comfort. Refer to “AD-
JUST HANDLE” in the Service and Adjust-
ments section of this manual.
35
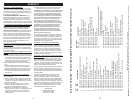
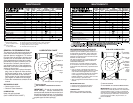
No arranca 7. Cuchilla suelta o adaptador 7. Apriete el perno de la cuchilla
(continuado)
de la cuchilla quebrado. cambie el adaptador de la cuchilla.
8. Barra de control en la 8. Presione la barra de control
posición suelta. hacia el mango.
9. Barra de control defectuosa. 9. Cambie la barra de control.
10. Válvula del combustible (si equ- 10. Gire a la válvula del combustible
ipada) está en la posición OFF. a la posición ON.
Falta de 1. Cuchilla desgastada, doblada 1. Eleve la altura de corte.
fuerza o suelta.
2. Altura de las ruedas dispareja. 2. Eleve la altura de corte.
3. Velocidad del motor lenta. 3. Limpie/cambie el fi ltro de aire.
4. Acumulación de césped, hojas o 4. Limpie la parte inferior de la
basura debajo de la segadora. caja de la segadora.
5. Demasiado aceite en motor. 5. Revise el nivel del aceite.
6. Velocidad de recorrido 6. Corte a una velocidad de
demasiado rápida. recorrido más lenta.
Mal corte- 1. Cuchilla desgastada, doblada 1. Cambie la cuchilla. Apriete el perno
disparejo o suelta. de la cuchilla.
2. Altura de las ruedas dispareja. 2. Ajuste todas las ruedas a la misma
altura.
3. Acumulación de césped, hojas o 3. Limpie la parte inferior de la
basura debajo de la segadora. caja de la segadora.
Vibración 1. Cuchilla desgastada, doblada 1. Cambie la cuchilla. Apriete el
excesiva o suelta. perno de la cuchilla.
2. Cigueñal del motor doblado. 2. Póngase en contacto con su centro
de servicio Husqvarna o con un otro
centro de servicio cualifi cado.
Cordón 1. El freno del volante del motor 1. Presione la barra de control
arrancador está aplicado cuando se hacia el mango superior antes
difícil de tirar suelta la barra de control. de tirar el cordón arrancador.
2. Cigueñal del motor doblado. 2. Póngase en contacto con su centro
de servicio Husqvarna o con un otro
centro de servicio cualifi cado.
3. Adaptador de la cuchilla quebrado. 3. Cambie el adaptador de la cuchilla.
4. La cuchilla se arrastra en 4. Mueva la segadora a un lugar
el césped. en donde el césped ha sido
cortado o a una superfi cie fi rme
para hacer arrancar el motor.
Recogedor de 1. Altura de corte demasiado baja. 1. Eleve la altura de corte.
césped no se 2. Levantamiento de la cuchilla 2. Cambie las cuchillas.
llena (si viene desgastado.
equipado) 3. Recogedor sin ventilación de aire. 3. Limpie el recogedor de césped.
Difícil de 1. El césped está demasiado alto o la 1. Eleve la altura de corte.
empujar altura de la rueda demasiado baja.
2. Parte trasera de la 2. Eleve la parte trasera de la caja de
caja/cuchilla de la segadora la segadora (1) un lugar más alto.
arrastrándose en el césped.
3. Recogedor de césped 3. Vacíe el recogedor de césped.
demasiado lleno.
4. Posición de la altura del mango 4. Ajuste la altura del mango de
no adecuada para usted. modo que le acomode.
Pérdida de 1. Desgaste de la correa. 1. Re vise/cambie correa de impulsión.
impulsión 2. La correa está fuera de la polea. 2. Revise/vuelva a instalar la
o retardase 3. Cable de la impulsión usado o roto. 3. Cambie el cable de la impulsión.
de la 4. El sistema de control del 4. Ajuste el control del mecanismo
velocidad mecanismo impulsor “suelto”. impulsor.
PROBLEMA CAUSA CORRECCIÓN
SOLUCIÓN DE PROBLEMAS - Vea la sección apropiada en el manual amenos que
esté dirigido a un centro de servico Husqvarna.


