16 – English
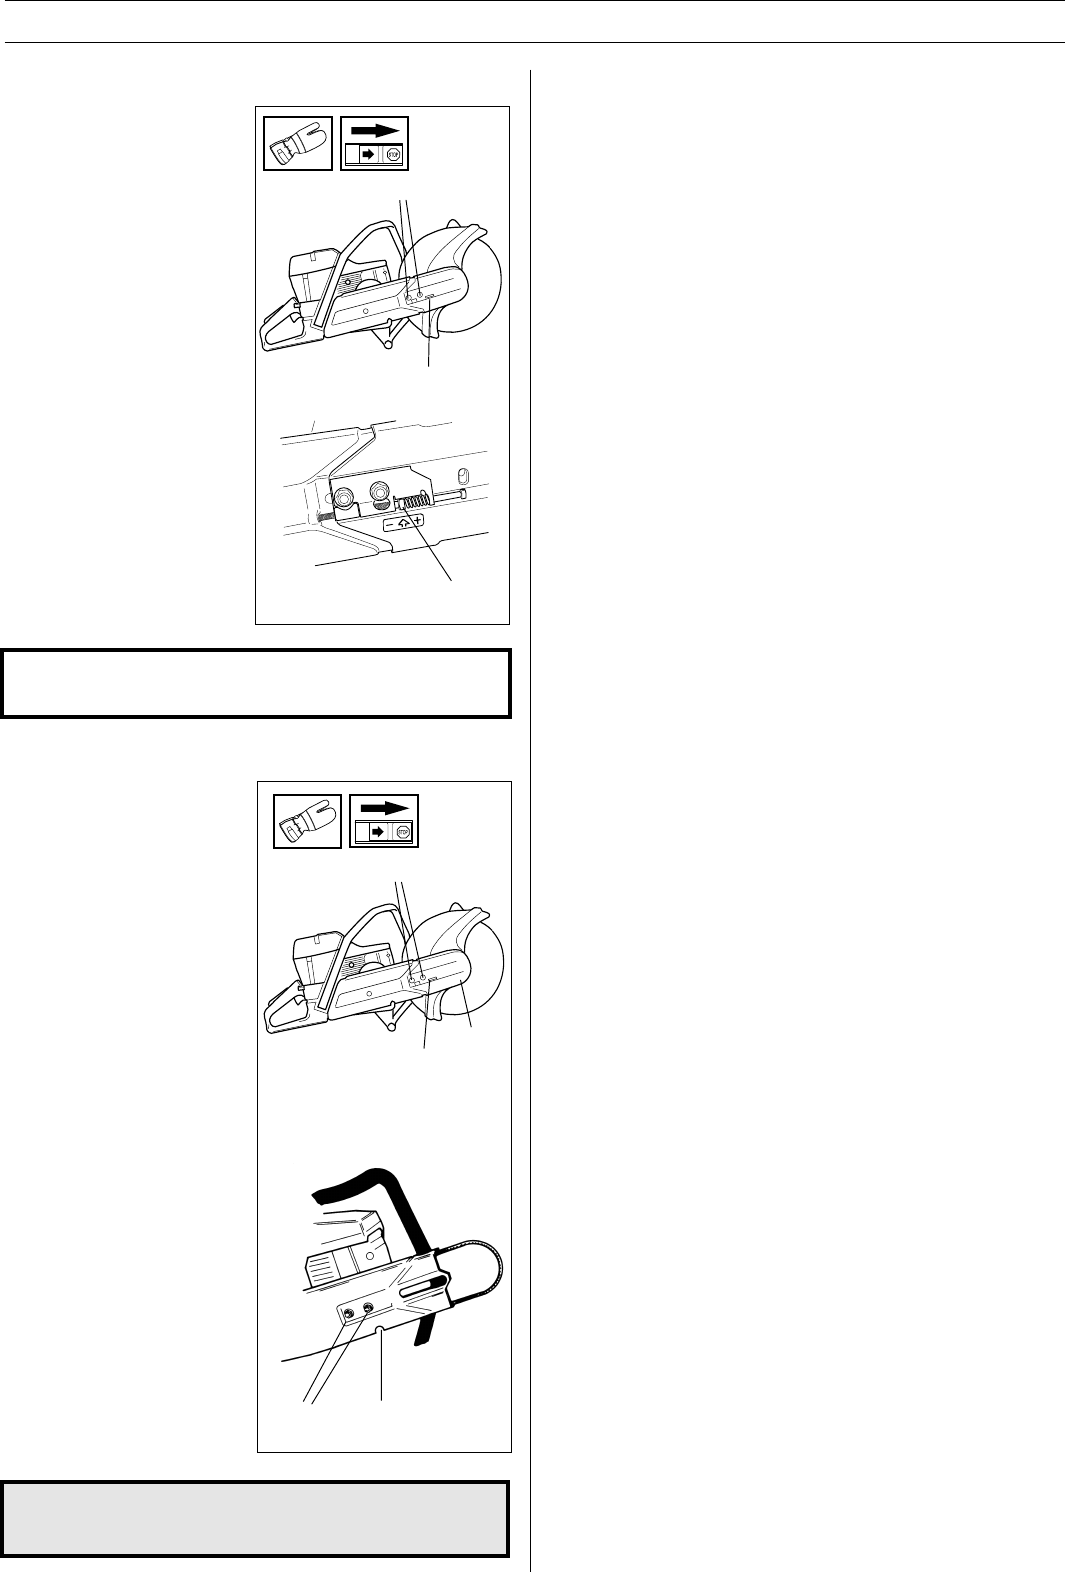
Adjusting the drive belt
• The drive belt is fully
enclosed and well protected
from dust, dirt and
mechanical effects during
the cutting process.
• To tension the drive belt,
slightly loosen the bolts (A),
which secure the cutting
head and belt guard.
• Turn the tensioning screw
so that the nut (B) is located
directly under the arrow on
the cover. Shake the head
to ensure the spring can
tension the belt. The belt
now automatically has the
right tension.
• Tighten the bolts that hold
the cutting head.
IMPORTANT INFORMATION! A new drive belt should be
tensioned after using one tank of fuel.
MAINTENANCE
!
WARNING! Never use a power cutter without a
blade guard over the cutting blade.
Changing the drive belt
• Loosen the two bolts (A).
• Turn the tensioning screws
(B) until the tension has
been released.
• Remove the two bolts (A).
• Remove the front belt cover
(C).
• Remove the belt from the
pulley.
• Dismantle the cutting head.
• Remove bolt (E) and nut
(D). Remove the side cover.
• Replace the drive belt.
• To assemble reverse the
procedure for dismantling.
• Check the cutting blade’s
blade guard for signs of
cracking or other damage.
Replace it if damaged.
B
B
C
B
A
A
E
D
Belt pulley and clutch
Never start the engine when the belt pulley and clutch are
removed for maintenance.


