


9
ASSEMBLY
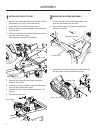
1. Makesurethetensionreleaseleverisforwardor
disengaged.
2. Placethebeltoverthepulleyonthedeck.Referto
illustration for proper routing.
3. Move the tension release arm to the rear and
engage in the latch.
3
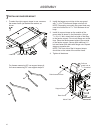
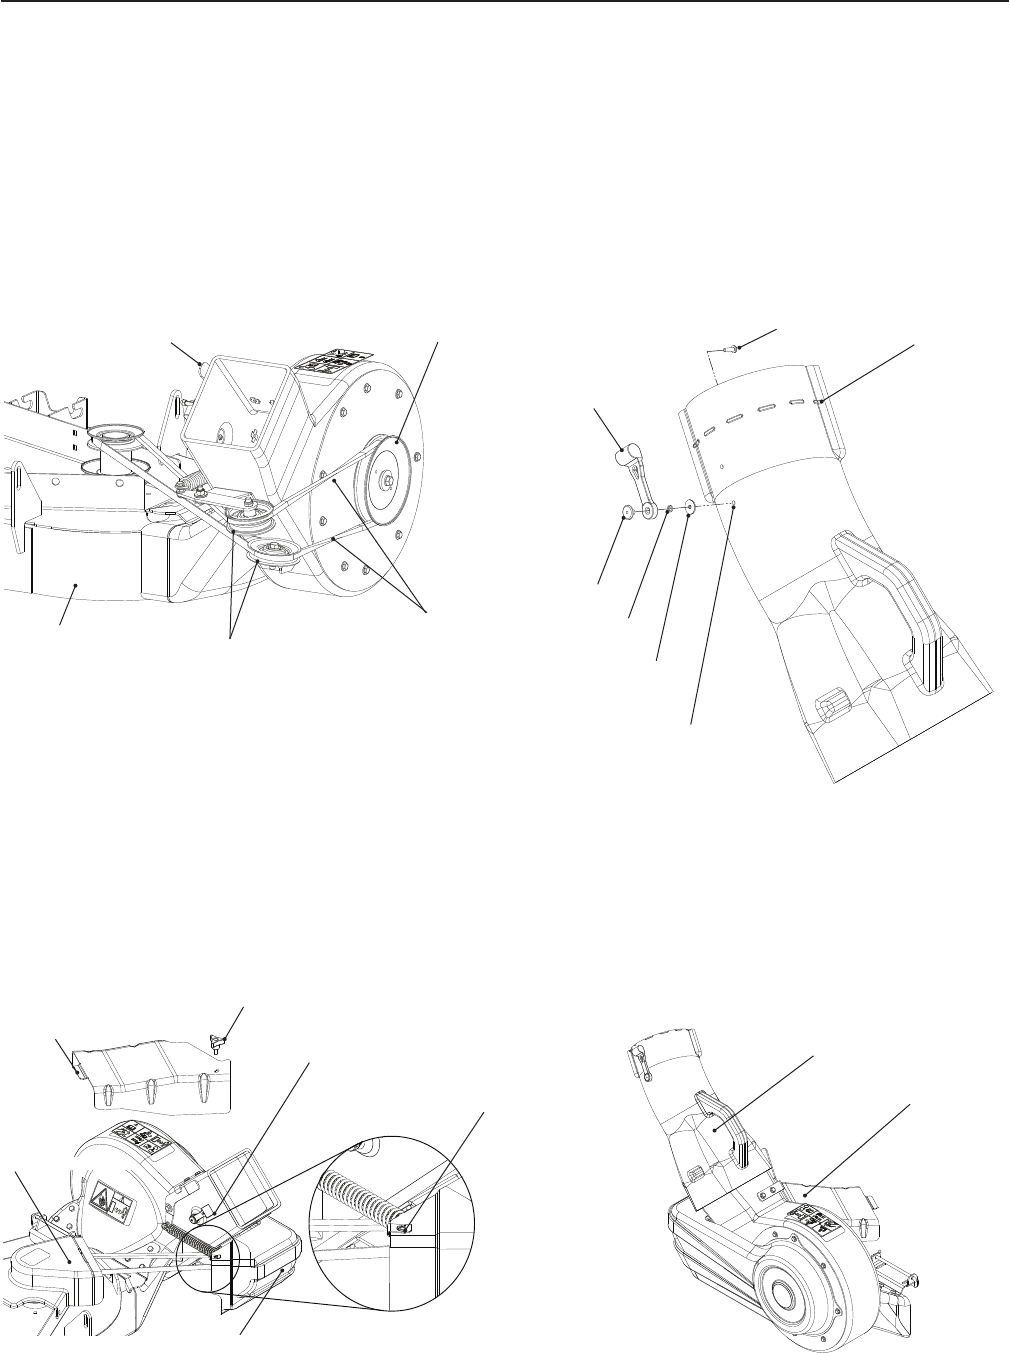
INSTALLING DRIVE BELT
RearOfDeck
Idler Pulleys
Outer Pulley
Twist in Belt
Tension Release Arm
4
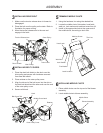
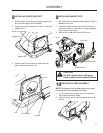
INSTALLING BELT COVERS
1. Placethedeckbeltshieldonthedeckoverthe
drive pulley and secure with hardware removed
from steel belt shield.
2. Place retainer on the outer pulley cover.
3. Align the tab end of the belt cover into the slot on
thedeckbeltshieldandtheotherendovertheend
of the outer pulley cover.
4. Securewithknob.
Retainer
Knob
Outer Pulley Cover
DeckBeltShield
Belt Cover Tab
Middle Chute Latch
5
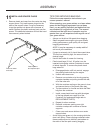
TRIMMING MIDDLE CHUTE
1. Usingthehacksaw,trimalongthedashedline.
2. Locatethemiddlechute,atwasher,hoodlatch,
weldnut,lockwasherandmachinescrewfromkit.
3. Install in the appropriate hole at the upper end of
themiddlechute,accordingtodecksize.
Trim Line
Hood Latch
Weld Nut
Machine Screw
LockWasher
Latch Location
Flat Washer
6
INSTALLING MIDDLE CHUTE
1. Place middle chute over the top end of the blower
assembly.
2. Latch middle chute to blower assembly.
Middle Chute
Blower Assembly