


14
41847-01 • 05/28/10 • Hunter Fan Company
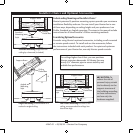
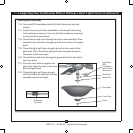
Installing the Light Fixture
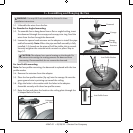
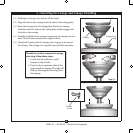
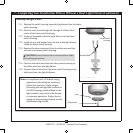
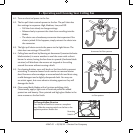
7-9. Remove the switch housing cap and plug button from the lower
switch housing.
7-10. Push the wires from the light kit through the hole in the
center of the lower switch housing.
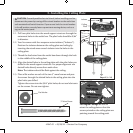
7-11. Screw the threaded rod of the light fixture into the lower
switch housing.
7-12. Install the nut and washer from the end of the light fixture
inside the lower switch housing.
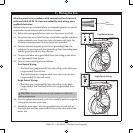
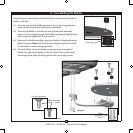
7-13. Remove the wire connectors from the white wire and the
red wire in the lower switch housing.
7-14. Connect the white wire from the lower switch housing to
the white wire from the light fixture.
7-15. Connect the red wire from the lower switch housing to the
black wire from the light kit fixture.
7 • Completing Your Installation With or Without a Bowl Light Fixture (Continued)
Lower Switch
Housing
readed Rod
Steps 7-17 – 7-19
Step 7-21
Cap
Plug Button
CAUTION: Be sure no bare wires or wire strands are visible
after making connections.
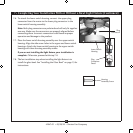
Note: In compliance with US federal energy
regulations, this ceiling fan contains a
device that restricts its light output.
Exceeding the wattage limit marked on
the MAX wattage sticker affixed to the
light socket(s) may result in fire hazard
or improper operation. If lights do not
appear to be operating properly, see the
troubleshooting section.