


Page 12
STRING REPLACEMENT
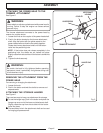
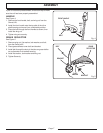
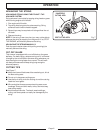
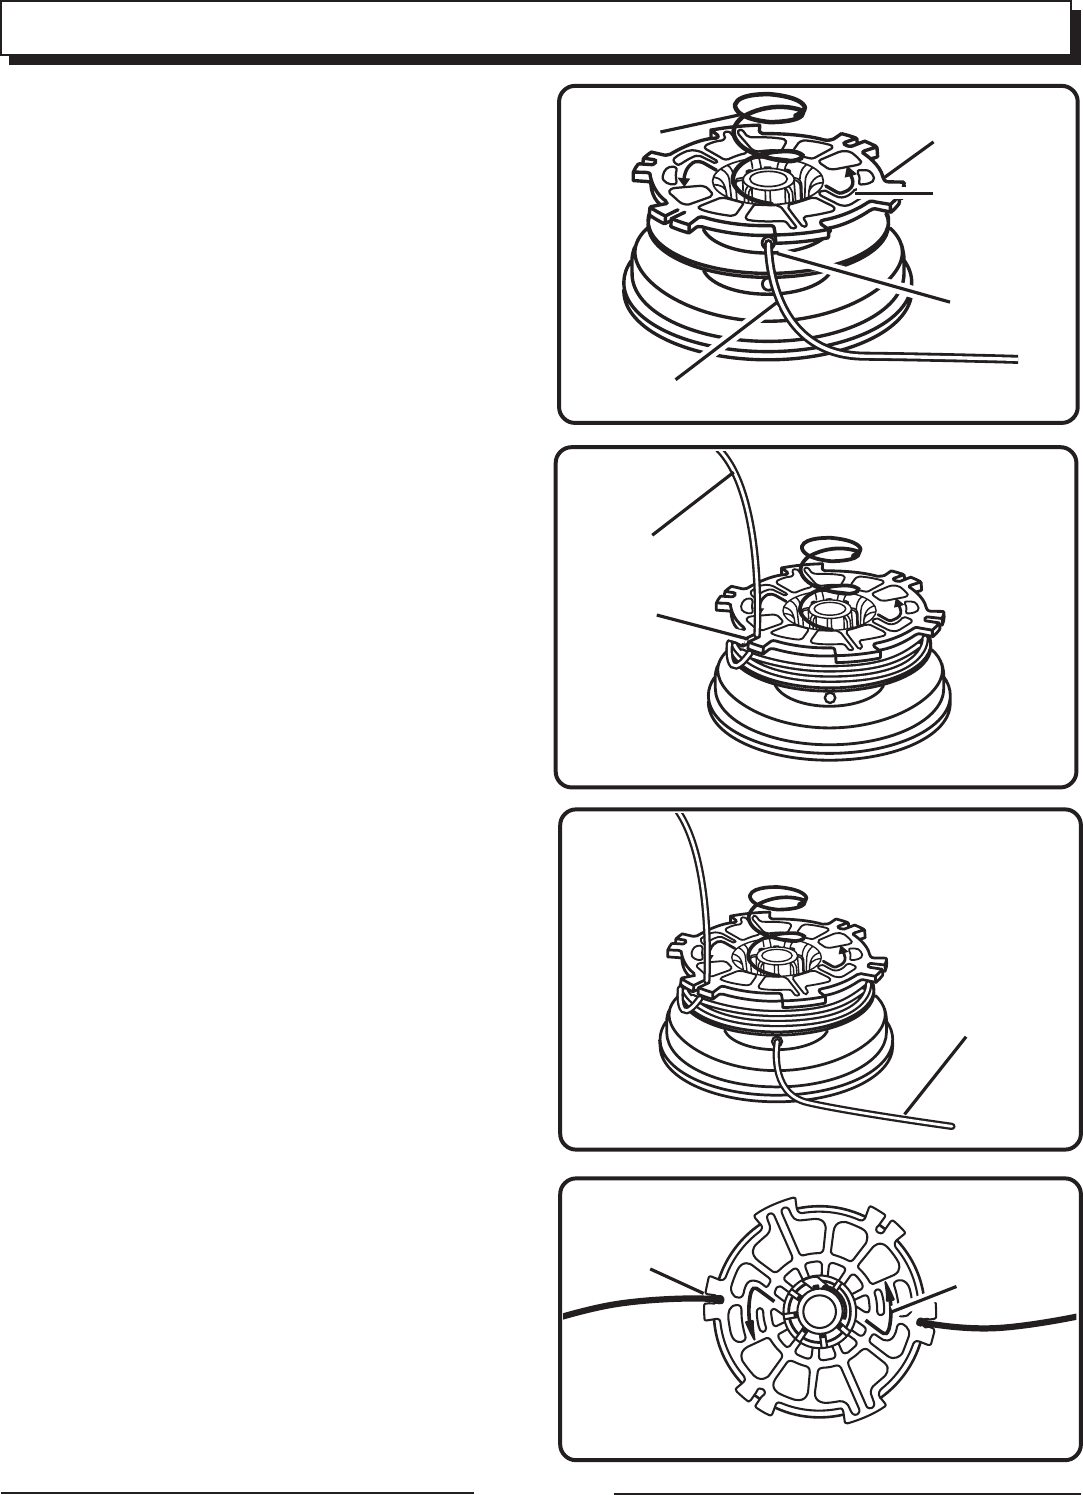
See Figures 12, 13, 14, and 15.
1. Stop the engine, disconnect the spark plug wire.
Hold the string head and unscrew the spool retainer.
Turn counterclockwise.
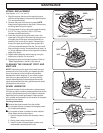
2. Remove the spool from the string head. NOTE:
Keep the spring attached to the spool. Remove any
old string remaining on the spool.
3. Cut two pieces of string, each being approximately
9 ft. (2.7 m) long. Use only .080 in. (2.0 mm)
diameter monofilament string.
4. Insert the first string into the anchor hole in the
upper part of the spool. Wind the first string around
the upper part of the spool counterclockwise, as
shown by the arrows on the spool. Place string in
the slot on upper spool flange, leaving about 6 in.
(152 mm) extended beyond the slot. Do not overfill.
After winding the string, there should be at least 1/4
in. (6 mm) between the wound string and the outside
edge of the spool.
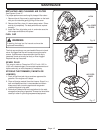
5. Repeat above step with second string, using the
bottom part of spool. Do not overfill.
6. Replace the spool and the spool retainer. Refer to
"Spool Replacement " earlier in this manual.
CLEANING THE EXHAUST PORT AND
MUFFLER
NOTE: Depending on the type of fuel used, the type
and amount of oil used, and/or your operating condi-
tions, the exhaust port and muffler may become
blocked with carbon deposits. If you notice a power
loss with your gas powered tool, you may need to
remove these deposits to restore performance. We
highly recommended that only qualified service techni-
cians perform this service.
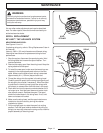
SPARK ARRESTOR
The spark arrestor must be cleaned or replaced every
25 hours or yearly to ensure proper performance of your
product. Spark arrestors may be in different locations
depending on the model purchased. Please contact
your nearest service dealer for the location of the spark
arrestor for your model.
Cleaning Instructions:
■■
■■
■ Remove the spark arrestor from the muffler.
■■
■■
■ If your spark arrestor is made of a fiberglass mate-
rial, discard and replace.
■■
■■
■ If your spark arrestor is made of a metal material
follow these cleaning instructions:
1. Spray the spark arrestor with a quality carbon
cleaner.
2. Gently clean using a wire brush.
3. Install the new or cleaned spark arrestor and
reassemble completely before use.
MAINTENANCE
Fig. 14
Fig. 15
SPRING
Fig. 13
SLOT
ARROWS ON
SPOOL
SECOND
STRING
FIRST STRING
Fig. 12
SPOOL
ANCHOR
HOLE
ARROWS ON
SPOOL
FIRST STRING
SLOT