


Page 8
ASSEMBLY
UNPACKING
This product requires assembly.
n Carefully remove the tool and any accessories from the
box. Make sure that all items listed in the packing list are
included.
n Inspect the tool carefully to make sure no breakage or
damage occurred during shipping.
n Do not discard the packing material until you have care-
fully inspected and satisfactorily operated the tool.
n If any parts are damaged or missing, please call
1-800-242-4672 for assistance.
PACKING LIST
Trimmer Assembly
Operator’s Kit
Front Handle
Curved Shaft Grass Deflector - Trim ‘n Edge and Trimlite
Straight Shaft Grass Deflector - Easy Reach
Edger Guide - Trim ‘n Edge
Hardware Bags (2) - Trimlite and Easy Reach
Hardware Bags (3) - Trim ‘n Edge
Bottle of 2-Cycle Oil
Operator’s Manual
WARNING:
If any parts are missing do not operate this tool until the
missing parts are replaced. Failure to do so could result
in possible serious personal injury.
WARNING:
Do not attempt to modify this tool or create accesso-
ries not recommended for use with this tool. Any such
alteration or modification is misuse and could result in a
hazardous condition leading to possible serious personal
injury.
WARNING:
To prevent accidental starting that could cause serious
personal injury, always disconnect the engine spark plug
wire from the spark plug when assembling parts.
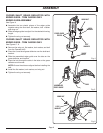
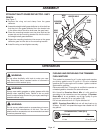
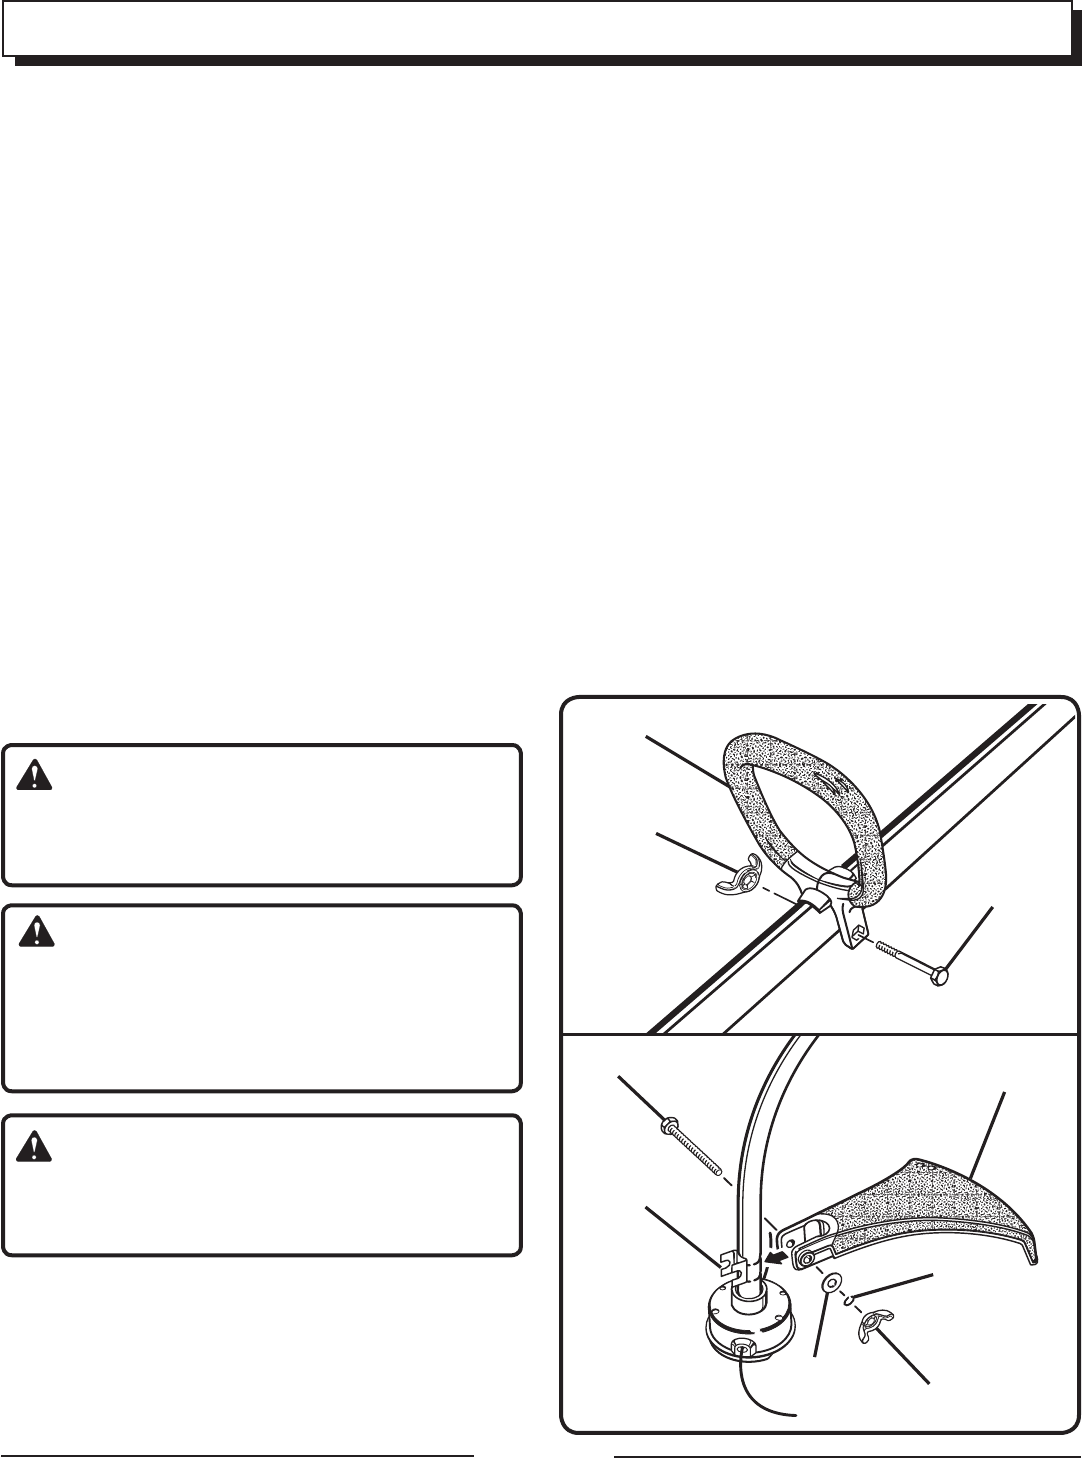
FRONT HANDLE
See Figure 2.
n Remove the front handle, bolt, and wing nut from the
operator’s kit.
n Install the front handle onto the top side of the drive shaft
housing and move it to a comfortable position.
n Place the bolt through the front handle as shown, then
install the wing nut.
n Tighten wing nut securely.
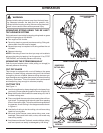
CURVED SHAFT GRASS DEFLECTOR WITH-
OUT EDGER GUIDE - TRIMLITE AND TRIM ‘N
EDGE
See Figure 3.
n Remove wing nut, flat washer, lock washer, and bolt from
the operator’s kit.
n Place curved shaft grass deflector over shaft and
bracket.
n Install bolt through the slots in the tabs on grass deflector
and bracket on shaft housing.
n Install flat washer, lock washer, and wing nut.
n Tighten securely.
WING
NUT
FRONT
HANDLE
BOLT
Fig. 2
GRASS
DEFLECTOR
BRACKET
BOLT
WING NUT
Fig. 3
FLAT
WASHER
LOCK
WASHER