


Page 11
MAINTENANCE AND REPAIR
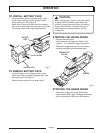
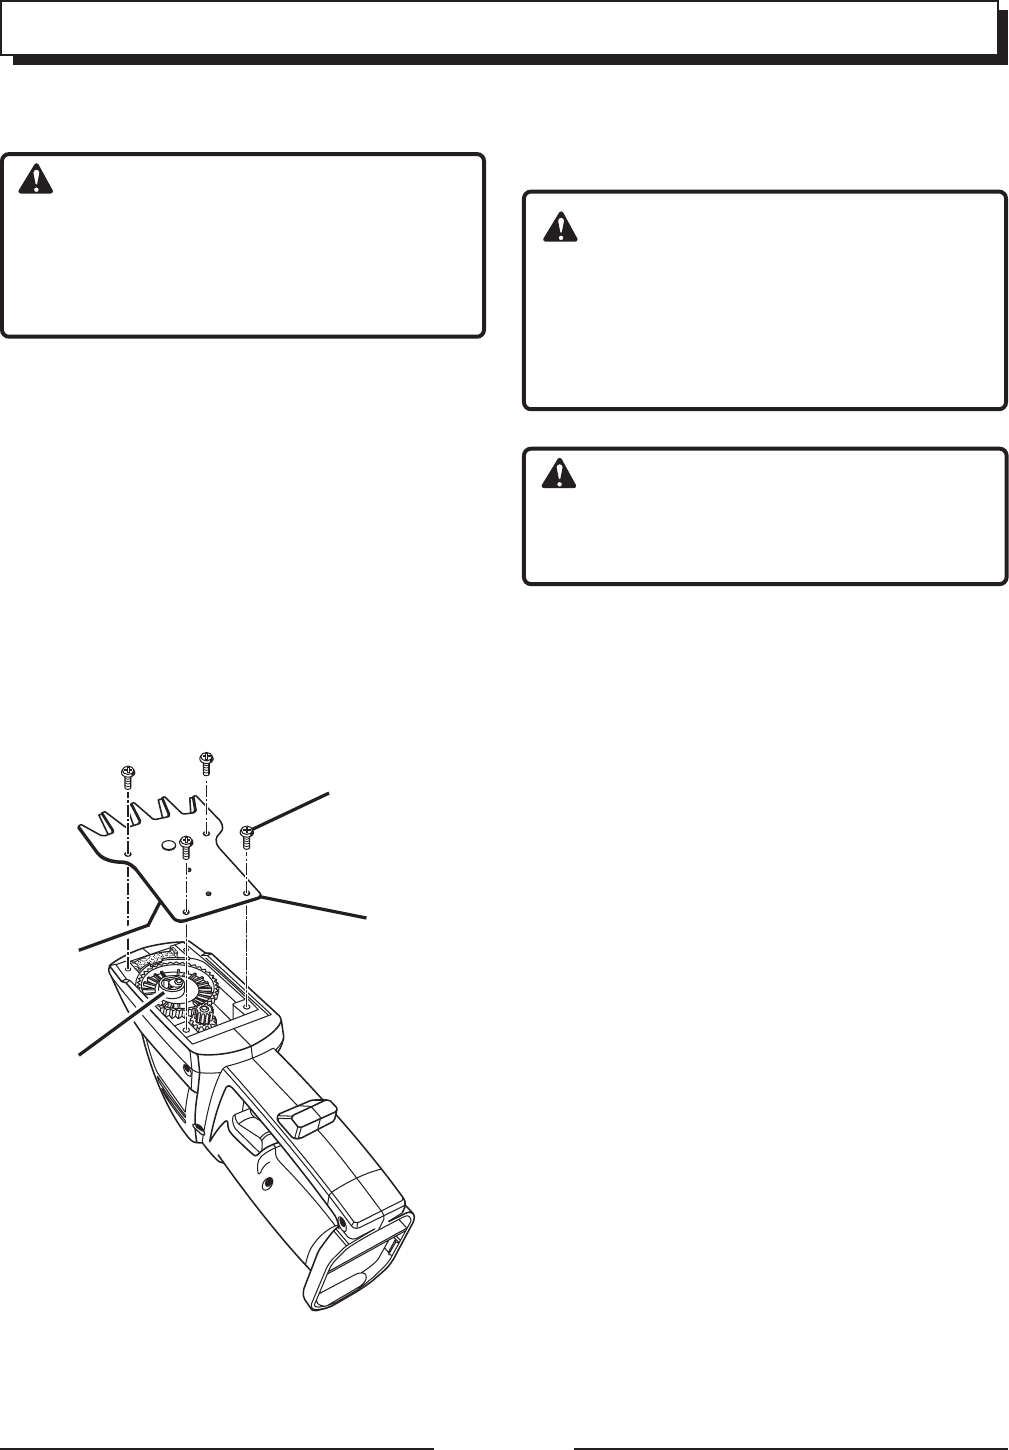
BLADE SCREWS
BLADES
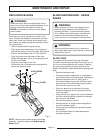
Fig. 6
Dull blades cut poorly and put extra strain on the
motor. Replace the blades if they become dull from
heavy use. A new set of blades at the beginning of
each season will speed cutting and extend the life of
your grass shear.
• Remove battery pack from grass shear.
• Place grass shear upside down on a workbench
and remove the four (4) blade screws.
See Figure 6.
• Remove the old blades from unit.
See Figure 6
.
• Clean any grass from the bottom of the case.
Rotate the large gear to line up the gear post with
the slot in the blade.
• Install the new blades on the unit.
• Reinstall the four (4) blade screws and tighten to
secure the blades in place.
REPLACING BLADES
WARNING:
Blades are sharp. When handling blades, do not
place your hand or fingers between blades or in any
position where they could get pinched or cut.
NEVER touch blades or service unit with battery
pack installed.
NOTE: If binding occurs after replacing the blade
assembly, repeat the steps under Replacing the
Blade section.
BLADE MAINTENANCE - GRASS
SHEAR
WARNING:
Battery units do not have to be plugged into an
electrical outlet; therefore, they are always in
operating condition. To prevent serious personal
injury, always remove the battery and take extra
precautions and care when performing mainte-
nance, service or for changing the cutting blades.
WARNING:
To prevent serious personal injury, remove the
battery pack before servicing, cleaning, or removing
material from the unit.
BLADE CARE
For longest life and easiest trimming, the blades
should be cleaned if sap and debris have built up, or if
you live in an area where the soil is sandy. Cleaning
unusually heavy deposits requires removal of the
blades. Periodically inspect the blades for damage and
wear.
• Remove the battery pack.
• Place grass shear upside down on a workbench
and remove the four (4) blade screws.
See Figure 6.
• Remove the blades from unit.
See Figure 6
.
• Scrub each blade using a small, stiff bristle brush
and mild soap. Rinse the blades using tap water,
then dry them using a clean cloth.
• Clean any grass from the bottom of the case.
Rotate the large gear to line up the post with the
slot in the blade.
• Using a clean cloth, apply a thin coat of household
oil to the inside contacting surfaces of the blades.
Do not over oil the blades.
• Reinstall the blades on the unit.
• Reinstall the four (4) blade screws and tighten to
secure the blades in place.
• Always use the manufacturer's specified replace-
ment blades.
• Do not sharpen blades. If blades become dull,
have them replaced.
GEAR POST
BLADE
SLOT