


UK - Page 19
STOP
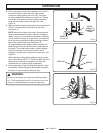
WARNING:
Weather conditions and altitude may affect
carburation.
Do not allow bystanders close to the chainsaw while
adjusting the carburettor.
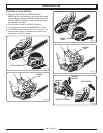
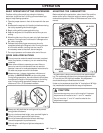
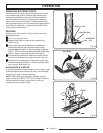
ADJUSTING IDLING SPEED
QQ
QQ
Q If the engine starts, runs, and accelerates but will not
idle, turn the idling speed screw “ T ” clockwise to
increase idling speed.
QQ
QQ
Q If the chain turns at idle, turn the idling speed screw “ T ”
anticlockwise to reduce the idling RPM and stop the
chain movement. If the saw chain still moves at idling
speed, contact a Homelite service dealer for adjustment
and discontinue use until the repair is made.
WARNING:
THE SAW CHAIN SHOULD NEVER TURN AT IDLE.
Turn the idling speed screw “T” anticlockwise to
reduce the idling RPM and stop the chain, or contact
a Homelite service dealer for adjustment and
discontinue use until the repair is made.
Serious personal injury may result from the saw chain
turning at idle.
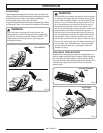
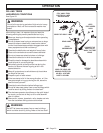
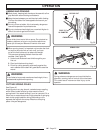
OPERATING THE CHAIN BRAKE
Refer to “Safety” earlier in this manual for additional
information.
Check the operating condition of the chain brake before
each use.
1. Start the engine and grasp the front and rear handles
securely with both hands.
2. Pull the throttle trigger to bring the chainsaw up to full
speed. Using the back of your left hand, engage the
chain brake by pushing the chain brake lever/hand guard
towards the bar while the chain is rotating rapidly. See
Figure 27.
NOTE: The chain brake should engage and stop the
chain immediately. If not, stop the saw by pressing the
“ | / O ” on ignition switch. Take the saw to a Homelite
service dealer for repair and discontinue use until the
repair is made.
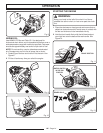
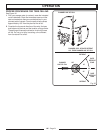
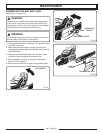
3. Reset the chain brake back into the RUN position by
grasping the right-hand side (from operator’s position) of
the chain brake lever/hand guard and pull towards the
front handle until you hear a click. See Figure 28.
BRAKE POSITION
WARNING:
If the chain brake does not stop the chain
immediately, take the saw to a Homelite service
dealer for repair before use.
Fig. 27
Fig. 28
Fig. 26
RUN POSITION
OPERATION