9
2. Precautions
○ The case must be securely attached to the cover.
○ Check the cover, case and other components for cracks or
other damage.
○ Check the case and button for wear.
If the wear limit mark (17) on the case is no longer visible or
there is a hole in the bottom (18) of the button, change the new
parts immediately. (Fig. 13)
18
17
Fig. 13
○ The cutting head must be securely mounted to the unit’s gear
case.
○ For outstanding performance and reliability, always use Hitachi
nylon cutting line. Never use wire or other materials that could
become a dangerous projectile.
○ If the cutting head does not feed cutting line properly, check
that the nylon line and all components are properly installed.
Contact Hitachi Authorized Service Centers if you need
assistance.
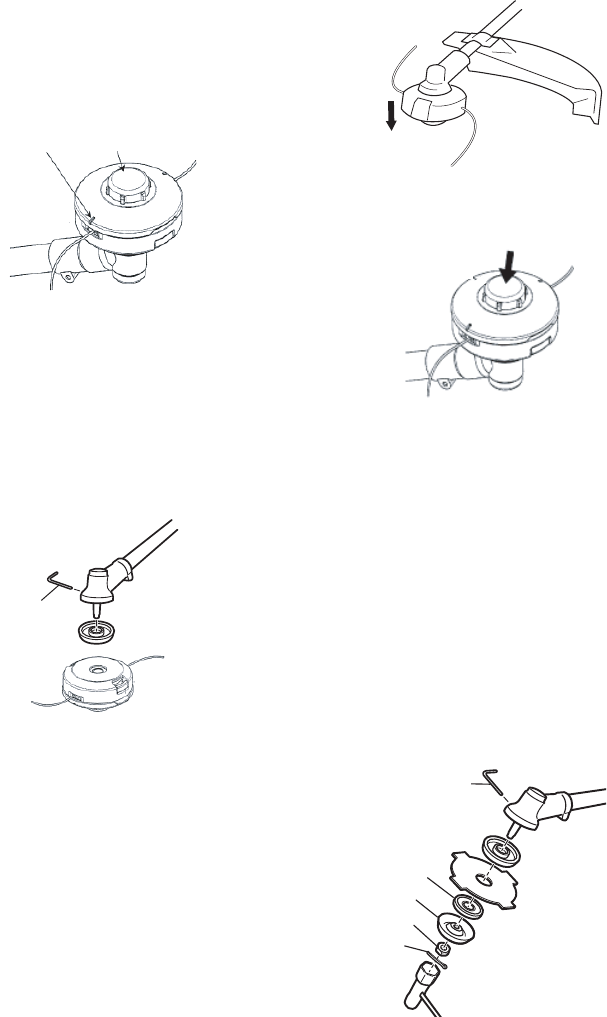
3. Installation (Fig. 14)
○ Install cutting head on gear case of grass trimmers/brush
cutters. The mounting nut is left-hand-threaded. Turn clockwise
to loosen/counterclockwise to tighten.
19
Fig. 14
For curved shaft models, the mounting nut is right-hand-threaded.
Turn counterclockwise to loosen/clockwise to tighten.
NOTE
○ Since the cutter holder cap is not used here, keep it for when a
metal blade is used, if so equipped.
○ Insert Allen wrench (19) into the hole of the gear case in order to
lock the cutter holder.
4. Adjusting line length
○ Set the engine speed as low as possible and tap the head on
the ground. The nylon line will be drawn out about 3 cm with
each tap. (Fig. 15)
Fig. 15
Also, you can extend the nylon line by hand but the engine must
be completely stopped. (Fig. 16)
Fig. 16
○ Adjust the nylon line to the proper length of 11–14 cm before
each operation.
Installation of cutting blade (Fig. 17)
NOTE
Please note that the guard which is supplied with CG22EAS(SL),
CG24EAS(SL), CG27EAS(SL) is designed only for nylon cutting
lines.
Never use it for a cutting blade.
If the machine is used with blade, make sure to select the
appropriate blade guard and the guard bracket, as specifi ed by
Hitachi Authorized Service Centers, and follow the instructions
shown in this manual (Fig 9-c) for installation.
Specifi c parts: CG22EAD Parts List (195) COVER BRACKET,
(196) HEX.HOLE BUTTON SCREW 6×25S, (218) GUARD
HOLDER, (219) COVER.
Please ask Hitachi Authorized Service Centers.
(If so equipped)
When installing a cutting blade, make sure that there are no cracks
or any damage in it and that the cutting edges are facing the correct
direction.
21
20
22
23
19
Fig. 17


