


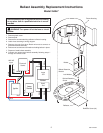

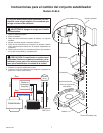
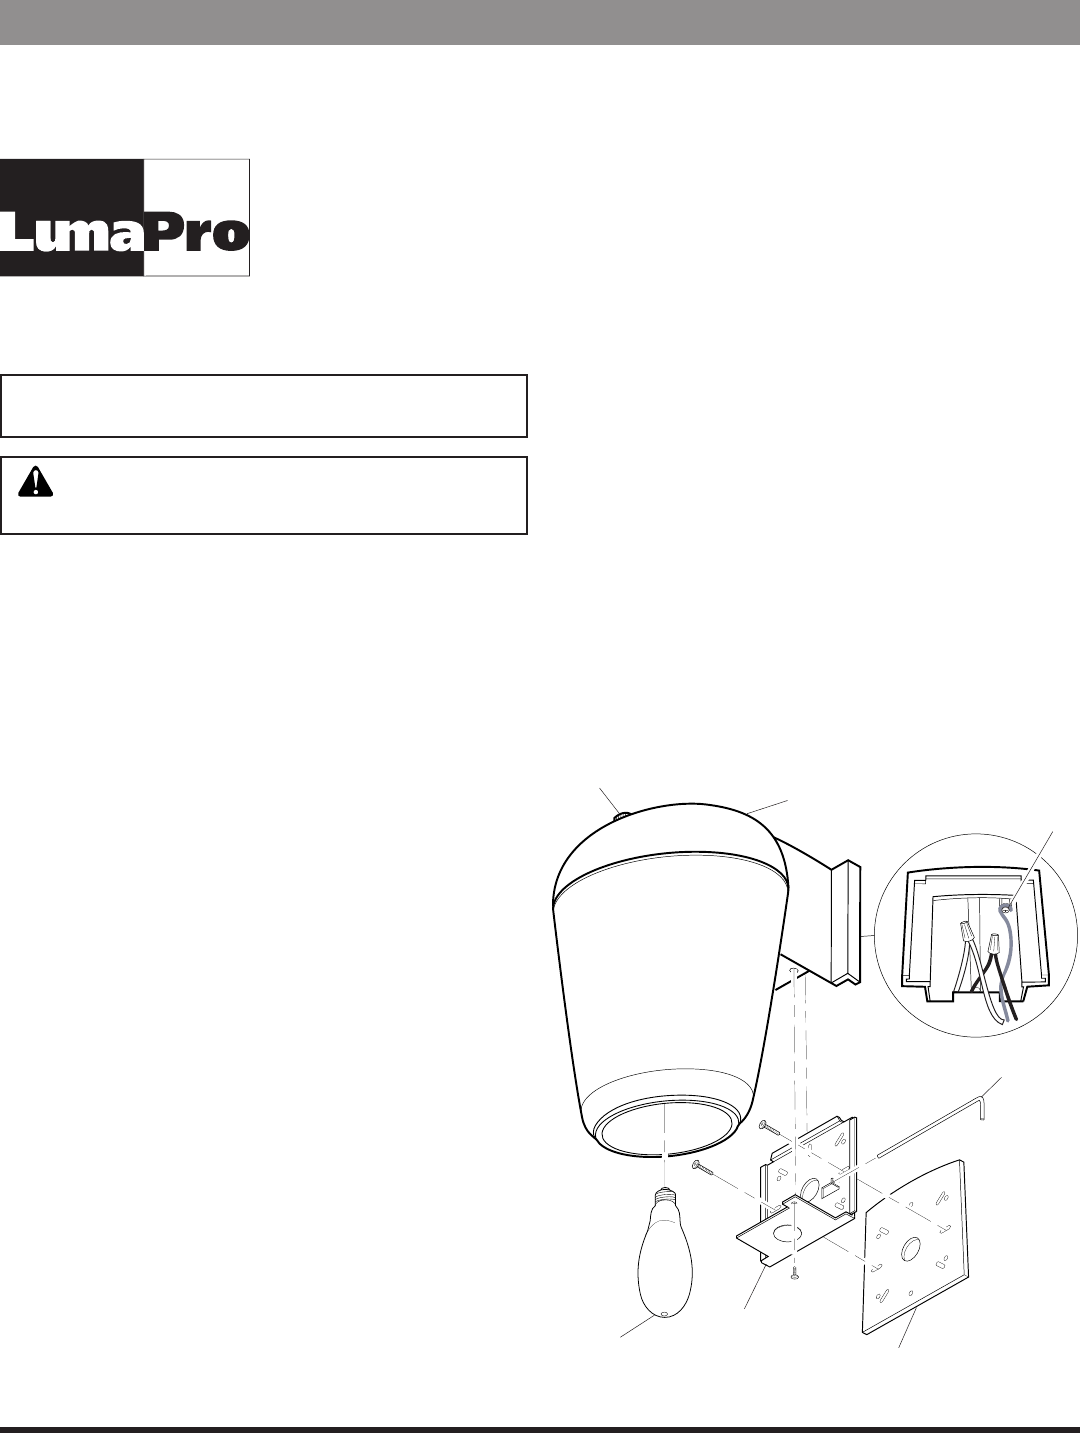
Gasket
(Optional)
Mounting
Bracket
Photocontrol
Ground
Screw
Fixture
Lamp
Temporary
Pin
This fixture can be mounted on a wall with, or without using a flush-
mounted junction box. Do not attempt to mount this fixture on a
surface-mounted “Wet Location” junction box. Use the instructions
below that apply to your application.
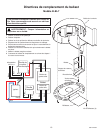
Installation Using A Junction Box
Note: If your junction box protrudes out of the wall slightly, you may
want to use the enclosed gasket so less caulking is required.
1. Hold the Mounting Bracket and Gasket over the junction box.
Thread the supply wires through the large hole in the back of
the Mounting bracket. Select the holes in the mounting bracket
that line up with the screw holes in the junction box. Make sure
the bottom of the Mounting Bracket is level. Secure with the two
#8 screws provided.
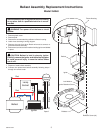
Installation Without A Junction Box
1. Select a location on a flat wall with structurally sound wood and
from 5 to 25 feet from the ground. The wood should be at least
one inch thick to safely secure the fixture.
2. Use the Mounting Bracket as a template. Hold it at the desired
mounting location (making sure the bottom is level), and mark
four mounting holes.
3. Use four #8 or #10 wood screws or galvanized deck screws at
least 1 inch long (not provided) to secure the Mounting Bracket
to the wall. It may be necessary to drill appropriate pilot holes if
mounted to hardwood to avoid splitting.
4. Remove the knockout in the bottom of the Mounting Bracket, and
bring your supply wires through this knockout using appropriate
flexible conduit or other approved means of wiring.
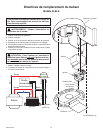
Complete The Installation
1.
Put the Temporary Pin through the holes in the Mounting Bracket.
2. This fixture must be grounded. Connect the supply ground wire to
the green ground screw. You can also attach a bare or green “pigtail”
to the green ground screw, then connect the ground pigtail to the
supply ground when the other supply wires are connected.
3. Slide the fixture onto the Mounting Bracket, and allow the fixture
to rest on the Temporary Pin.
4. Connect the fixture wires to the supply wires (black to black,
white to white, and if a ground pigtail was added above, con-
nect this pigtail to the supply ground wire). Secure with the wire
connectors provided.
5. Remove the Temporary Pin, and slide the fixture all the way down
onto the Mounting Bracket making sure no wires get pinched.
6. Install the screw through the bottom of the Mounting Bracket and
into the fixture housing. Tighten this screw.
7. Install lamp (provided). Lamp rating must match the rating of the
fixture.
Model 2LBL7: 50 watt metal halide M110/O open rated lamp.
Model 2LBL8: 70 watt high pressure sodium type S62 lamp.
8. Caulk fixture mounting surface with silicone weather sealant.
To test operation during daylight, cover the photocontrol with black
tape. Turn on the power. The light will take up to ten minutes to reach
full brightness. Remove the tape from the photocontrol and your unit
will operate automatically—on at dusk, off at dawn.
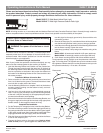
WARNING: Turn power off at the fuse or circuit
breaker.
Model 2LBL7: 50 Watt Metal Halide Patio Light
Model 2LBL8: 70 Watt High Pressure Sodium Patio Light
NOTE: All wiring must be run in accordance with the National Electrical Code (Canadian Electrical Code in Canada) through conduit or
another acceptable means. Contact a qualified electrician if there is any question as to the suitability of the system.
®
Operating Instructions & Parts Manual 2LBL7, 2LBL8
Please read and save these instructions. Read carefully before attempting to assemble, install, operate or maintain
the product described. Protect yourself and others by observing all safety information. Failure to comply could
result in personal injury and/or property damage! Save these instructions for future reference.
598-1319-02
LPG-5659, LPG-5679
HEA 012
Printed in China
02/08
Lamp in Fixture Contains Mercury. Dispose According
to Local, State, or Federal Laws.