Page 136" & 8" Bear Cat Chipper Operators Manual
1. Remove the two 3/8 inch retaining bolts holding access
cover to main frame assembly. Tilt access cover over to
allow rotor access.
2. Remove large belt guard (three 5/16 inch bolts).
3. Lift belt idler pulley off drive belt and remove belt from
pulleys. Using the push bolts from the bushing, remove
the bushing and pulley from the rotor shaft.
4. If a rotor bearing needs repair, it is best to remove the
complete rotor assembly from chipper frame.
5. Using an overhead hoist or lifting device, remove the
four 1/2 inch bolts on each rotor bearing and lift the rotor
assembly completely out of the frame. The complete
rotor assembly weighs 275 lbs.
6. Once the rotor assembly is out of the frame, both bear-
ings can be removed by a puller and replaced on the
shaft.
7. Use the overhead hoist or lifting device to return the
complete rotor assembly to the chipper frame.
8. Install the four 1/2 inch bolts on each bearing to secure
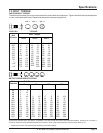
them to the frame. Tighten bolts to 75 ft. lbs.
9. Replace drive belt on pulleys and lower belt idler. Check
alignment of pulleys and adjust engine if needed.
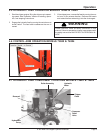
10. Check belt tension before start-up. Adjust the eyebolt
that anchors the idler spring to adjust the belt tension.
Tighten the eyebolt until the belt deflection at the center
of the belt is 7/16" when a 20 lb. load is placed against
the belt (See Fig. #8).
Service and Maintenance
5.6 REPAIRING OR REPLACING RO-
TOR BEARINGS
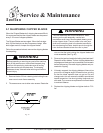
WARNING
The rotor assembly has a lock mechanism. When work-
ing on the rotor assembly, use the lock mechanism at all
times. To use, remove plastic bearing cover under the
chipper chute. There is a hole in the rotor jack shaft and a
matching hole in the bracket mounted to the rotor bearing
front side. Install a punch through the rotor shaft and
bracket to lock the rotor in place.
11. Close cover and replace bolts.
12. Replace belt guard and resume operation.
13. Depress foot clutch pedal, start engine, release foot
clutch pedal to engage belt, and test unit. Readjust
pulleys and belt tension if needed.
14. On hydraulic units remove hydraulic pump and belts
prior to step 3 and replace prior to step 12.
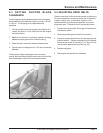
The models have five greaseable bearings and pivots that
require grease every 50 hours:
1. Two bearings on the rotor shaft.
2. One greaseable bushing on the foot clutch pedal pivot.
3. One grease zerk on idler pivot.
4. One grease zerk on discharge chute.
1. Service engine according to the Honda engine manual.
Change engine oil and filter as recommended in manual.
2. Every 10 hours of operation, all bolts and other fasten-
ers should be checked for correct torque.
1. Check wheel bolt torque every 10 hours of towing use.
2. Check air pressure in tires every 10 hours of towing.
Inflate to pressure marked on sidewall of tire.
3. Check and repack wheel bearings with grease every 12
months.
4. When towing, use a 2 inch trailer ball, and always con-
nect the safety chains. Make sure trailer hitch bolts are
tight and secure.
5.8 OTHER SERVICE TIPS
5.7 GREASEABLE BEARINGS AND
PIVOTS
5.9 TRAILER SERVICE TIPS


