


Fuel System
Maintenance
Emptying the Fuel Tank and
Cleaning the Fuel Filter
Service Interval: Yearly
The fuel lter (screen) element is located inside the fuel
tank. Clean the fuel lter element yearly.
1. Stop the engine and wait for it to cool down.
Note: Drain petrol from a cold engine only.
2. Disconnect the wire from the spark plug.
3. Disconnect the fuel line by loosening the tube clamp
at the carburetor.
4. Open the fuel valve.
5. Drain the petrol completely from the tank and fuel
line into an approved fuel container.
6. Remove the fuel tank from the mower.
7. Pour a small amount of fuel in the fuel tank, move
the fuel around in the tank, and pour it out into an
approved fuel container.
8. Install the fuel tank and fuel line; refer to Installing
the Fuel Tank and the Fuel Line.
Drive System
Maintenance
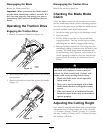
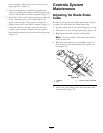
Adjusting the Self-propel Drive
If the mower does not self-propel or has a tendency to
creep forward when the control bar is more than 1-1/2
inches (3.8 cm) from the handle, adjust the self-propel
drive.
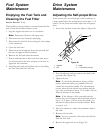
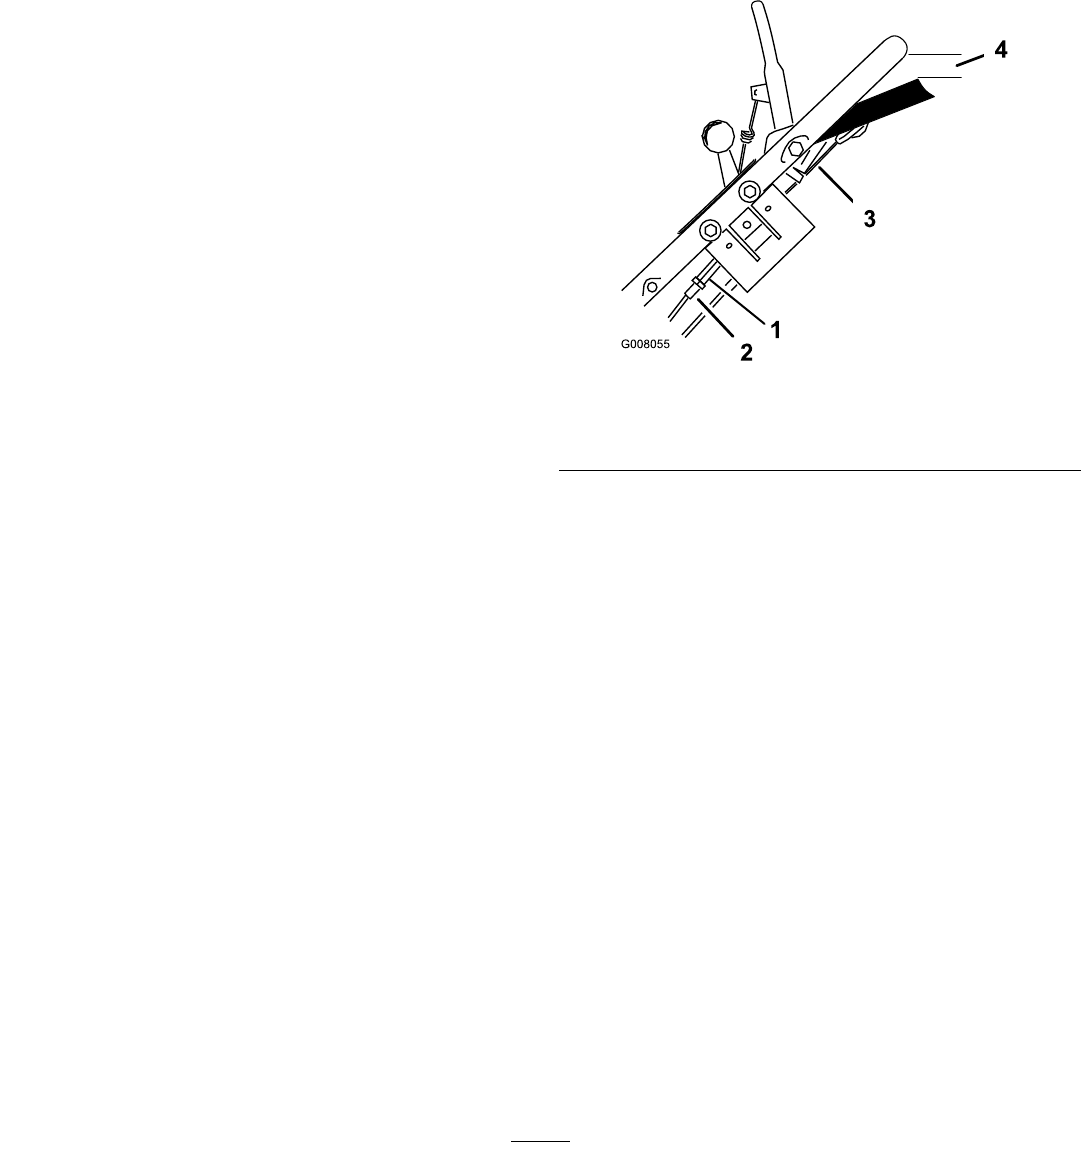
1. Loosen the nut that secures the adjuster (Figure 28).
Figure 28
1. Adjuster
3. Cable
2. Nut
4. 1-1/2 inches (3.8 cm)
2. Turn the adjuster until you remove the slack in the
exposed cable (Figure 28).
3. Tighten the nut.
Note: To check the adjustment, slowly pull the
mower backward while you gradually move the
control bar toward the handle. The adjustment is
correct when the rear wheels stop turning and the
top of the control bar is about 1-1/2 inches (3.8 cm)
from the bottom of the handle.
Note: If the adjuster is fully extended and the
mower does not self-propel when the blade control
bar is 1-1/2 inches (3.8 cm) from the handle, you
will need to adjust the lower anchor bracket. Refer
to steps 4 to 9.
4. Move the adjuster to obtain the maximum slack in
the cable.
5. Remove the fuel tank.
Note: You do not need to disconnect the fuel line
from the fuel tank.
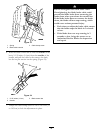
6. Remove the upper belt cover (Figure 29).
21