


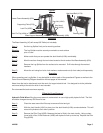
Mounting
The Base Assembly (#5) will accept 3/8" Bolts (not included).
Step 1) Set the Log Splitter firmly on its mounting surface.
Warning: The Log Splitter must be securely mounted to a work surface
prior to use!
Step 2) Make certain that you can operate the Jack Handle (#19A) comfortably.
Step 3) Mark the surface through the two holes located at the far ends of the Base Assembly (#5A).
Step 4) Remove the Log Splitter from the surface to be mounted. Drill holes through the marked
locations.
Step 5) Mount the unit using four bolts, lock washers, washers and nuts (in that order) sold separately.
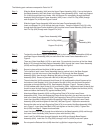
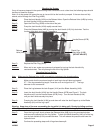
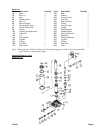
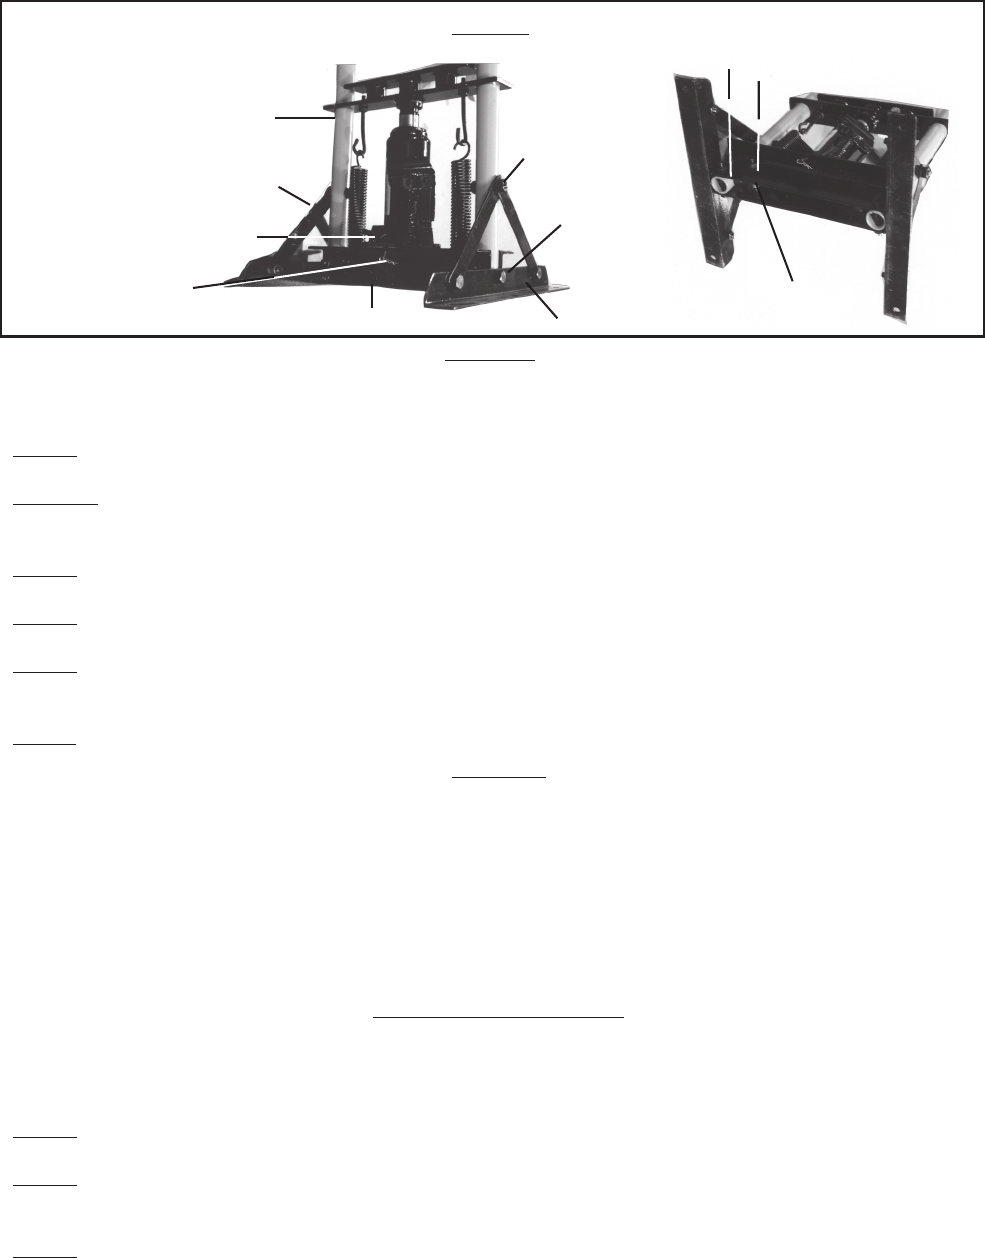
Lower Frame Assembly (#3A)
Supporting Plate (#7A)
Lock Pin (#22A)
Hair Pin Clip (#20A)
Base Support Assembly (#9A)
Figure 3
Hex Nut (#18A)
Hex Head
Bolt (#16A)
Hex Head Bolt (#17A)
Bushing (#8A)
Base Assembly (#5A)
Operation
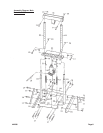
When operating your Log Splitter, it may be helpful to refer to each of the operational Figures as well as to the
Parts List and Assembly Diagram located on the last pages of this manual.
Never force the tool or attachment to do the work of a larger industrial tool. It is designed to do the job better
and more safely at the rate for which it was intended.
Do not exceed the tools maximum capacity.
Filling the Pump Reservoir
Hydraulic Fluid: When filling the pump reservoir, make certain to use a high quality hydraulic fluid. The fluid
should be changed at every 300 hours of use.
Step 1) Clean the area around the filler cap to remove all dust and grit.
Step 2) With the Jack Handle (#19A) in place, turn the Jack Handle (#19A) counterclockwise. This will
retract all cylinders to their return position.
Step 3) Remove the Filler Plug (#33B). Measure the level of fluid in the tank visually. Using a clean
funnel with a filter, fill the Reservoir (#29B) with hydraulic fluid up to the top. Replace the Filler
Plug (#33B).
#42696 Page 5