


8
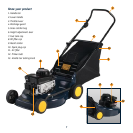
Assembly
It is necessary to fit the lower handle (2), handle bar
(1), and catcher (5) to the mower.
Attaching the grass catcher bag
1. Lift up the discharge guard
(4) and hook the catcher
onto the rod.
2. To remove the catcher, raise
the discharge guard, grab the
catcher by the handle and
lift it off the bar.
Note. Always empty the catcher
before it has reached maximum capacity, otherwise it will
decrease the performance of the mower.
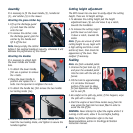
Attaching the Handles
It is necessary to attach both
the lower handle and handle
bars.
1. To attach the lower handle,
first use a spanner to remove
the 4 bolts.
2. Place the lower handle in
position and replace the 4
bolts. Use the spanner to retighten the nuts.
3. To attach the handle bar, first remove the two handle
bar locking knobs (14).
4. Position the handle bar over the lower handle and
insert the two locking knobs, and tighten to secure the
handles together.
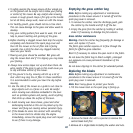
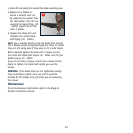
Cutting height adjustment
The GMC mower has one lever to easily adjust the cutting
height. There are 10 height settings.
1. To decrease the cutting height pull the height
adjustment lever (6) out and move it up a notch,
towards the handlebar.
2. To increase the cutting height
pull the lever out and move
it down a notch, towards the
motor.
Note. If you are unsure of which
cutting height to use, begin with
a high setting and trial a small
section of lawn, then check the
appearance of the lawn. Then
readjust if necessary.
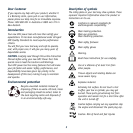
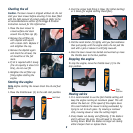
Fuelling
Note. Use fresh unleaded petrol.
1. Unscrew the fuel tank cap (7)
and pour the unleaded petrol
into the tank with the aid of a
funnel.
2. Fill the tank to approximately
2.5 cm below the lowest
portion of the neck to allow
for fuel expansion. Be careful
not to over fill.
3. Be careful not to spill any petrol, if this happens, wipe
the spill with a clean rag.
4. Start the engine at least three meters away from the
area where the fuel tank has been filled in order to
avoid the risk of fire.
WARNING. Never attempt to refuel the engine while it is
running or still warm, allow it to cool before fuelling.
Note. For further information refer to the Fuel
Recommendations section in the Briggs & Stratton
instruction manual.
1
1
3
1
3
2