START-UP CHECKLIST
Before working on the generator, ensure the fol-
lowing:
• The AUTO/OFF/MANUAL switch is in the OFF
position.
• The 120VAC supply to the battery charger is
switched OFF.
PREPARATION FOR START-UP
• Ensure that the 120VAC circuit breaker to the bat-
tery charger is open.
• Remove the fuse from the the control panel. For
the H-100 and R-100: Open the front door of the
control box and remove the 15 Amp ATO fuse in
the lower left-hand corner of the control box.
• Connect the battery cables to the battery. Attach
negative battery cable last.
• Close the 120VAC circuit breaker to the battery
charger.
• Measure the voltage at the battery before and after
the charger is turned on.
• Verify all AC electrical connections are tight at the
circuit breaker and transfer switch.
• Visually inspect entire area looking for loose paper,
plastic wrappings, leaves, etc.
• Check all hoses clamps fittings for leaks or dam-
age.
• Check all electrical plugs throughout the genera-
tor. Ensure each plug is seated correctly and fully
inserted into its receptacle.
• Verify the AUTO/OFF/MANUAL switch is in OFF
position.
• Open the valve to the engine fuel line.
• Bleed the fuel system of air. (necessary for long fuel
lines).
• Open the generator main line circuit breaker.
• Connect a manometer to the gas line and record
the static pressure. It must be as listed in the
Specifications.
• Insert the fuse into the control panel.
• Move the AUTO/OFF/MANUAL switch to the man-
ual position. The engine should now crank and
start.
• Check voltage at the generator terminals.
• For 3-phase units, check phase rotation at the
transfer switch terminals. The generator phase
rotation must match the utility phase rotation.
• Check for coolant, fuel, oil, and exhaust leaks.
• Close the generators main line circuit breaker.
• Turn the generator set off.
• Connect the UTILITY supply to the transfer
switch.
• Set the AUTO/OFF/MANUAL switch to AUTO.
• Disconnect utility power before the transfer
switch.
Engine should start, transfer to load.
Run at least 15 minutes on generator power.
Make certain all 3-phase loads are functioning
correctly (correct phase rotation).
• Reconnect Utility power
Transfer switch will transfer back to Utility and
engine will shut down within the given time
parameters set up for the specific transfer switch
and controller.
• Install all covers, access plates and door panels.
• Put the Owners Manual in a safe and accessible
place.
• Make certain the AUTO/OFF/MANUAL switch is in
the AUTO position.
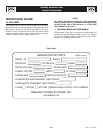
START-UP INSPECTION
When a start-up is performed by an Authorized
Service Dealer, a standard three-part form titled
“Start-up Inspection for Standby Power Systems”
(part no. 067377), should be completed by the instal-
lation technician or engineer. See page 1-3 for infor-
mation on locating the nearest Authorized Service
Dealer. The installer should complete the form and
disseminate copies as follows:
• White copy: Mail to Generac Warranty Department,
P.O. Box 340, 211 Murphy Dr., Eagle, WI 53119-
2062.
• Pink Copy: For service file of installing dealer.
• Yellow Copy: For the customer’s records.
8-2
Standby Generator Sets
Installation
Install001 Rev. 0 08/05


