


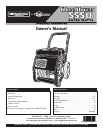
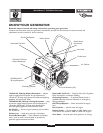


WheelHouse™ 5550 Watt Generator
7
is relieved by turning the vent knob fully counterclockwise
or loosening and retightening the fuel cap/gauge.When
installing the tank on your generator, relieve tank pressure
before tightening the four large plastic wing nuts.
IMPORTANT:The vent knob should be closed whenever
you move the generator or transport the fuel tank.
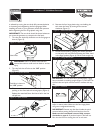
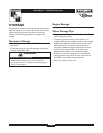
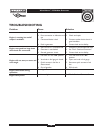
1. Turn the vent knob fully clockwise on the fuel gauge to
close it (Figure 2).
WARNING! Failure to follow these fuel tank
removal instructions could result in death or serious
injury.
2. Turn the fuel shut off valve to the “Off” position
(Figure 3).
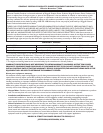
3. Disconnect the quick connect on the fuel line by
pushing on the metal tab and twisting apart (Figure 4).
Release the metal tab. Some fuel that is left in the line
will spill out.
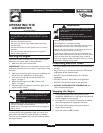
4. Remove the four large plastic wing nuts holding the
tank onto the frame by turning them counter-
clockwise (Figure 5).
5. Lift off the fuel tank by grasping the handle (provided
on the tank) with one hand and putting the other hand
in the finger pocket (Figure 6). Lift the tank straight up.
IMPORTANT:The fuel tank MUST be filled with it lying
flat, not slanted or standing upright (Figure 7). DO NOT let
the fuel valve and quick connect come in contact with any
dirt.
To place the fuel tank back on the unit, follow these same
steps in reverse order. Make sure the four large plastic
wing nuts are tightened securely.
IMPORTANT: Remove any dirt found inside the quick
connect before putting the fuel tank back on the unit.
Make sure the vent knob is turned fully counter-
clockwise to open it. If you don’t open it, fuel will not
flow into the fuel line causing the unit to not start.
Figure 4 — Quick Connect
Figure 5 — Plastic Tank Wing Nuts
Figure 6 — Lifting Off Fuel Tank
Figure 7 — Fuel Tank
Figure 2 — Vent Knob
Vent Knob
Figure 3 — Fuel Shut-off Valve
Fuel Valve is shown in
the “Off” position
Fuel Tank