


54
GARDENA
Water Timer Electronic T 14 e
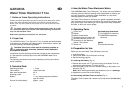
1. Notes on these Operating Instructions
Please read these operating instructions carefully and observe the notes
given. Use these operating instructions to familiarise yourself with the
Water Timer, the unit’s features and proper use as well as with the notes
on safety.
A
For safety reasons, children and young people under 16 as well
as anyone who is not familiar with these operating instructions
may not use the Water Timer.
Keep these operating instructions in a safe place.
2. Proper Use
The GARDENA Water Timer Electronic T 14 e is suitable and determinated
for private use in domestic and hobby gardens, exclusively for outdoor use,
to control sprinklers and watering systems.
A
The Water Timer must not be used for industrial purposes or
in conjunction with chemicals, foodstuffs, easily flammable
and explosive materials.
Compliance with the operating instructions provided by the manufacturer
is a prerequisite to ensure proper use of the GARDENA Water Timer
Electronic.
The operating instructions also contain operating, servicing and mainte-
nance conditions.
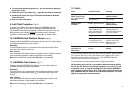
3. Technical Data
Operating pressure: 1-12 bar
Flow medium: clean fresh water
Max. water temperature: 40 °C
Watering cycles: 14
Battery: 1 × 9 V alkali-manganese (alkaline)
type IEC 6LR61
Service life of the battery: approx. 1 year
G
4. How the Water Timer Electronic Works
This GARDENA Water Timer Electronic T 14 e allows you to set different
watering cycles for different watering times independent of whether you
are using a sprinkler, a sprinkler system installation or a drip-head
watering system to water your garden.
Your Water Timer Electronic will water your garden completely automati-
cally according to the program you choose. You can set the timer to water
your garden early in the morning or late at night when water evaporates
the least, or while you are on holiday.
5. Operating Parts
1
Control unit Accompanying accessories
2
Display
8
G ¾ adaptor for sleeve nut
3
Battery compartment
9
GARDENA threaded tap
4
Connection plug for control unit connector
5
Release button for control unit
6
Connection for Soil Moisture
Sensor / Rain Sensor Option
7
Sleeve nut
0
Anti-theft protection
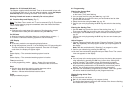
6. Preparation for Use
Before you use your Water Timer Electronic you must:
1. Insert the battery
2. Connect the Water Timer Electronic to the tap
3. Set the watering program
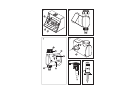
6.1 Inserting the Battery (Fig. A)
1. Remove the control unit
1
from the housing of the Water Timer by
pressing the release button
5
(see Fig. B/C).
2. Insert the battery (only use a 9 V alkaline battery) in the battery com-
partment (Fig. A).
Note: When inserting the battery pay attention to the +/– markings.
3. Reattach the control unit to the housing.
6.2 Connecting the Water Timer to the Tap (Fig. C)
The Water Timer is fitted with a sleeve nut for taps with a 33.3 mm (G1)
thread.