


18
GB
19
GB
1918
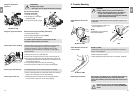
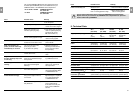
3. Function
Mowing tips:
If grass residue is left in the discharge opening, pull mower
backwards about 1 m so that the grass residue can drop out
downwards.
To produce a well-maintained lawn. we recommend cutting the
lawn regularly once a week if possible. The lawn becomes thicker
if cut frequently.
After relatively long intervals between mowing (holiday lawn),
first of all cut in one direction with the cutting height as high as
possible, then cut in the crosswise direction at the cutting
height required.
If possible, only cut the grass when it is dry, if the grass is damp,
the cutting pattern will be uneven.
Mulching tips:
You will achieve the best mulching results by cutting the grass
regularly once or twice a week depending on the amount the
grass has grown.
For mulching the grass must be mown no more than 1/3 of
its height. The cut height must be set at 4 cm at least (for
very dense grass the cut height may have to be set higher).
So that the grass mulch can rot down properly, mulch when the
grass is as dry as possible. Mulching is not recommended for
lawns with a great deal of moss or very matted grass. The moss
and weeds must be removed by scarifying.
Make sure that there are no other people
(especially children) or animals anywhere near
the working area.
Stop the engine and disconnect the spark plug
wire, make sure that all moving parts have
come to a complete Stopp and, where a key is
fitted remove the key: after striking a foreign
object. Inspect the lawnmower for damage and
make repairs before restarting and operating
the lawnmower.
Never use the mower when it is raining or
in damp or wet conditions.
Please observe any local restrictions or noise
levels.
Petrol engine notes:
Warning! Fuel is highly inflammable. Fuel must
be stored only in containers authorised for the
purpose. The fuel must be filled only outdoors;
do not smoke during filling. Fill with petrol prior
to use; the petrol cap must not be removed and
no petrol may be added if the engine is running
or is hot. If petrol is spilled during filling, the
engine must not be started until the spilled
petrol has been wiped up and the mower has
been removed from the area where the fuel
was spilled. You must not attempt to start the
engine until the petrol vapours have dissipated.
To avoid the danger of fire, keep the engine
and exhaust free from grass, leaves, grease or
oil and away from combustible materials.
There is danger of carbon monoxide poisoning.
Do not let the engine run in closed spaces.
When filling with petrol and oil, ensure that no
foreign bodies (e. g. grass) get into the engine.
Always check the oil level before mowing.
For security reasons, replace the tank lid if
damaged.
Never store a mower with fuel in the tank in
a room where petrol fumes could come into
contact with an open flame.
If the fuel tank has to be drained, this should be
done outdoors.
Reduce the throttle setting during engine
shut down and, if the engine is provided with
a shut-off valve, turn the fuel off at the
conclusion of mowing.
Do not change the engine governor settings or
overspeed the engine.
v Follow the enclosed engine operating
instructions.
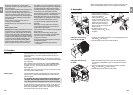
When mowing with the mulch unit the cut grass is returned to the
grass as a self fertiliser and there are no waste lawn clippings.
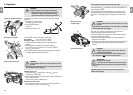
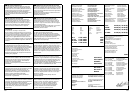
4. Assembly
Fitting the handle: 1. Push the screw
1
with the
square washer
2
through the
hole in the handle
3
.
2. Put the handle lock
4
with
spring
5
, handle
6
and round
washer
7
on the screw
1
and
tighten with the wing nut
8
When doing this the eyes
9
must be on the same side as the
starter cord
0
.
3. Thread the starter cord
0
through the two eyes
9
on the
handle
6
.
0
9
6
1239
6
8
4
55
4
7
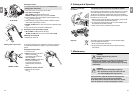
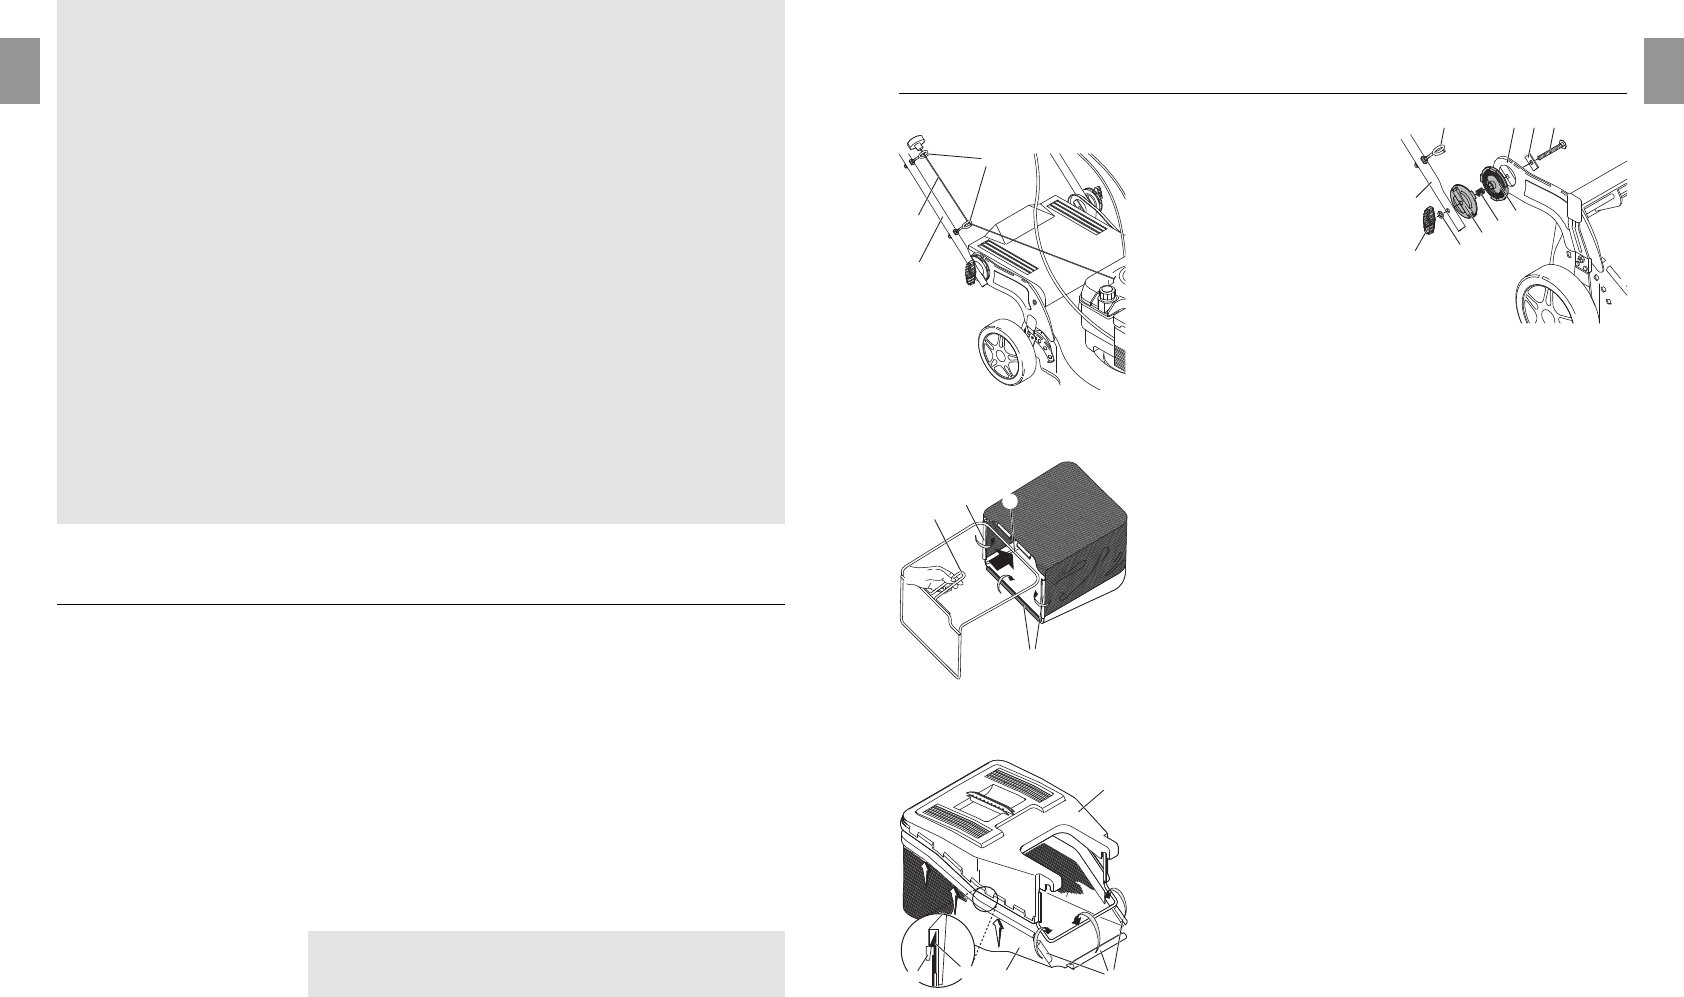
Fitting the collection bag
(44 V / 46 VD / 46 VDA):
1. Feed the bow-shaped handle
q
into the Collecting Bag so that
the handle
w
is on the top.
2. Fold the safety straps
e
around the handle
q
.
ww
e
q
e
Fitting the collection bag
(51 VDA):
1. Place the collection bag cover
r
onto the collecting bag
t
from the top so that ALL the eyes
a
are positioned over the
hook
b
.
2. Push the Collecting Bag cover
r
down onto the collecting
bag
t
until all hooks
b
engage securely.
3. Fold the safety straps
e
around the handle.
ß
a
ß
b
t
e
r