


E2E1
x3
E4 E5
E6
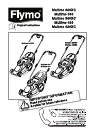
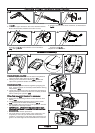
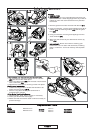
4. Fold down the Cam Lock towards the Handle as
illustrated in fig E4, and continue to turn clockwise
(E5) until tightened.
5. The Cam Lock can be unlocked and locked as
illustrated in fig E6.
Repeat for the other side.
E3
Assembly of Upper Handles to Lower Handles
1. Insert the Barrel Nut into the Cam Lock as illustrated
in fig E1.
2. Attach the Upper Handle to the Lower Handle with the
Round Headed Bolt, Washer and Cam Lock as
illustrated in fig E2
3. Turn the Cam Lock 3 times clockwise, as illustrated in
fig E3.
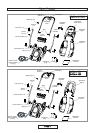
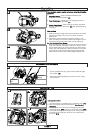
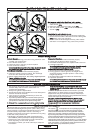
Grassbox Assembly
G1
G2
Grassbox Handle Assembly
1. Locate the grassbox handle into the slots in the grassbox
upper and push until it clicks into position. (F1)
2. Looking at the underside of the lid (F2), ensure the
clips of the grassbox handle are securely located.
Grassbox Assembly
1. Locate the the grassbox halves together by aligning the
clips Ensure all clips are correctly located before clicking
into position. (G1)
2. Locate the grassbox lid onto the assemble grassbox by
aligning the clips. Ensure all clips are correctly located
before clicking into position (G2)
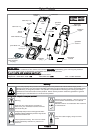
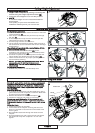
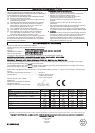
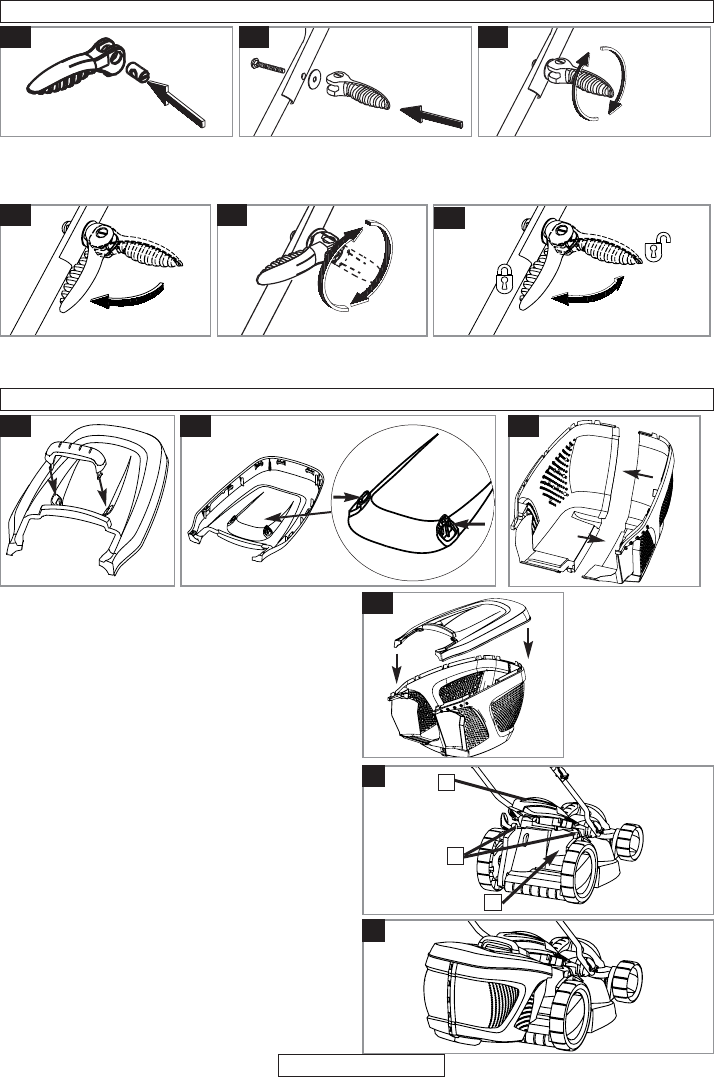
Fitting Fully Assembled Grassbox to Lawnmower.
1. Lift safety flap (H1)
2. Make sure the discharge chute is clean and free from
debris (H2)
3. Locate fully assembled grassbox onto 2 location points
(H3)at the rear of the deck as illustrated in pic. J
4. Locate safety flap onto the top of the grassbox. Ensure
the grassbox is securely located.
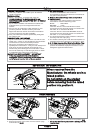
• IMPORTANT ! AFTER FITTING ENSURE NO GAP
REMAINS BETWEEN THE SAFETY FLAP AND THE
GRASSBOX.
•
Removal is the reverse procedure.
• For larger areas of grass where grass collection is not
required you can use your lawnmower without the
grassbox. The design of the safety flap permits the cut
grass to be discharged downward behind the machine.
H
1
3
J
PAGE 6
2
F1
F2