


31
Clutch Belt Removal
1. Park the tractor on a smooth, level surface such as a
concrete floor. Disengage the PTO, engage the
parking brake, turn off the engine, and remove the
ignition key.
2. Remove the rear skid plate by removing the bolts
that fasten the skid plate to the bumper and slide the
plate forward until it drops from the mounts.
3. Remove the rear belt shield and rear guard support.
4. Remove the bumper.
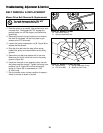
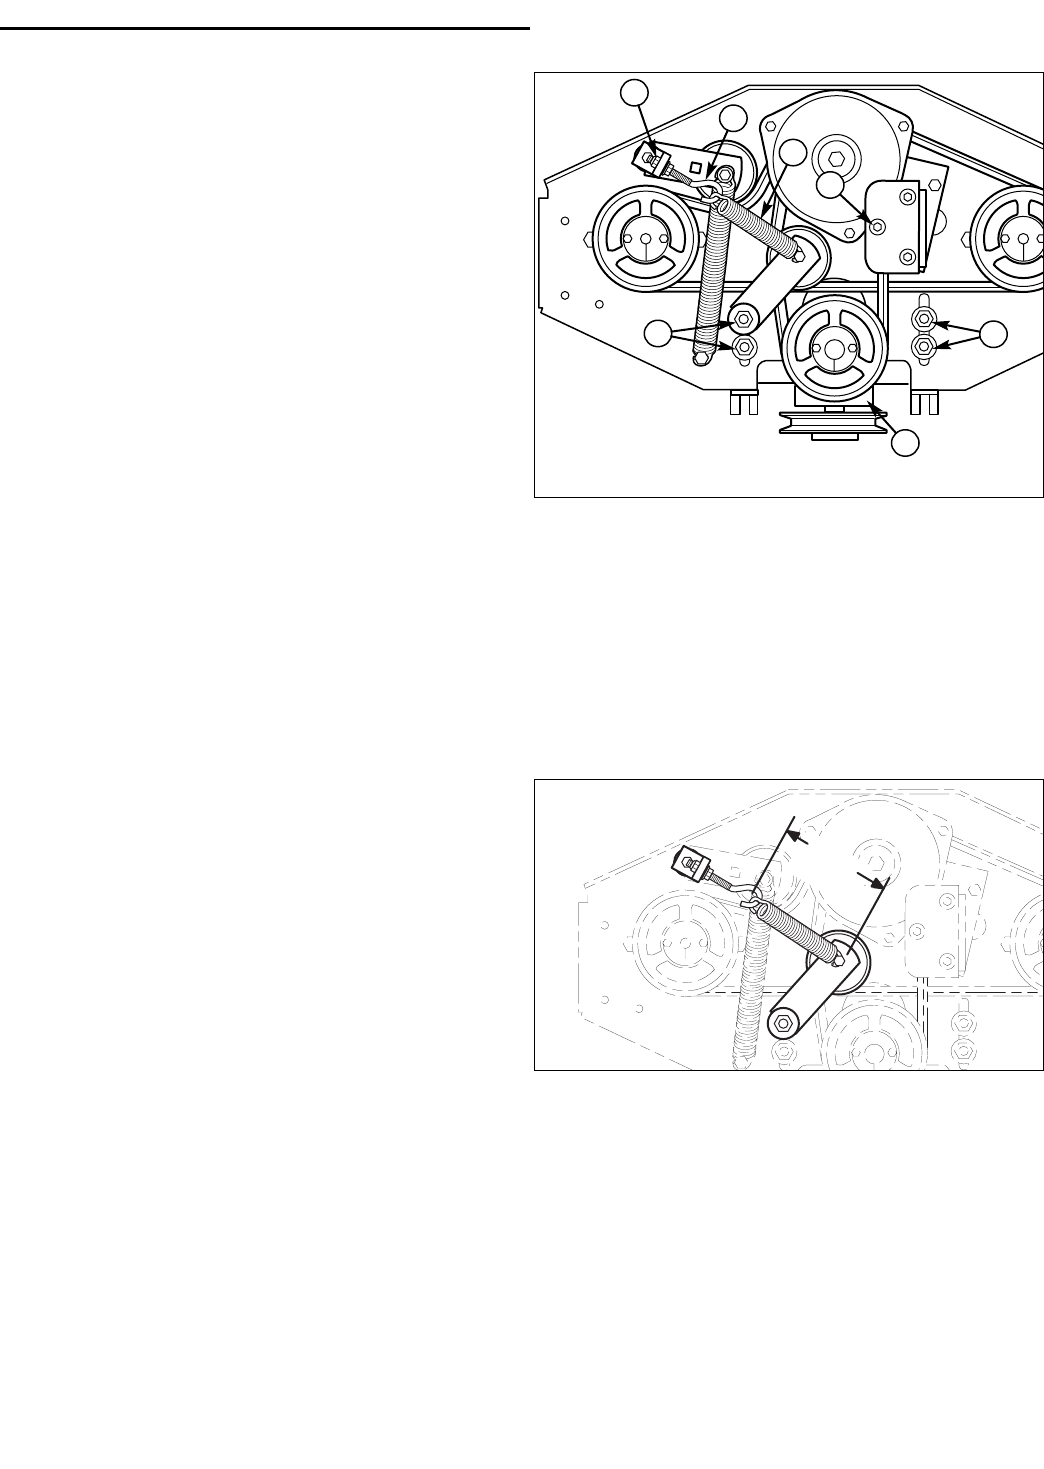
5. Remove the nylon lock nut (A, Figure 40) to release
the belt tension and unhook the clutch belt idler
spring (C) from the screw hook (B). Set the screw
hook aside.
6. Remove the 5/16” bolt, washers and nut (D) that fas-
ten the rubber pad to the clutch and unplug the
clutch from the electrical harness. Note the order
that the hardware is oriented before removing.
7. Loosen the four (4) nylon lock nuts (E) that mount
the gear box to the pump plate.
8. Pushing upward on the gearbox (F), remove the
clutch belts from the gearbox pulley grooves.
9. Pulling the belts over the top of the clutch, remove
the clutch belts from the clutch pulley grooves and
pull around the idler pulley.
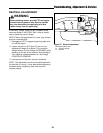
Clutch Belt Replacement & Adjustment
1. Install the clutch belts over the top of the clutch, into
the grooves of the crankshaft pulley and around the
idler pulley.
2. Pushing upward on the gearbox (F), place the clutch
belts in the grooves of the gear box pulley.
3. Push the gearbox down as far as possible and tight-
en the four (4) nylon lock nuts (E). Make sure the
bottom pulley on the gearbox is parallel with the
frame.
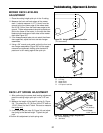
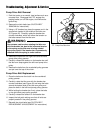
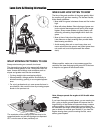
4. Hook the spring clutch belt idler spring on the screw
hook and reinstall the screw hook into the anchor.
Adjust the screw hook until the spring measures
4-3/4” (12,1cm) to the outside of the loops on the
spring (see Figure 41).
5. Reinstall the clutch anchor pad to the clutch with the
hardware (D) previously removed. Make sure the
hardware is in the same order as is was before being
removed, with the smaller washer(s) between the
clutch pad and the clutch.
6. Reinstall the bumper, rear hood support, rear belt
shield and skid plate.
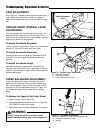
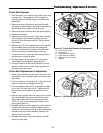
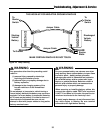
Figure 40. Clutch Belt Removal & Replacement
A. 3/8” Nylon Lock Nut
B. Screw Hook
C. Clutch Belt Idler Spring
D. Clutch Anchor Hardware
E. Gearbox Mount Hardware
F. Gearbox
F
E
E
D
C
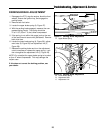
4-3/4"
(12,1cm)
Figure 41. Idler Spring Measurement
A
B
Troubleshooting, Adjustment & Service