


'$C#%
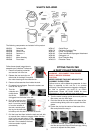
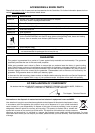
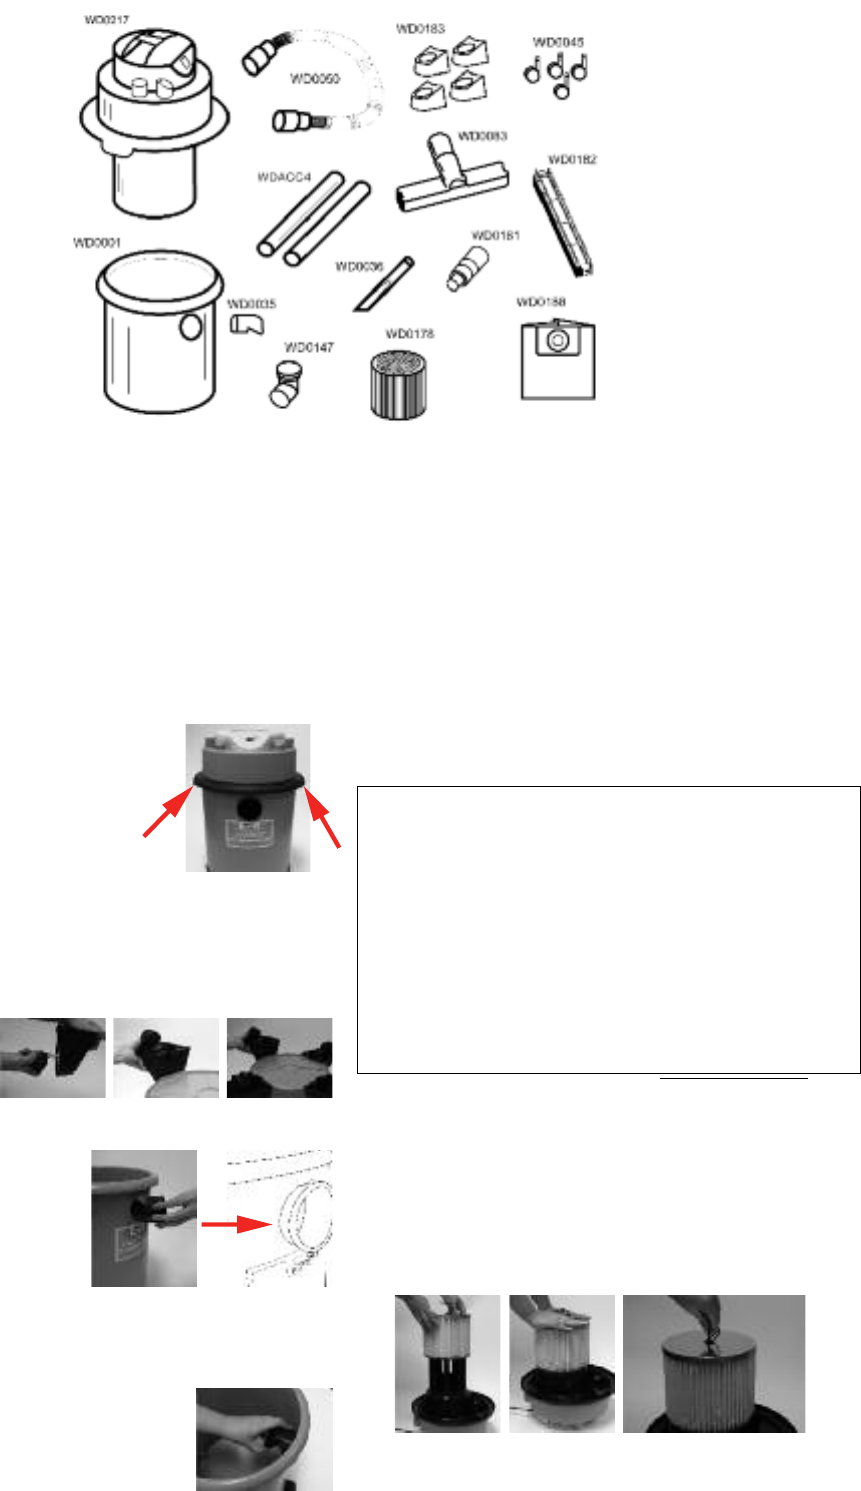
The following components are included in this product.
WD0001 Collection Bin
WD0035 Hose Inlet
WD0036 Crevice Tool
WD0045 Castors x 4
WD0050 Hose
WD0217 Motor Housing
WD0083 Floor Head
WD0147 Outlet Elbow
WD0178 Cellulose Cartridge Filter
WD0181 Power Tool Adaptor
WD0182 Floor Head Brush/Squeegee Attachment
WD0183 Outriggers x 4
WD0188 Dust Collection Bag
WDACC4 Extension Tubes
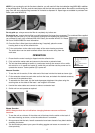
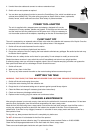
Follow these simple instructions to
assemble your CombiVac
®
before use.
1. Remove all packing materials
and remove unit from box.
2. Release the two tank clips on
either side of the black rim and lift
the motor housing off the collection bin.
3. Remove all accessories from inside the tank.
4. Fit castors into outriggers. Ensure the castors are
fitted all the way in.
5. Turn the
collection bin
upside down
and fit the
outriggers into the holes in the bin.
6. Push the hose inlet into
the side of the recovery
tank. It must be pushed
in from the outside of
the tank, ensuring that
the lug on the hose inlet
is lined up with the slot in the tank as shown.
7. Pull the hose inlet from inside the tank and pull with
an up and down motion to engage. Make sure the
clips on the top and bottom of the
hose inlet are fixed into place inside
the tank. Once installed, the hose
inlet can remain in place
permanently.
$$$$"
%#$$
'"#$" '"
#% )"
%$
&" "$$#%$'$%$$
""$$"$$
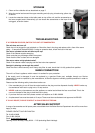
Failure to do so will invalidate the guarantee. A clean
filter is essential to this unit for it to operate
efficiently. If the filter becomes clogged or damaged,
or fails to operate, you must fit an Earlex
replacement. Please call 01483 454666 for more
information or visit our website www.earlex.com
8. Turn the motor housing upside down and push the
filter down over the float cage.
9. Push the filter all the way down to the base of the
motor housing taking care not to squash the filter
pleats.
10. Fasten the pin into the centre of the base of the
filter and push all the way in.
11. To remove the filter, pull the pin out of the base of
the filter and pull the filter off the float cage, taking
care not to squash the filter pleats.
3