


12
2
C
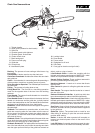
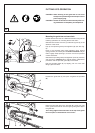
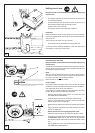
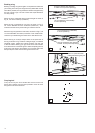
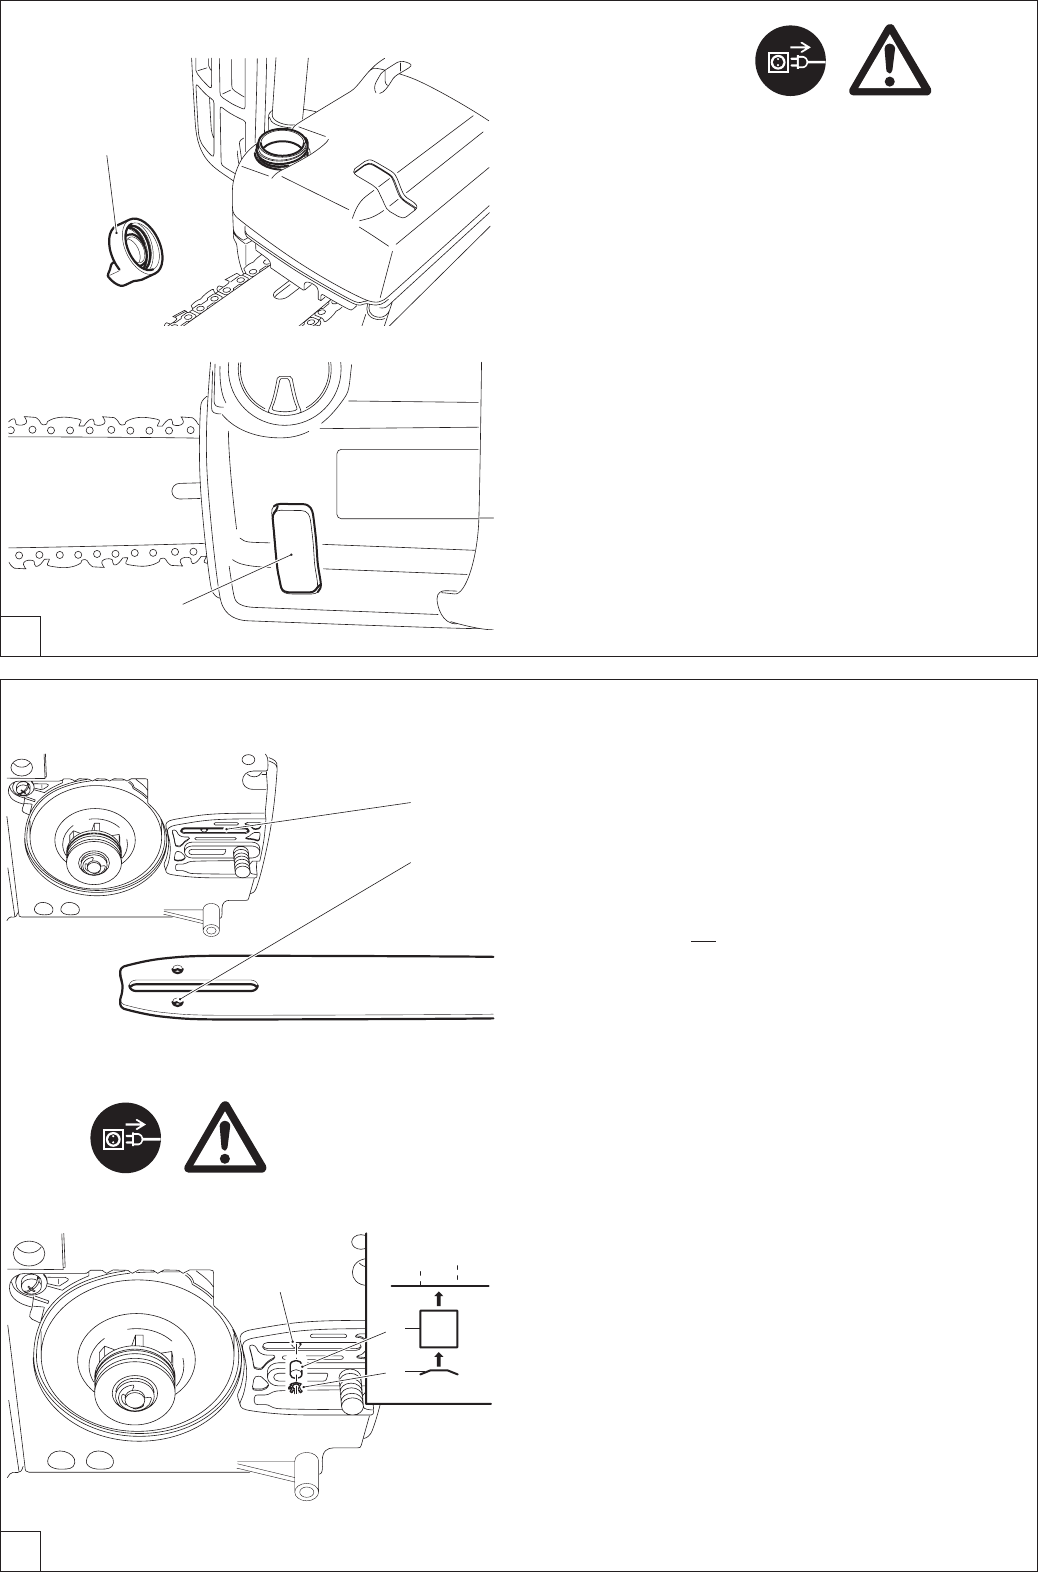
Relling the oil tank
Only if the motor is switched off and the power supply plug
is pulled out!
- Thoroughly clean the oil tank around the cap to prevent dirt
from entering the tank.
- Unscrew the tank cap (
1) and ll in chain oil until it is on a
level with the bottom edge of the ller socket.
- Tightly screw on the tank cap.
- Thoroughly remove any oil that has overown.
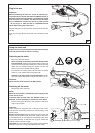
Important!
Before operating the saw for the rst time, the oil feed system
must be completely lled, until the chain oil lubricates the chain
and guide bar.
This procedure can take up to two minutes.
- The oil level can be controlled in the sight glass (
2).
In order to ensure sufcient lubrication of the saw chain there
must always be enough oil in the tank.
1
D
4
3
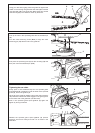
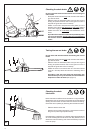
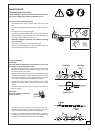
Lubricating the saw chain
Only if the motor is switched off and the power supply plug
is pulled out!
To guarantee a troublefree operation of the oil pump the oil guide
groove (3) as well as the oil inlet bore in the guide bar (4) must
be cleaned in regular intervals.
Note:
After the saw has been turned off it is normal for residual chain
oil to drip from the oil feed system, the guide bar and the chain
for a time. This does not constitute a defect!
Place the saw on a suitable surface.
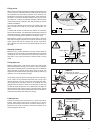
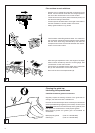
Chain oil lter
Dirt particles that accumulate on the chain oil lter will impede
the ow of chain oil. This will eventually lead to poor lubrication,
and faster wear to the chain and guide bar.
If the chain is no longer getting enough lubrication, the chain
oil lter (6) will need to be cleaned or replaced.
- Remove the sprocket guard, chain, and guide bar (see
PUTTING INTO OPERATION).
- Carefully clean the area around the oil outlet hole (
5).
- Using a small screwdriver, carefully remove the serrated
washer (7) and chain oil lter (6).
- Clean the chain oil lter. If it is severely contaminated, replace
it.
- Plug in the chain saw and let it run until the chain oil comes
out the oil outlet hole.
-
Switch off the saw and unplug the power cord.
- Clean the area around the oil outlet hole (
5) with a cloth.
- Insert the chain oil lter (
6) and serrated washer (7) as shown
in Installation. When the oil lter cannot be secured with
the serrated washer, replace the serrated washer with a new
one.
- Put the guide bar, chain, and sprocket guard back on (see
PUTTING INTO OPERATION).
6
5
7
Installation