


www.desatech.com
121117-01B8
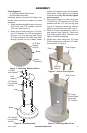
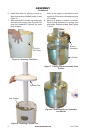
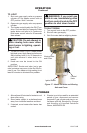
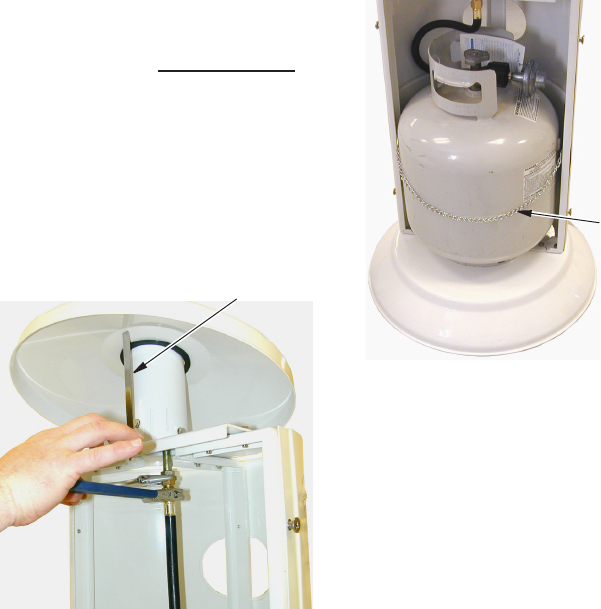
Figure 13 - Attaching Regulator and
Hose Assembly
Figure 14 - Propane Tank and Safety
Chain
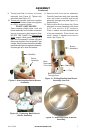
13. Remove tank door. Wrench tighten regu-
lator and hose assembly to manifold as
shown in Figure 13. Check connections
for gas leaks (see Checking for Leaks).
Note: Make sure hose and regulator as-
sembly attached to manifold are never
bent or kinked during installation and
operation of heater.
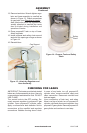
14. Place propane/LP tank on top of base.
Attach regulator.
15. Install propane tank safety chain around
tank and into openings on legs as shown
in Figure 14.
16. Reinstall door.
ASSEMBLY
Continued
CHECKING FOR LEAKS
IMPORTANT: The heater must be leak tested
before any further assembly is done. Use only
a noncorrosive leak detection uid. DO NOT
USE FLAME.
Turn control knob to the OFF position. Se-
curely connect regulator to propane/LP gas
cylinder. Open propane/LP cylinder valve.
Apply a noncorrosive leak detection uid to
connections at the manifold and regulator
connections. Bubbles forming show a leak.
In case of any leaks, turn off propane/LP
cylinder valve, remove manifold, check and
clean connection. Reconnect manifold and
leak test again.
Upon completion of leak test, and when
there is no sign of a leak, turn off propane/LP
cylinder valve and disconnect regulator from
propane/LP gas cylinder. Remove propane/LP
gas cylinder and continue to next step.
Cap Support
Safety
Chain