


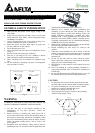
MODEL VFB080D4LED1
P
a
g
e 2.
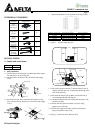
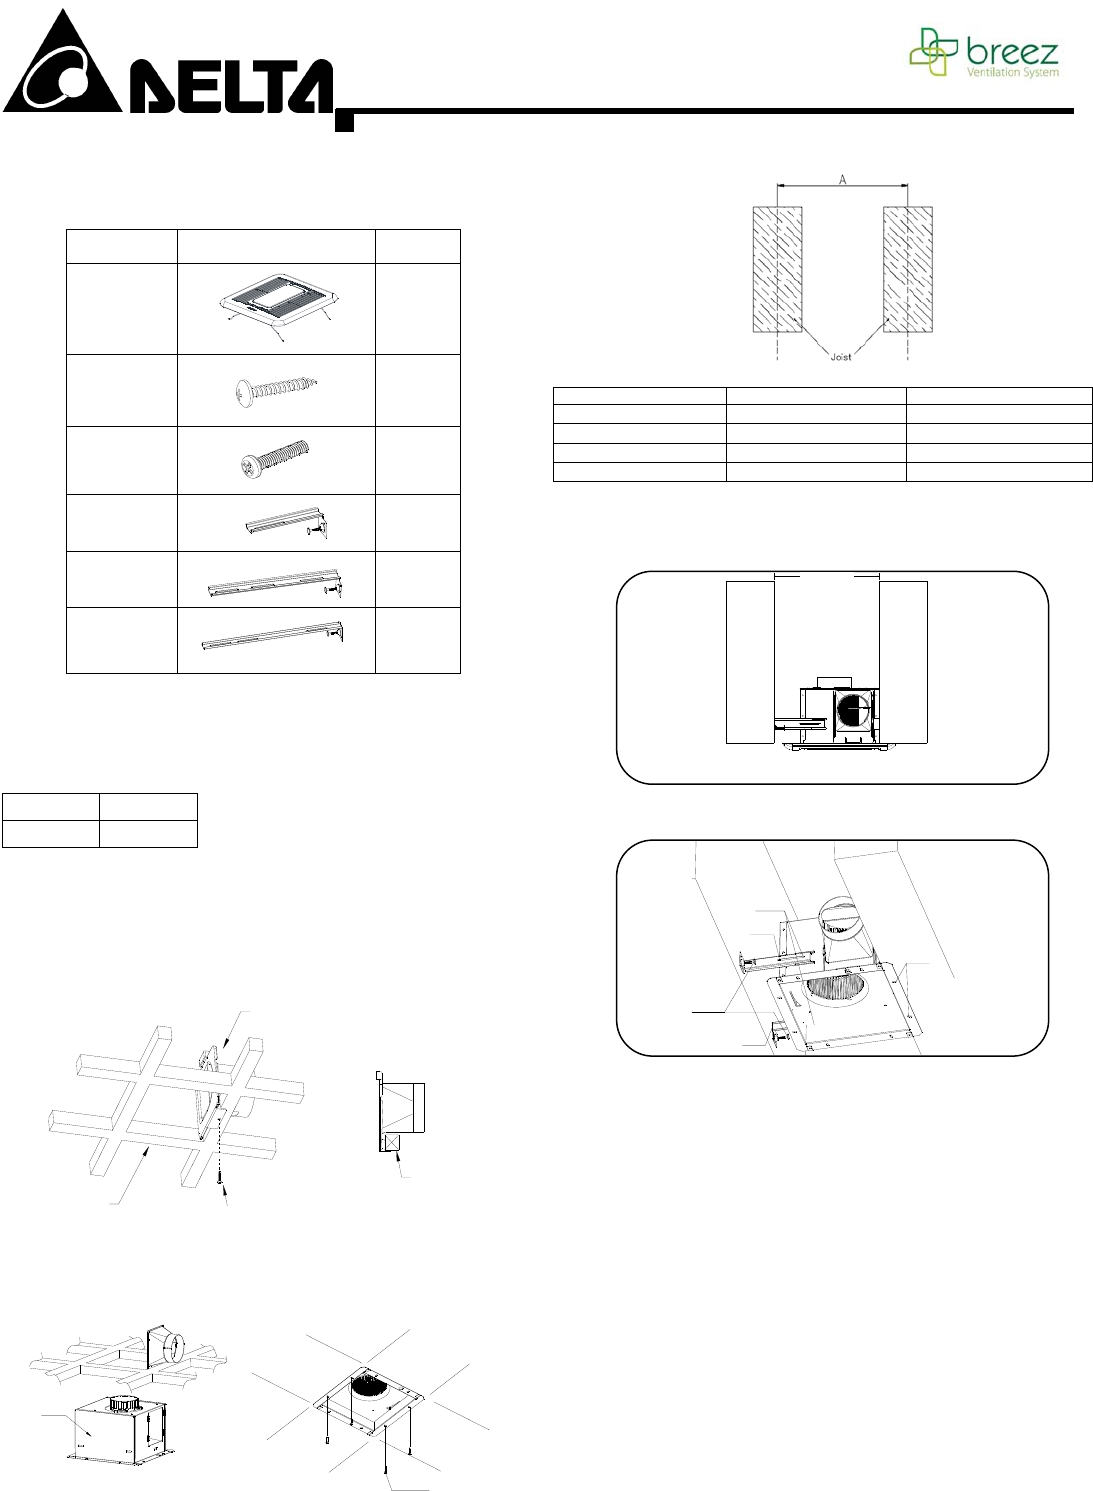
SUPPLIED ACCESSORIES
Part name Appearance Quantity
Grille
(Include LED
Light Engine)
1
Long Screw
(M4×25)
6
Screw
(M4×12)
3
Suspension
bracketⅠ
(6.10 inch)
1
Suspension
bracketⅡ
(11.81 inch)
1
Suspension
bracketⅢ
(13.98 inch)
1
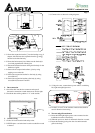
INSTALLATIONS
A. Install with wood frame
Model No. VFB080D4LED1
Install Dim. (in.)
10.2 ╳ 10.2
1. Body installation
1-1. Construct the wood frame(not provided) with 30mm square
bar and attach it to the ceiling joist.
1-2. Attach the duct connector to the wood frame with taping
screw.
1-3. Insert the body into the wood frame and connect it to the
duct connector. Secure the body on wood frame with taping
screws.
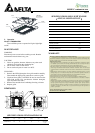
B. Install with joist
1. Choose the installation type according to the fig as below:
Spacing A on center joists Insert Suspension bracket Suspension bracket No.
12.0 inch Refer to Fig B-01, B-02 I,II
16.0 inch Refer to Fig B-03, B-04 I,II,III
19.2 inch Refer to Fig B-03, B-04 I,II,III
24.0 inch Refer to Fig B-03, B-04 I,II,III
1-1 TypeⅠ-12 inches between joists
1-1.1 Insert the suspension bracketⅠ into the bracket cover of
adaptor side and select one of suspension bracketⅡ of the
back of the fan body.
1-1.2 Insert the fan between joists. Make sure the fan body is
level and perpendicular with the joist.
1-1.3. Ensure the distance between ceiling and fan body for the
thickness of grille.
1-1.4 Secure the all suspension bracket to joists by using
tapping screw on the tab.
1-1.5 Secure the suspension bracket I and II to fan body by
using screw(M4×12-2pce each).
1-2 TypeⅡ-16/19.2/24 inches between joists
B-01
B-02
Suspension Bracket I
Suspension Bracket II
Long Screw(M4×25)
Joist Joist
Joist
Joist
Main Body
Long Screw(M4×25)
12.0
Screw M4×12
Tab
Duct connector
Wood frame
Taping screw
Wood frame