


27
Hydrostatic Transmission
Keep the area around the transmission cooling fan free
of grass and debris at all times. The hydrostatic
transmission is sealed at the factory and is
maintenance free. The fluid level cannot be checked
and on most models, cannot be changed.
IMPORTANT:
Several tractor components and parts
(pedals, seat, fender, fuel tank, etc.) must be removed
in order to refill the transmission after draining it.
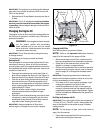
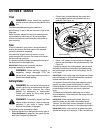
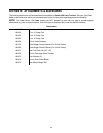
If your tractor is equipped with a transmission drain plug
(see Figure 20), exposed to extreme conditions (hilly
terrain, towing, etc.) and you choose to change the
hydrostatic fluid, do so after the tractor’s initial 50 hours
of operation and every 100 hours of operation
thereafter.
Figure 20
After draining the oil, refill the transmission with 76 oz.
(to the top of the fill hole found on the transmission’s
surface) with any SAE 20W 50 motor oil.
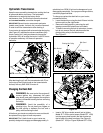
Changing the Deck Belt
WARNING: Be sure to shut the engine off,
remove ignition key, disconnect the spark
plug wire(s) and ground against the engine to
prevent unintended starting before removing
the belt(s).
WARNING: Avoid the possibility of a
pinching injury. Do not place your fingers on
the idler spring or between the belt and a
pulley while removing the belt.
All belts on your tractor are subject to wear and should
be replaced if any signs of wear are present.
IMPORTANT:
The V-belts found on your tractor are
specially designed to engage and disengage safely. A
substitute (non-OEM) V-belt can be dangerous by not
disengaging completely. For a proper working machine,
use factory approved belts.
To change or replace the deck belt on your tractor,
proceed as follows:
• Lower the deck by moving the deck lift lever into the
bottom notch on the right fender.
• Remove the belt guards by removing the self-
tapping screws that fasten them to the deck.
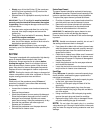
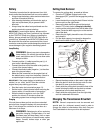
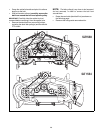
• To ease in removing the belt in later steps, loosen,
but do not remove, the bolt which secures the
pivoting idler pulley to the idler bracket.
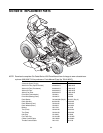
See Figure 21.
Figure 21
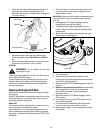
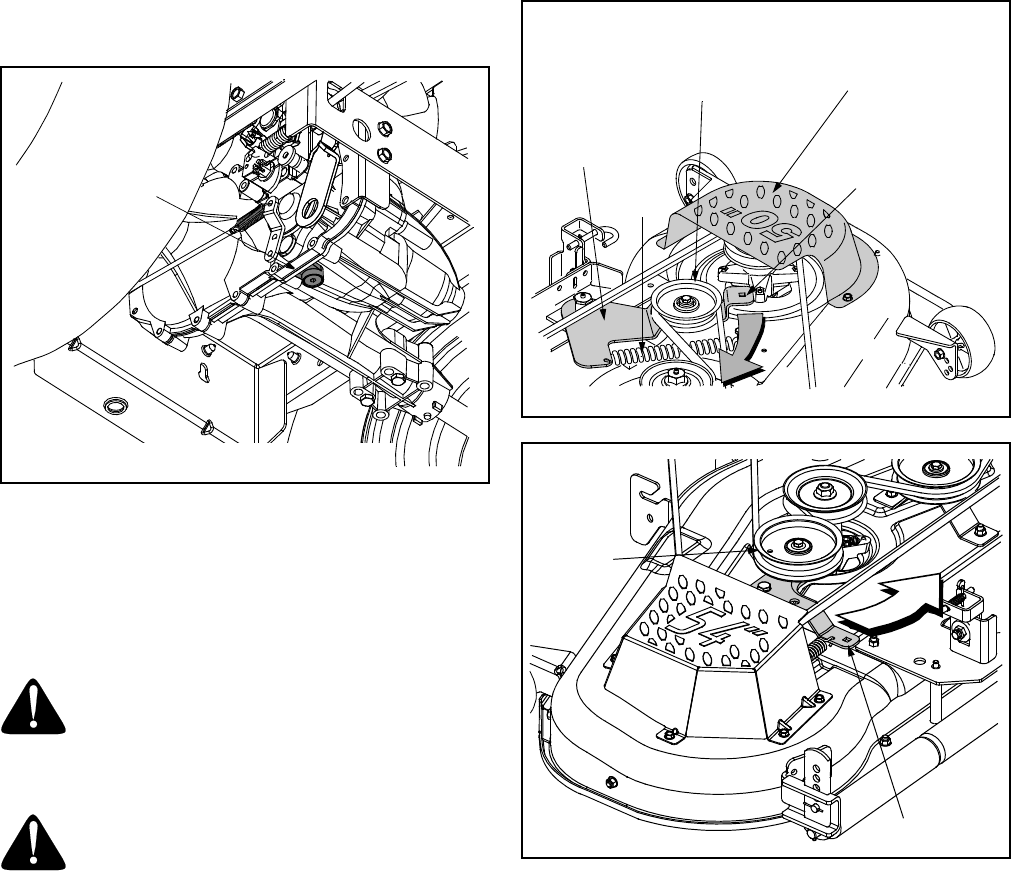
Figure 22
• Insert a 3/8”-drive ratchet wrench (set to tighten,
Model SLT 1550 or set to loosen, Model SLT 1554)
into the square hole found in the idler bracket on
the left side of the deck’s surface. See Figure 21
(Model SLT 1550) or Figure 22(Model SLT 1554).
Drain Plug
NOTE: View shown from beneath tractor.
3/8” Square Hole
Spring
Belt Guard
Idler Bracket
Pivoting Idler Pulley
3/8” Square Hole
Idler Pulley