


9
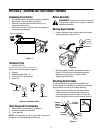
• Wipe all snow and moisture from the unit. Move the
choke lever back and forth several times and leave
it in the ON position.
Operating Tips
• Discharge snow downwind whenever possible.
Slightly overlap each previously cleared path.
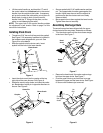
• Lifting up on the handle will allow the rubber on the
augers to propel the snow thrower forward. Pushing
downward on the handle will raise the augers off
the ground and stop the forward motion.
NOTE: Excessive upward pressure on the handle will
result in premature wear on the rubber auger blades
which would not be covered by warranty.
• Run the engine for a few minutes before stopping to
help dry any moisture on the engine.
• Clean the snow thrower thoroughly after each use.
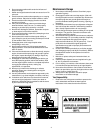
WARNING: Muffler, engine and surrounding
areas become hot and can cause a burn. Do
not touch.
SECTION 5: MAKING ADJUSTMENTS
WARNING: NEVER attempt to make any
adjustments while the engine is running, except
where specified in the operator’s manual.
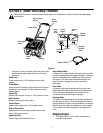
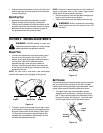
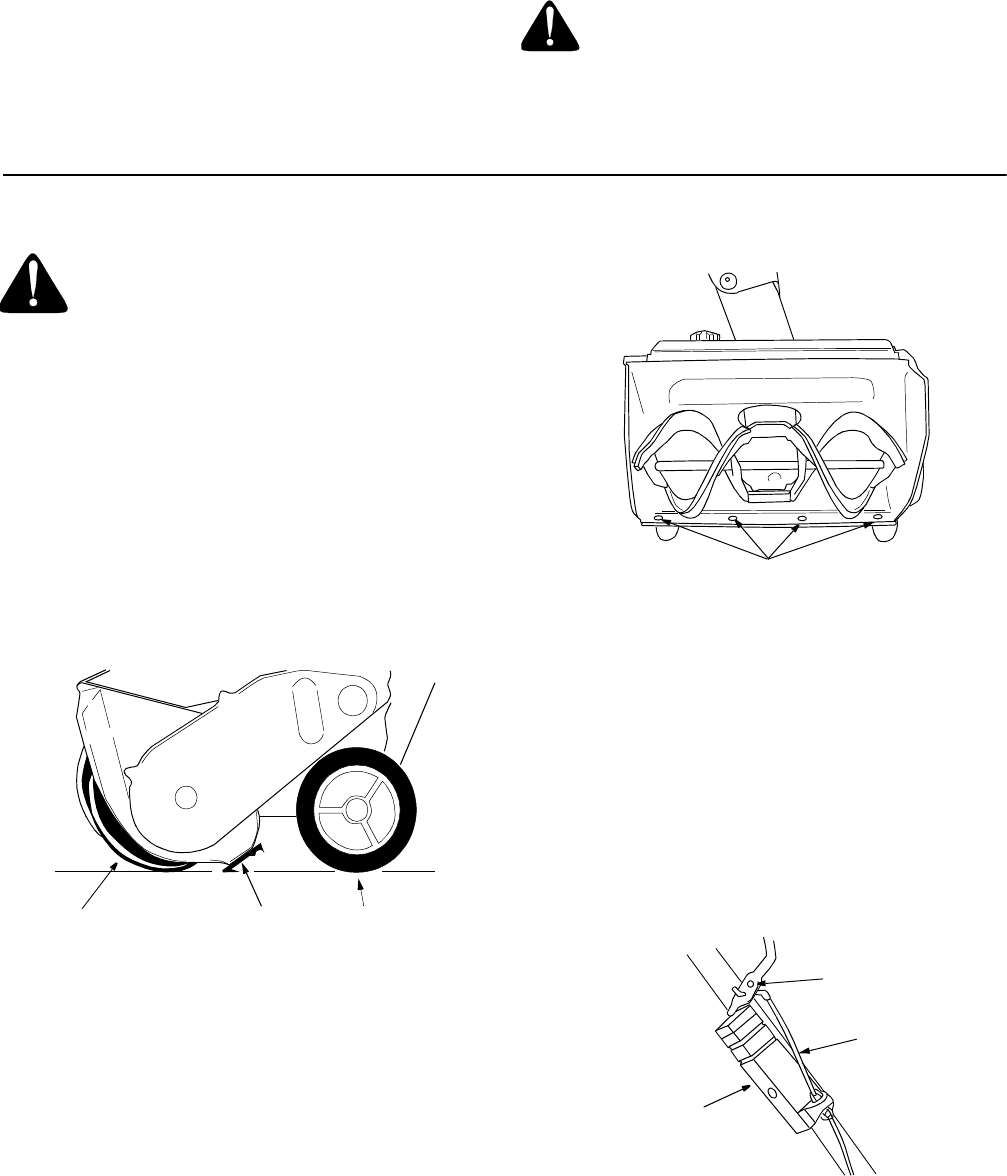
Shave Plate
• To check the adjustment of the shave plate, place
the unit on a level surface. See Figure 12. The
wheels, shave plate and augers should all contact
level surface. Note that if the shave plate is
adjusted too high, snow may blow under the
housing. If the shave plate wears out excessively,
or the unit will not self-propel, the shave plate may
be adjusted too low.
NOTE: On new units or units with a new shave plate
installed, the augers may be slightly off the ground.
Figure 12
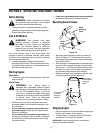
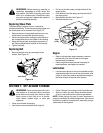
• To adjust, tip the snow thrower back so that it rests
on the handle. Loosen the lock nuts and bolts which
secure the shave plate to the housing. See Figure
13. Move the shave plate to desired position and
retighten the nuts and bolts. Make certain all nuts
and bolts are tightened securely
Figure 13
Belt Tension
Periodic adjustment of the belt tension may be required
due to normal stretch and wear on the belt. If augers
hesitate while turning although engine maintains same
speed, adjust tension following instructions below.
• The upper hole in the control handle provides
adjustment for belt tension. To adjust, disconnect
the “Z” end of control cable from the bottom hole in
the control handle. See Figure 14 . Hook the cable
into the upper hole in control handle as shown.
Figure 14
Augers
Shave Plate
Wheels
Nuts & Bolts
Upper
Hole
Clutch
Cable
Control
Housing