


14
5
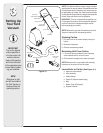
Maintaining
Your Yard
Vacuum
WARNING
Always stop engine,
disconnect spark
plug, and ground
against engine before
cleaning, lubricating
or doing any kind of
maintenance on your
machine.
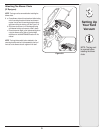
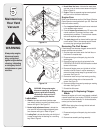
Figure 5-1
Figure 5-2
WARNING: Always stop engine,
disconnect spark plug, and ground
against engine before cleaning,
lubricating or doing any kind of
maintenance on your machine.
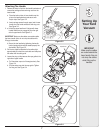
Lubrication
1. Wheels: Lubricate each wheel shoulder screw
(rear wheel) and pivot arm axle (front wheel) once a
season with light oil. See Figure 5-3.
2. Nozzle height adjustment levers: Lubricate the
pivot points of the nozzle height adjustment levers
once a season with light oil. Refer to Figure 7.
3. Locking Rod: Lubricate the locking rod with light oil
to ease the application of attaching on or removing
bag. Refer to Figure 6.
4. Nozzle/Hose Vac Lever: Lubricate the nozzle/hose
vac lever on top of nozzle once a season with light oil.
Refer to Figure 4-1.
5. Engine: Follow the separate engine manual packed
with your unit for lubrication instructions.
Engine Care
Refer to the Maintenance section of the Briggs & Stratton
Owner/Operator manual packed with your unit. Read and
follow instructions carefully.
1. Check engine oil level before each use as instructed
in the separate engine manual.
2. Clean air cleaner’s precleaner every 25 hours under
normal conditions. Clean every few hours under
extremely dusty conditions. To service the air cleaner,
refer to the separate engine manual.
3. The spark plug should be cleaned and the gap reset
once a season. Refer to the separate engine manual
for correct plug type and gap specifications.
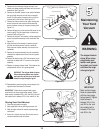
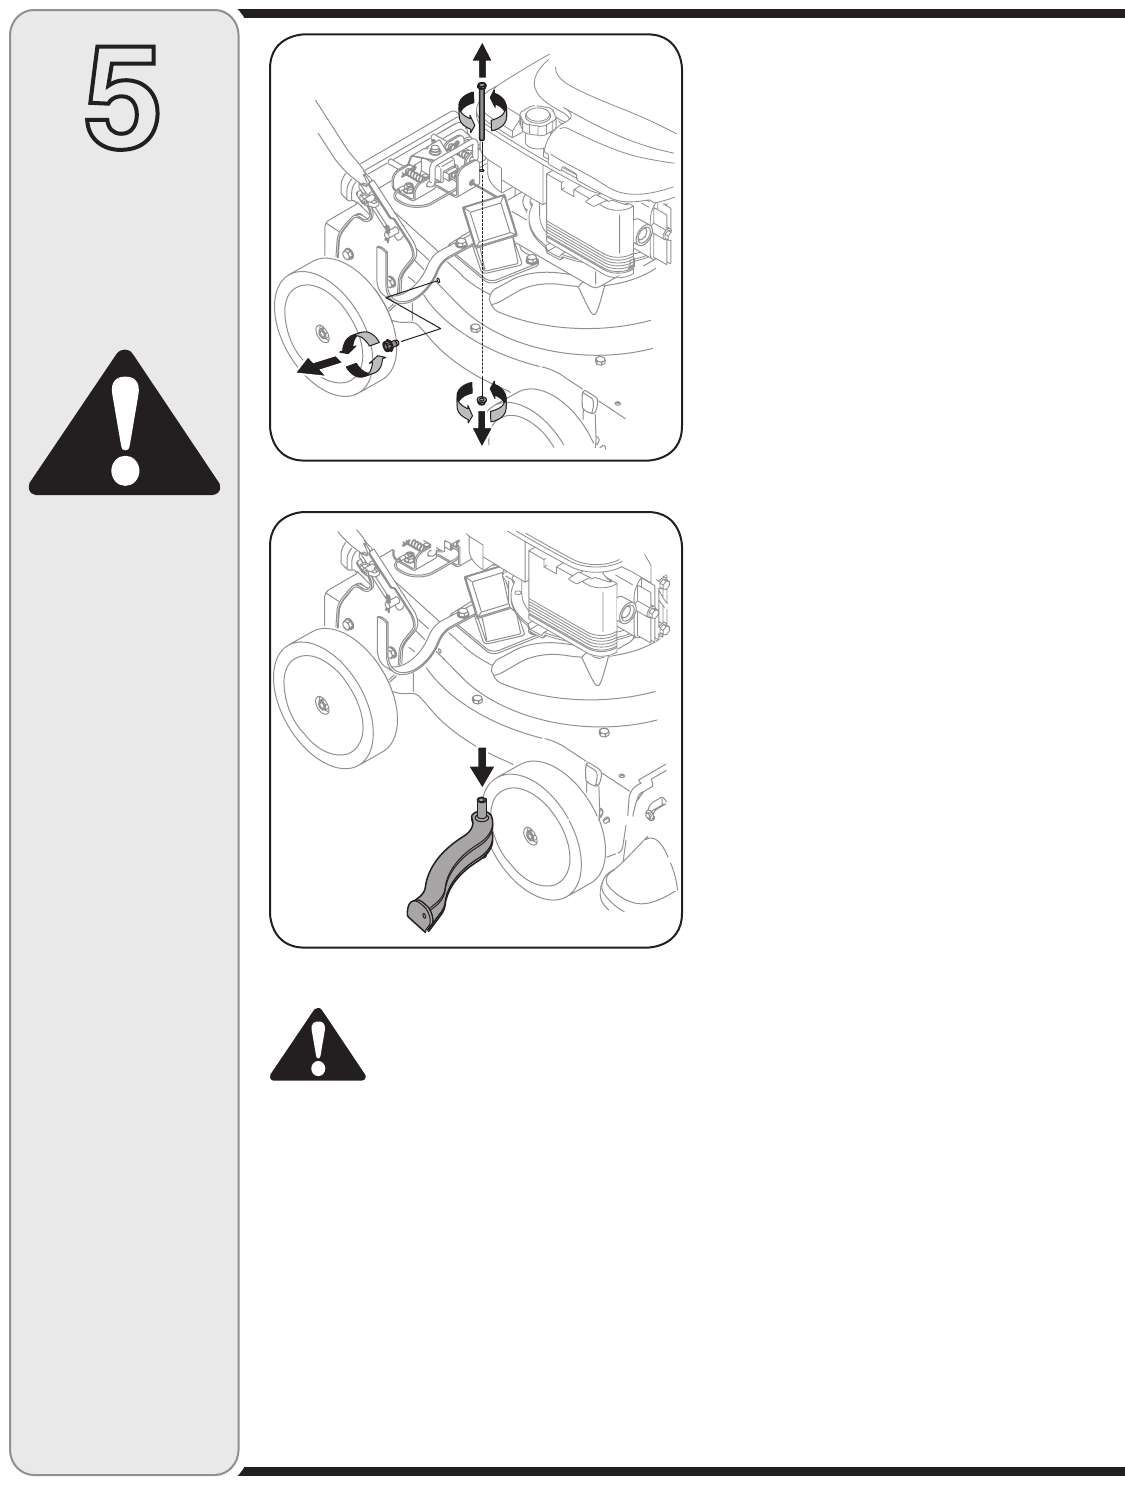
Removing The Flail Screen
If the discharge area becomes clogged, remove the flail
screen and clean area as follows:
1. Stop the engine and make certain the Yard Vacuum
has come to a complete stop.
2. Disconnect and ground the spark plug wire to the
retaining post.
3. Remove the bag from the unit as instructed in the
OPERATING YOUR YARD VACUUM section to obtain
access to flail screen.
4. Remove self-tapping screw on right side of unit that
attaches to the fail screen. It may be necessary to
remove the hose bracket hanger to get access to the
hex screw. See Figure 5-1.
5. Remove hex screw on top of rear housing mounting
bracket and the flange lock nut that secures flail
screen. See Figure 5-1.
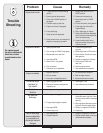
6. Remove and clean the screen by scraping or washing
with water. See Figure 5-2.
7. Reinstall the flail screen.
Sharpening Or Replacing Chipper
Blade
Because the engine on this unit has a tapered crankshaft,
a special impeller tool (part number 753-0900) is required
to remove the impeller assembly. For further assistance,
contact your local service dealer.
NOTE: When tipping the unit, empty the fuel tank and
keep spark plug side up.
1. Disconnect and ground the spark plug wire to retain-
ing post.
2. Remove hose assembly and bag assembly.