


6
6A
6B
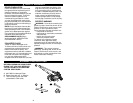
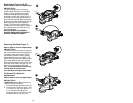
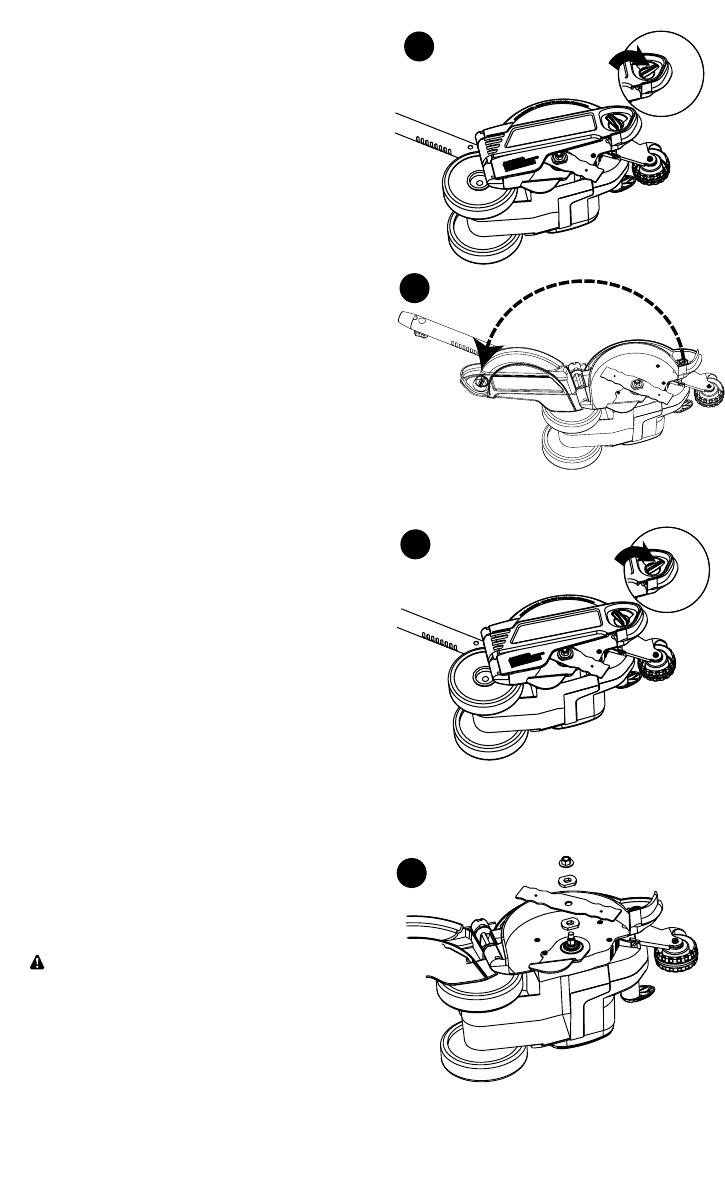
Blade Guard (Figure 6A & 6B)
Wait for blade to come to complete stop!
UNPLUG TOOL!
The guard swings open for cleaning
inside of blade housing or for changing
blades. To open guard turn the guard
release knob clockwise (facing blade
guard side of tool) until it stops (a turn of
about 90˚) fig. 6A detail; pull the knob to
open the door (fig. 6B). When closing the
guard turn the knob clockwise 90˚ (fig. 6A
detail) and push the door completely
closed. The knob should automatically
lock the door. If the knob doesn’t return to
the locked position press the door until
the knob engages.
BE SURE GUARD IS PROPERLY
CLOSED AND KNOB IS LOCKING IT
BEFORE OPERATING EDGER.
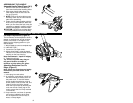
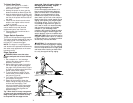
Attaching The Blade (Figure 7)
Wait for blade to come to complete stop!
UNPLUG TOOL!
The blade, two spacers and hex head nut
with conical washer should be attached to
your edger in the order shown. Please
check that the blade has been properly
mounted before using your edger. The
Edger blade has two wear indicators that
show when blade needs to be replaced.
When the blade wears to the small hole at
each end of the blade it will give only 1/4"
depth of cut and should be replaced.
Tip: To increase blade life, keep initial
cutting depth at minimum and
increase depth setting as blade wears.
To Remove The Blade For
Replacement:
Wait for blade to come to complete stop!
UNPLUG TOOL!
CAUTION: Blade rotates momentarily
after the switch is released.
1. Turn knob and open guard door. (Fig. 7A)
2. Loosen the hex head nut (9/16”). Use
a 1" wrench on the outer spacer, or a
2” x 4” wood block between the
blade and guard if necessary to hold
the blade from turning. (Fig. 7B)
7B
7A