4
ASSEMBLY
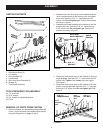
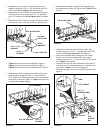
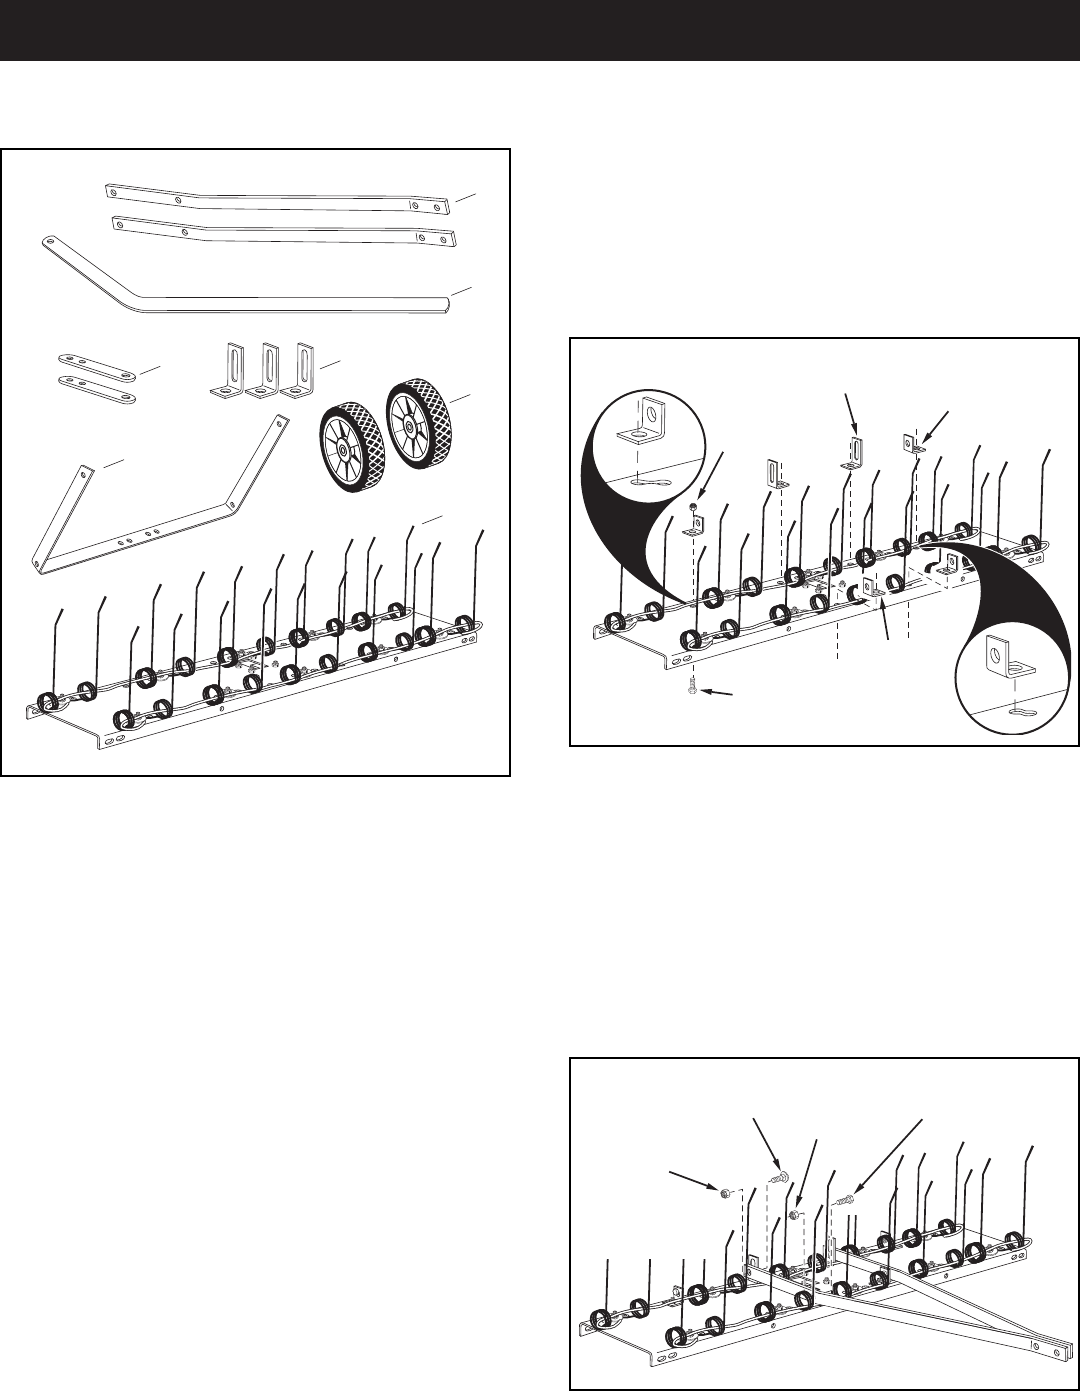
FIGURE 2
FIGURE 1
• Fastenthehitchmountarmstotheoutsideofthefront
anglebrackets.Usetwo5/16"x1"hexboltsand5/16"
nylocknuts.Tighten, then loosen the nuts slightly.
Seegure2.
• Fastenthehitchmountarmstotheoutsideoftherear
hitcharmmountbrackets.Usetwo5/16"x1"carriage
boltsand5/16"nylocknuts.Do not tighten yet. See
gure2.
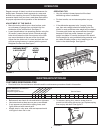
CARTON CONTENTS
REMOVAL OF PARTS FROM CARTON
• Removeallpartsandhardwarepackagesfromthe
carton.Layoutallpartsandhardwareandidentify
usingtheillustrationsonpages3and4.
TOOLS REQUIRED FOR ASSEMBLY
(2)1/2"wrenches
(1)9/16"wrench
(1)3/4"wrenchoradjustablewrench
(1)Pliers
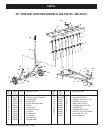
1. HitchMountArms(2)
2. LiftHandle
3. HitchBrackets(2)
4. AxleBracket
5. HitchArmMountBrackets(3)
6. Wheels(2)
7. TineShieldAssembly
2
4
6
1
5
3
7
5/16" x 1"
CARRIAGE BOLT
5/16"
NYLOCK
NUT
5/16" x 1"
HEX BOLT
5/16"
NYLOCK
NUT
HITCH ARM
MOUNT BRACKET
ANGLE
BRACKET
5/16" x 1"
HEX BOLT
5/16" NYLOCK
NUT
ANGLE
BRACKET
• Assembletwo(tall)hitcharmmountbracketsandtwo
(short)anglebracketstothebottomofthetineshield
attherear.Usefour5/16"x1"hexboltsand5/16"
nylocknuts.Do not tighten yet.Positionthebrackets
asshowningure1.
• Assembletwoanglebracketstothebottomofthetine
shieldatthefront.Usetwo5/16"x1"hexboltsand
5/16"nylocknuts.Do not tighten yet.Positionthe
bracketsasshowningure1.


