


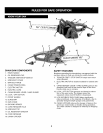
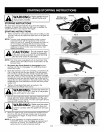
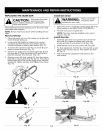
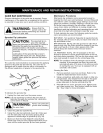
REPLACING THE GUIDE BAR
,_ I_AI I'l'll_lkl. Disconnect the chain
%,/rlU/l%Jll, saw from power
source before checking or adjusting the
chan saw tens on.
These instructions are for replacing a bar. The unit is fully
assembled when shipped.
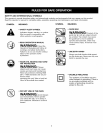
NOTE: Always wear heavy gloves when handling the saw
chain.
Remove Old Bar
1. Place the power unit on a flat surface, on its side with
chain tensioner facing up.
2. Loosen knob (B) slightly by turning knob counter-
clockwise and then turn the chain tension ring (C)
counter-clockwise to relieve chain tension (Fig. 17).
3. To remove the sprocket cover (A), turn knob (B) com-
pletely counter-clockwise. (Fig. 17)
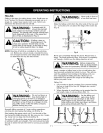
4. Remove saw chain from around the guide bar (E) and
the sprocket (F). Slide the guide bar (E) with tension
plate (D) attached, from the unit. (Fig. 18)
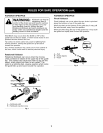
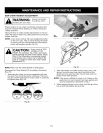
5. Remove screw with lock washer (G) from the tension
plate (D) to remove plate from the old bar. Then attach
tension plate (D) to the new bar using screw with lock
washer (G). Tighten securely with Phillips screw driver
(Fig. 19).
Install Saw Chain
handling the saw chain.
Always use protec-
tive gloves when
I
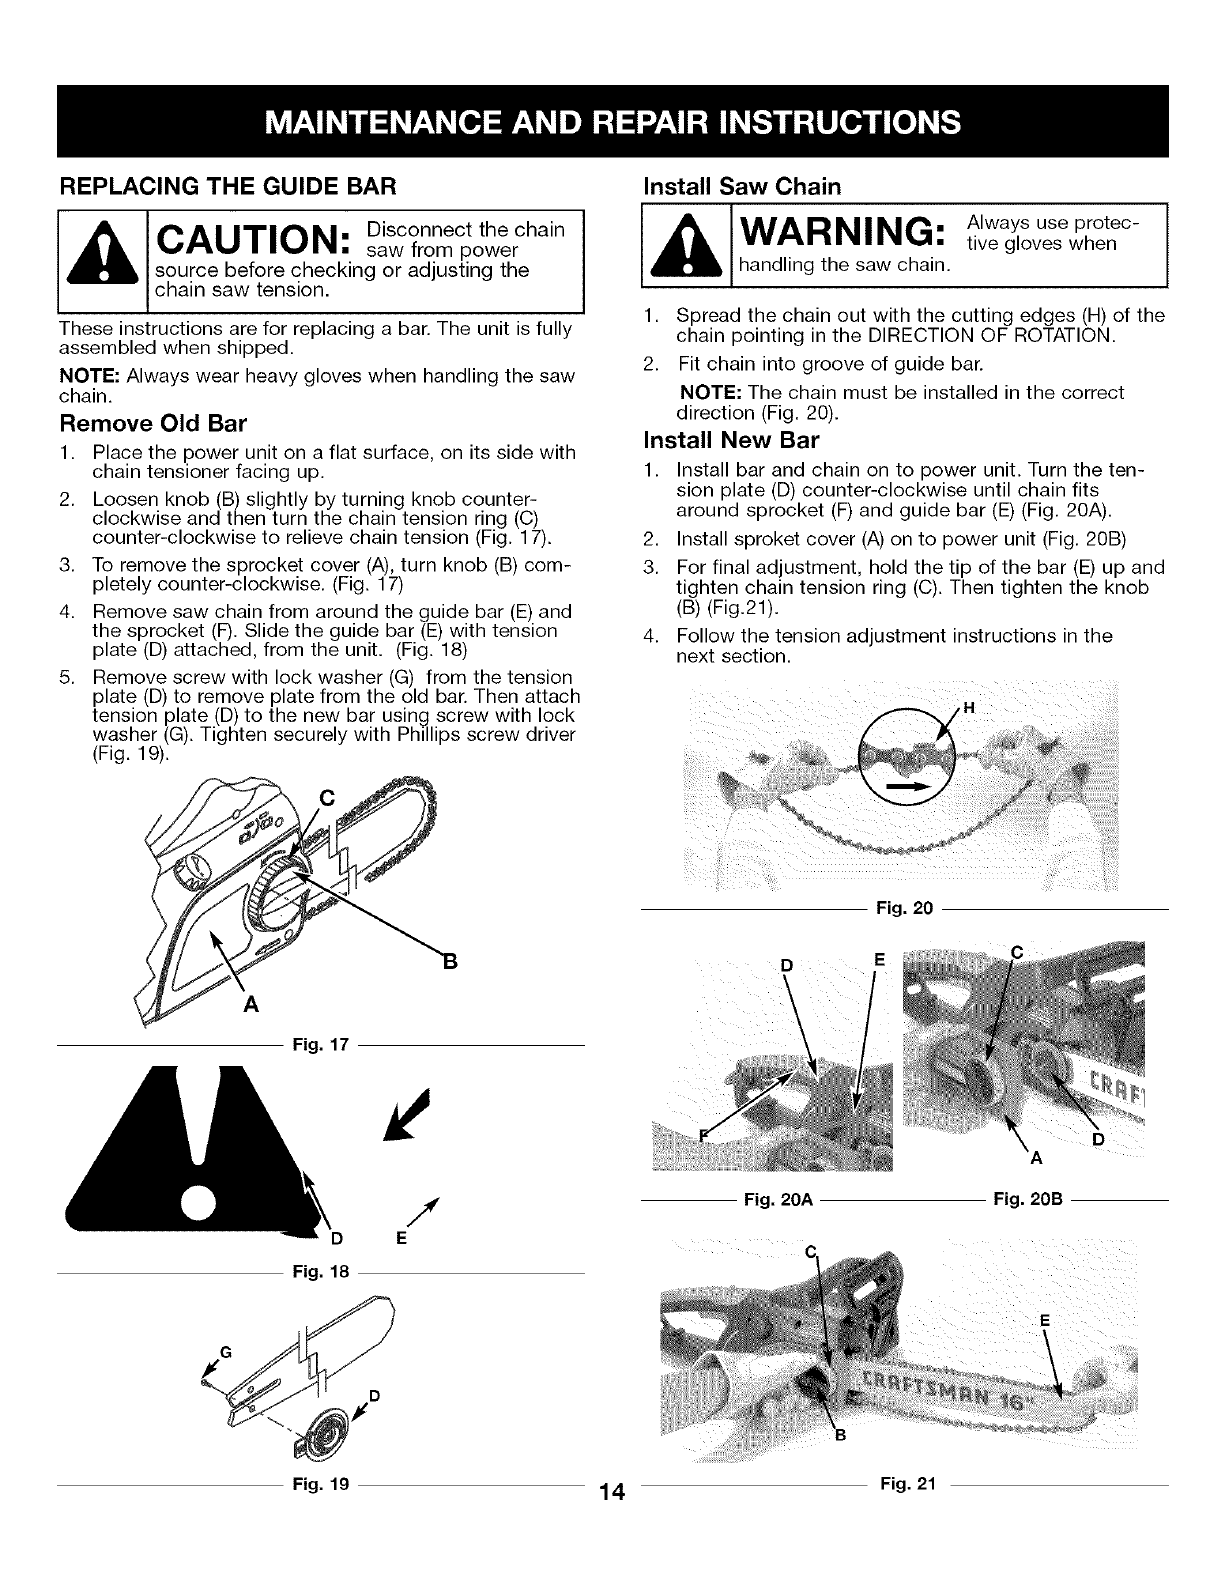
1. Spread the chain out with the cutting edges (H) of the
chain pointing in the DIRECTION OF ROTATION.
2. Fit chain into groove of guide bar.
NOTE: The chain must be installed in the correct
direction (Fig. 20).
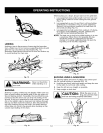
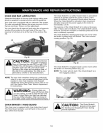
Install New Bar
1. Install bar and chain on to power unit. Turn the ten-
sion plate (D) counter-clockwise until chain fits
around sprocket (F) and guide bar (E) (Fig. 20A).
2. Install sproket cover (A) on to power unit (Fig. 20B)
3. For final adjustment, hold the tip of the bar (E) up and
tighten chain tension ring (C). Then tighten the knob
(B) (Fig.21).
4. Follow the tension adjustment instructions in the
next section.
G
Fig. 17
,!'
E
Fig. 18
D
Fig. 20
D E
Fig. 20A Fig. 20B
Fig. 19 14 Fig. 21