THREE=POSITION PIVOTING HEAD
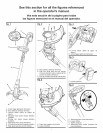
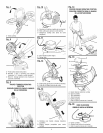
See Figure 8, page iL
The trimmer head can be adjusted to three different posi-
tions.
[] Remove the battery pack.
[] Depress the pivot button and move the trimmer head up
or down to one of the three positions indicated by the
notches.
NOTE: Adjust the trimmer head to the first and second
notches for trimming and edging. Adjust to thethird notch
for storage only.
[] Make sure the trimmer head is securely locked into place
before reinstalling the battery pack.
OPERATING THE TRIMMER
See Figure 9, page ii.
Follow these tips when using the string trimmer:
[] Hold the trimmer with your right hand on the rear handle
and your left hand on the front handle.
[] Keep a firm grip with both hands while in operation.
[] Trimmer should be held at a comfortable position with
the rear handle about hip height.
[] Cut tall grass from the top down. This will prevent grass
from wrapping around the boom housing and string
head which may cause damage from overheating.
If grass becomes wrapped around the string head:
[] Remove the battery pack from the trimmer.
[] Remove the grass.
_ WARNING: Always hold the string trimmer away
from the body keeping clearance between the body
and the string trimmer. Any contact with the string
trimmer cutting head while operating can result in
serious personal injury.
CUTTING TIPS
See Figure 10, page ii.
[] Keep the trimmer tilted toward the area being cut; this is
the best cutting area.
[] The string trimmer cuts when passing the unit from right
to left. This will avoid throwing debris at the operator.
Avoid cutting in the dangerous area shown in figure 10.
[] Use the tip of the string to do the cutting; do not force
string head into uncut grass.
[] Wire and picket fences cause extra string wear, even
breakage. Stone and brick walls, curbs, and wood may
wear string rapidly.
[] Avoid trees and shrubs. Treebark, wood moldings, siding,
and fence posts can easily be damaged by the string.
ADVANCING STRING
NOTE: The trimmer is equipped with an auto-feed head.
Bumping the head to try to advance the line will damage
the trimmer and void the warranty.
[] With the trimmer running, release the switch trigger.
[] Wait two seconds, and press the switch trigger.
NOTE: The string will extend approximately 1/4 in. with
each stop and start of the switch trigger until the string
reaches the length of the grass deflector cut-off blade.
[] Resume trimming.
ADVANCING THE STRING MANUALLY
See Figure 11, page ii.
[] Remove the battery pack.
[] Push the black button located on the string head while
pulling on string to manually advance the string.
LINE CUT-OFF BLADE
See Figure 12, page ii.
This trimmer is equipped with a line cut-off blade on the
grass deflector. For best cutting, advance line until it is
trimmed to length by the line cut-off blade. Advance line
whenever you hear the motor running faster than normal,
or when trimming efficiency diminishes. This will maintain
best performance and keep line long enough to advance
properly.
ROTATING REAR HANDLE
See Figure 13, page iL
The rotating rear handle is used in combination with the
edger guide.
[] Remove the battery pack.
[] Push down on the edging coupler and turn handle end
clockwise until the edging coupler locks into place.
[] Release the edging coupler.
8 - English


