


NOTE:Fuelstabilizeris anacceptablealternativein
minimizingtheformationof fuelgumdepositsduring
storage.Addstabilizerto gasolinein fueltankorstor-
agecontainer.Alwaysfollowthe mixratiofoundon
stabilizercontainer.Runengineat least10minutes
afteraddingstabilizerto allowthestabilizerto reach
thecarburetor.Donotdrainthegastankandcarbure-
torif usingfuelstabilizer.
• Drainalltheoilfromthecrankcase(thisshouldbe
doneaftertheenginehasbeenoperatedandisstill
warm)andrefillthecrankcasewithfreshoil.
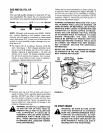
• Ifyouhavedrainedthefueltank,protecttheinside
of theengineasfollows.Removesparkplug,pour
approximately1/2ounce(approximatelyonetable-
spoon)of engineoil intocylinderandcrankslowly
to distributeoil.Replacesparkplug.
OTHER
• Do not store gasoline from one season to another.
• Replace your gasoline can if your can starts to rust.
Rust and/or dirt in your gasoline will cause problems.
• Store unit in a clean, dry area. Do not store next to
corrosive materials, such as fertilizer.
NOTE: If storing in an unventilated or metal storage
shed, be certain to rustproof the equipment by coating
with a light oil or silicone.
SERVICE & ADJUSTMENT
,_ MOVE IT AWAY FROM SPARK PLUG
BEFORE PERFORMING ANY ADJUST-
MENTS OR REPAIRS.
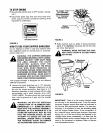
REMOVINGTHEFLAILSCREEN
If the discharge area becomes clogged, remove the
flail screen and clean area as follows.
• Stop the engine, make certain the chipper-shredder
has come to a complete stop and disconnect spark
plug wire from the spark plug before unclogging the
chute.
• Loosen the two hand knobs on each side of the
chute deflector. Lift the chute deflector up, and tie it
out of the way.
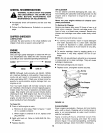
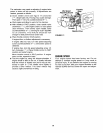
• Remove two hairpin clips from the clevis pins which
extend through the housing. Remove the clevis
pins. Lift the flail screen from inside the housing.
See figure 13.
• Clean the screen by scraping or washing with
water. Reinstall the screen.
NOTE: Be certain to reassemble the flail screen with
the curved side down as shown in figure 13.
Chute Deflq ./ Hairpin \\
Clips,
Clevis
Pins
WARNING: ALWAYS STOP ENGINE AND
DISCONNECT SPARK PLUG WIRE AND
SHARPENINGOR REPLACINGTHEBLADES
CHIPPER BLADES
• Disconnect spark plug 'wire and move it away from
spark plug.
• Remove the flail screen as instructed in previous
section.
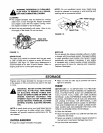
• Remove the chipper chute by removing three hex
nuts and washers. A 1/2" wrench is required. See
figure 13.
NOTE: When reassembling, the cupped washer goes
on the bottom of the chipper chute with the cupped
side against the chute.
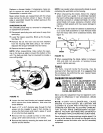
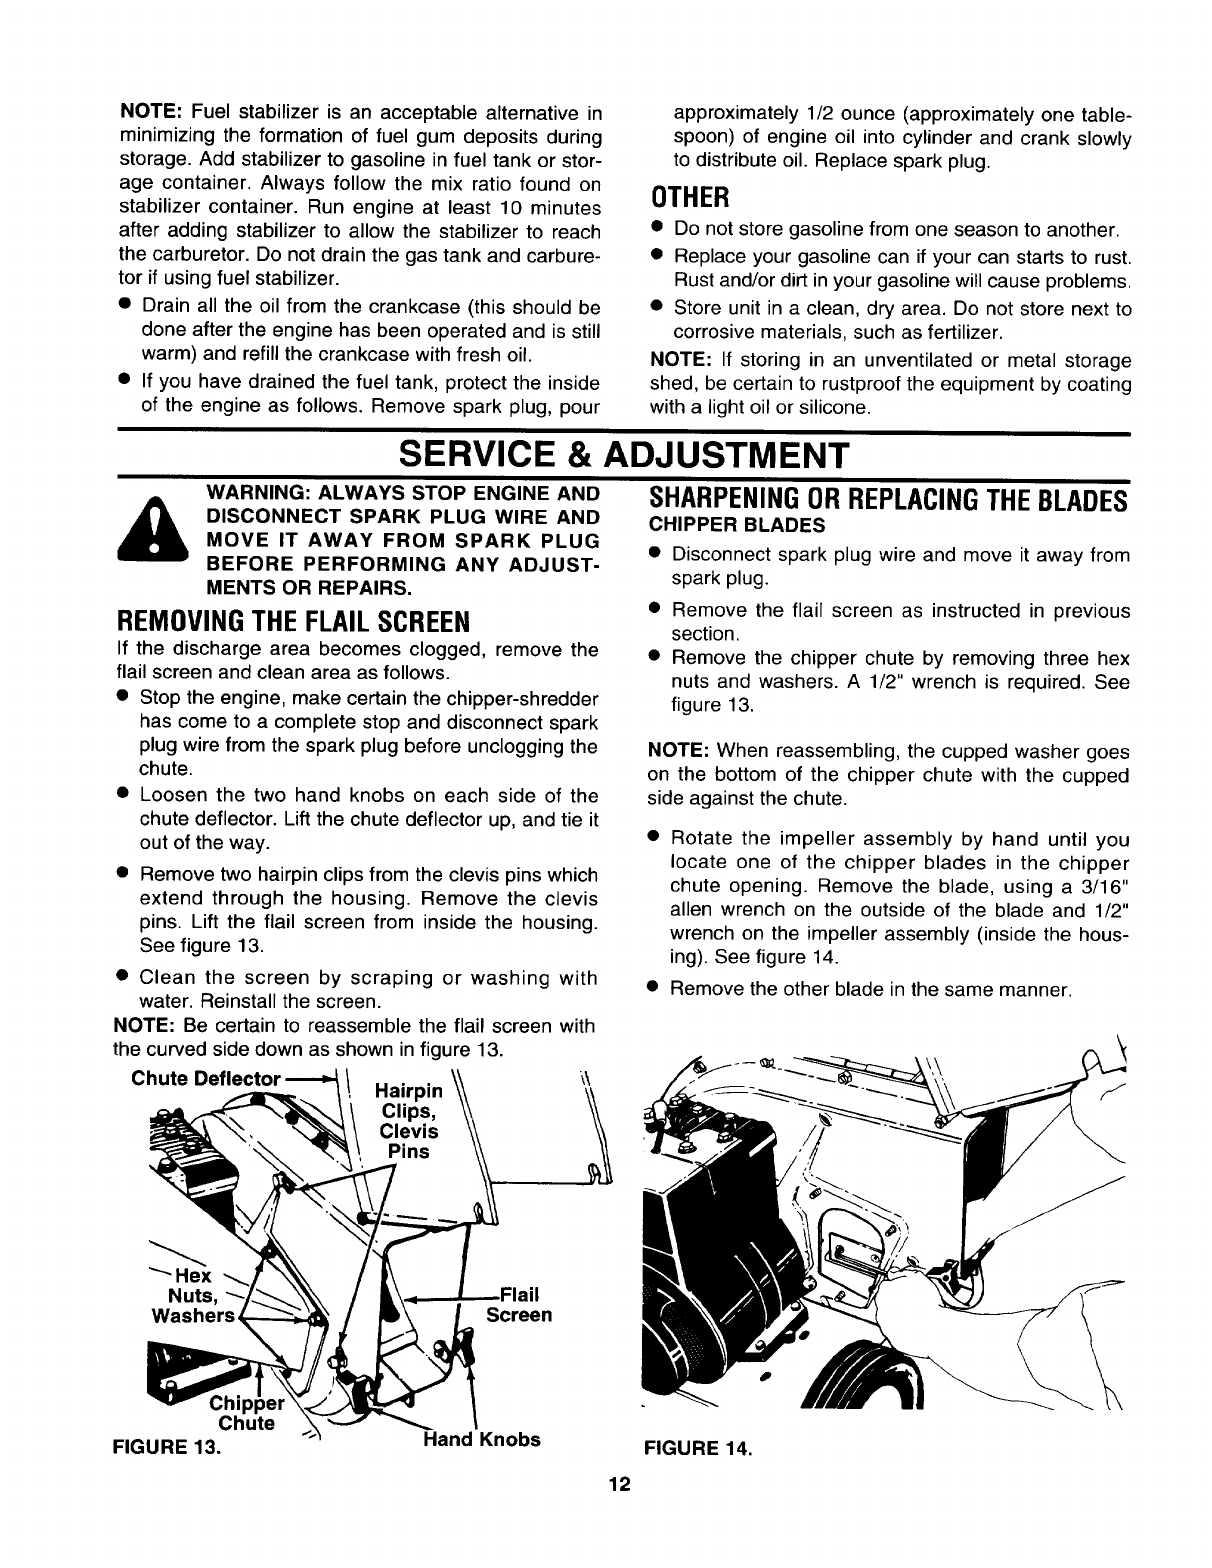
• Rotate the impeller assembly by hand until you
locate one of the chipper blades in the chipper
chute opening. Remove the blade, using a 3/16"
allen wrench on the outside of the blade and 1/2"
wrench on the impeller assembly (inside the hous-
ing). See figure 14.
• Remove the other blade in the same manner.
Hex
Nuts,
Washers
Screen
Chute
FIGURE 13.
Hand Knobs
12
FIGURE 14.