15
14
NOTE: THE AUXILIARY HANDLE MUST BE ATTACHED to the trimmer shaft
before use.
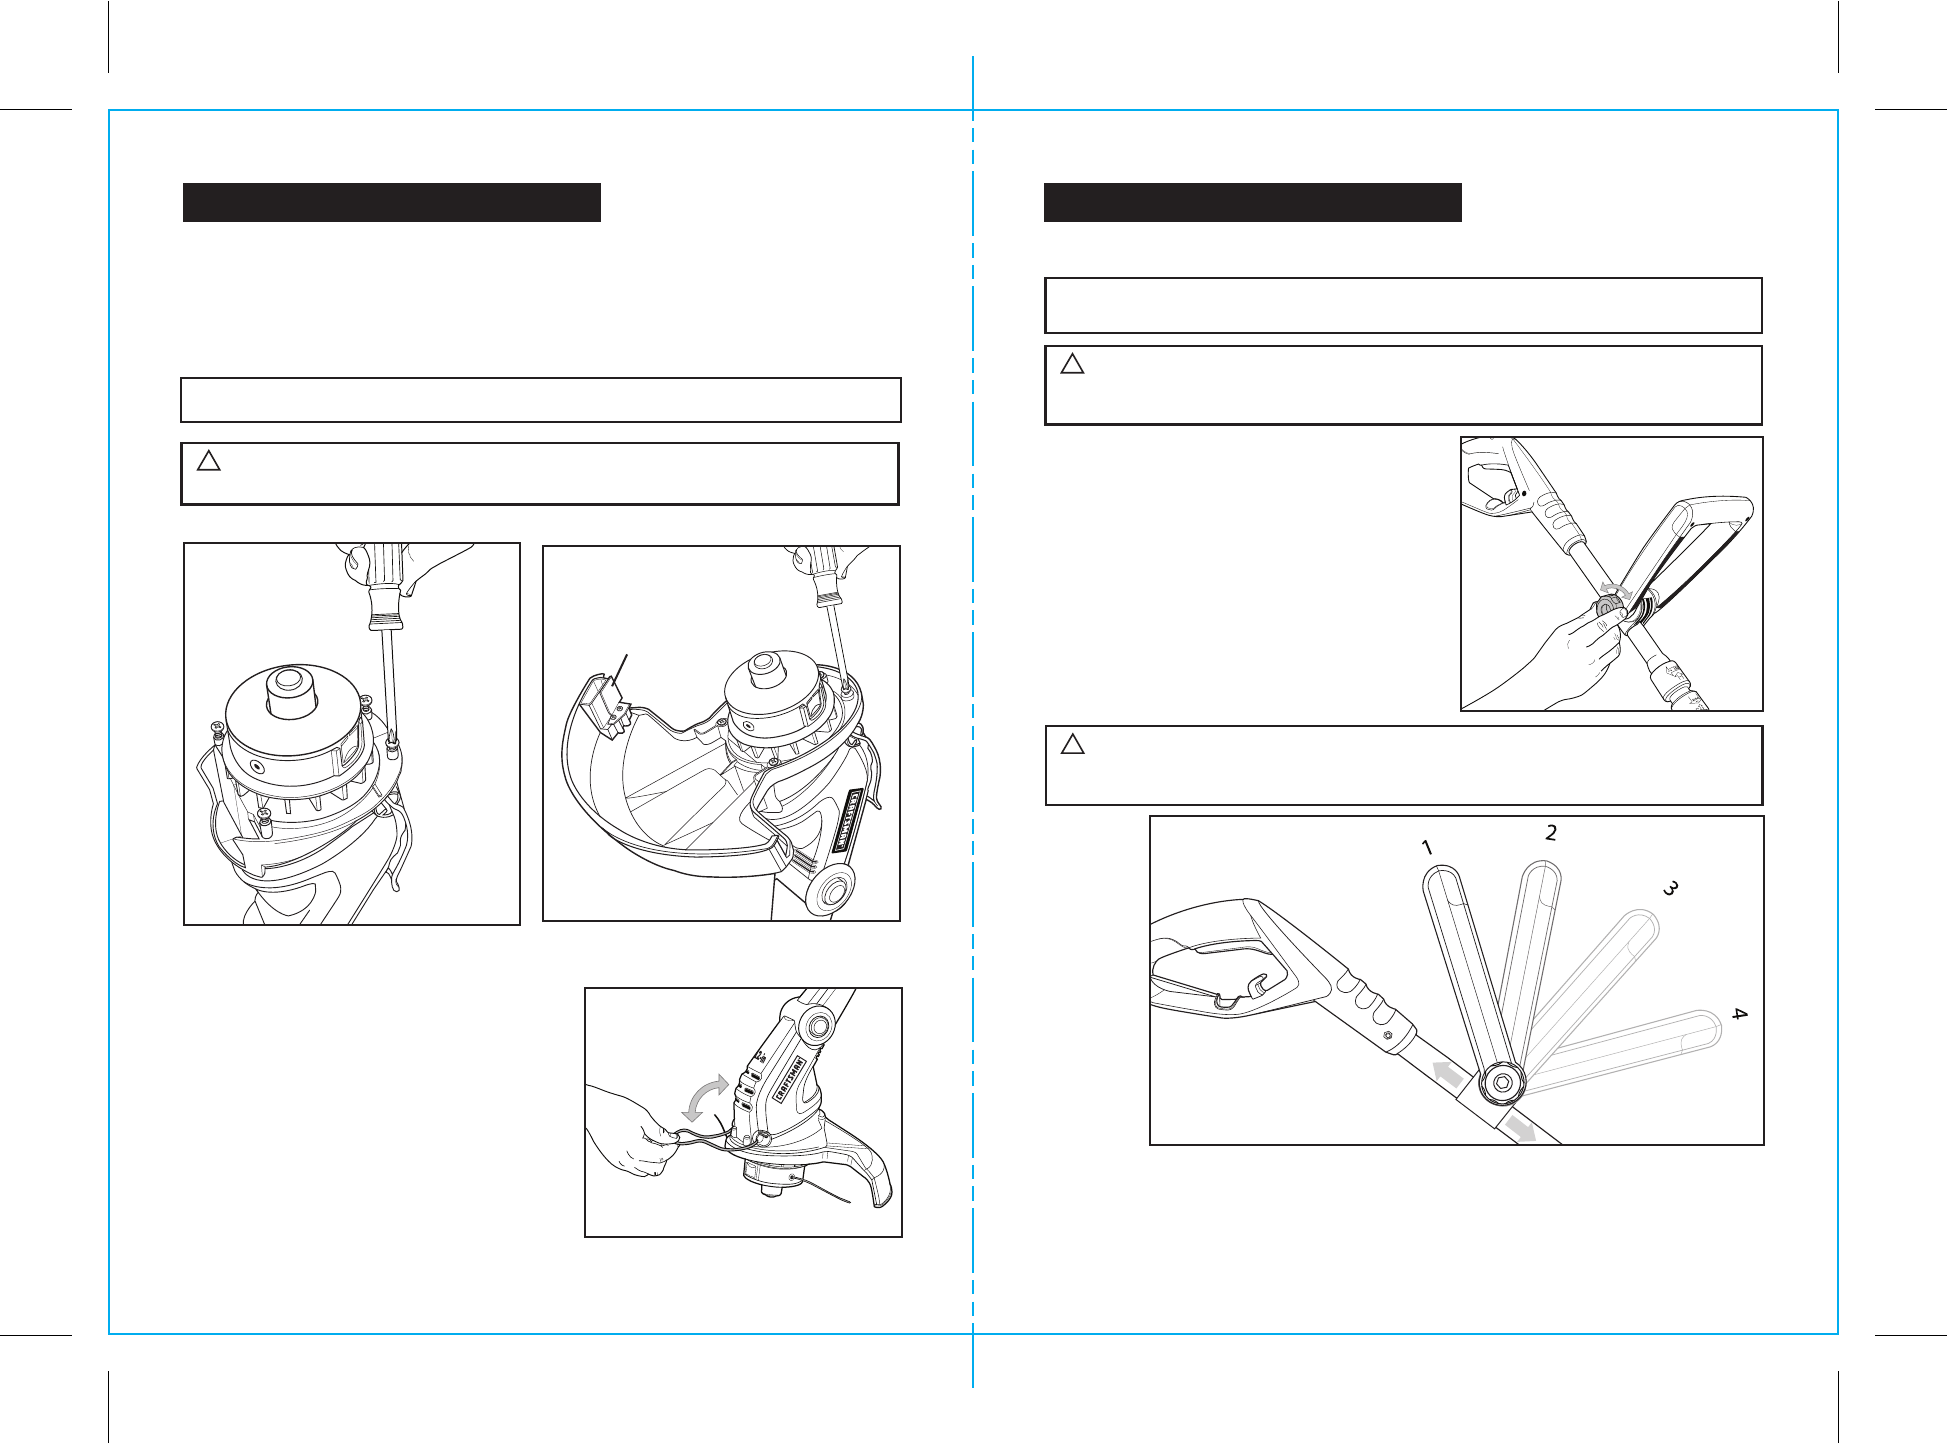
ATTACHING THE AUXILIARY HANDLE (Fig. 5 and 5a)
ASSEMBLY & ADJUSTMENTS cont. ASSEMBLY & ADJUSTMENTS cont.
1. Disconnect the trimmer from the power supply.
2. Unscrew the auxiliary handle’s tightening knob
(counterclockwise) and remove from handle.
3. Position auxiliary handle onto handle bracket
assembly located on trimmer’s top-shaft
(see Fig. 6).
4. Position the knob and screw through the auxiliary
handle and bracket, and tighten knob
(turn clockwise). Do not tighten completely until
you have adjusted the auxiliary handle to your
desired working position.
WARNING:
To avoid injury, ALWAYS turn off and disconnect the trimmer
from the power outlet BEFORE installing parts or cleaning the trimmer or
making any adjustments.
!
WARNING:
To avoid injury, adjust the auxiliary handle for maximum
control and balance. DO NOT overreach when operating the trimmer. ALWAYS
KEEP proper balance for better control of the tool in unexpected situations.
!
Fig. 6a
Fig. 4 Fig. 4a
CAUTION:
Line cutter on edge of safety guard is sharp. Use caution
when handling.
!
NOTE: Safety Guard will only fit one way.
4. Insert the edge of the guard into the slot along the back of the trimmer’s head, carefullly
lining the 4 screw holes in the guard up with the 4 screw holes in the trimmer head.
5. Insert screws and securely attach the safety guard (see Fig. 4a).
INSTALLING THE SAFETY GUARD cont. (Figs. 4 and 4a )
ATTACHING THE AUXILIARY HANDLE cont. (Fig. 6 and 6a)
Line Cutter
Install Guard
with 4 Screws
Remove
4 Screws
from
Bottom
of Head
Fig. 6
ADJUSTING THE AUXILIARY HANDLE (Fig. 6a)
1. The auxiliary handle’s bracket can be moved up or down on the shaft and the auxiliary
handle itself can be moved forward or backward into 4 different locked positions
(see Fig. 6a).
2. When the handle is in desired position, turn knob and tighten securely.
THE EDGE GUIDE (Fig. 5)
Your trimmer comes with an Edge Guide
that is handy for use as a cutting guide.
It can be used to help keep the cutting line
away from items you don’t want cut,
such as flowers, or damaged, such as
fences or screens.
Each end of the wire edge guide is force-fitted
into a hole located on each side of the trimmer’s
head. To use the edge guide, pull (force) it down
into the guide position as shown in Fig. 5.
Fig. 5


