


FAN SPEED ADJUSTMENTS
Changing the Pitch Diameter of the Sheaves:
1. Tools required: 5/32” allen wrench, 3/8” nut driver, 9/16” box
wrench and a medium size phillips screwdriver.
2. Remove the lower belt cover by removing the (5) sheet metal
screws.
3. Remove the rear grille by removing the (4) 1/4” bolts and nuts.
4. Remove the belt cover inside the blower by removing the (4) sheet
metal screws.
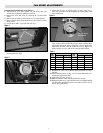
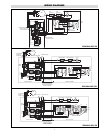
5. Loosen the (4) bolts, (2) on each side. See Fig. 1.
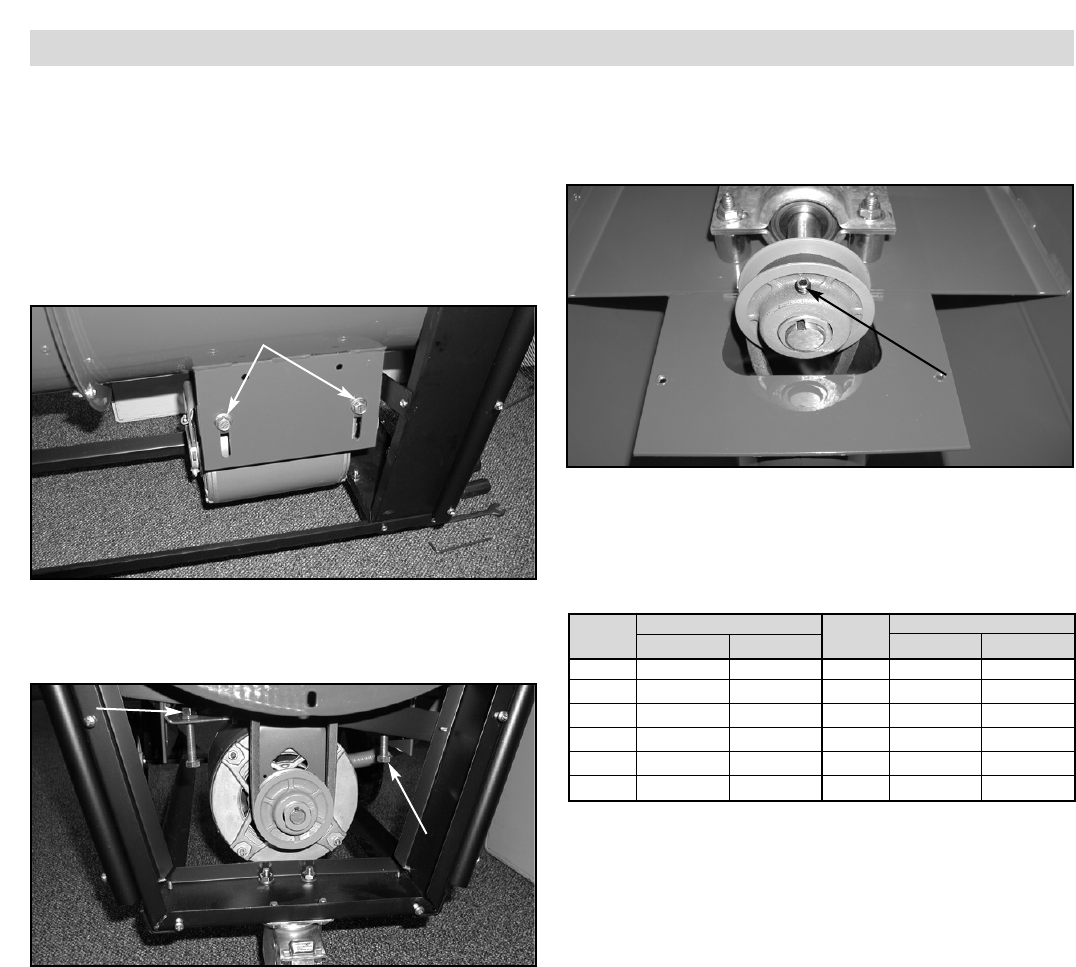
6. Loosen the (2) motor tension lock nuts and the fan belt tension
adjusting bolts. See Fig.2
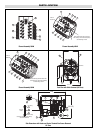
7. Loosen the set screw on the fan pulley or motor pulley. Fig. 3
shows the construction of the fan pulley, the motor pulley is the
same construction.
8. Rotate the front half of the pulley clockwise until it bottoms, then
rotate counter clockwise until the set screw aligns with the flat in
the threaded half of the pulley. The pulley is now in position for
adjustment. See Table 1 for the number of turns out. Tip: Leave
allen wrench in set screw and use free hand to fold fan blade.
9. Retighten set screw, use of thread locking compound is recom-
mended.
10. Adjust fan belt tension, see Fig. 2. A 1/2” of belt deflection is rec-
ommended. Tighten lock nuts.
11. Tighten the 3/8” bolts, see Fig. 1
12. Rotate fan blade to make sure the fan belt does not rub.
13. Reinstall top belt cover, grille and lower belt cover. Tip: Installing
the grille before installing the lower cover makes it easier to access
the two lower grille bolts.
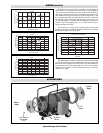
Table 1
Fan
No. of turns from full closed
Fan
No. of turns from full closed
RPM Motor Pulley Fan Pulley RPM Motor Pulley Fan Pulley
1500 3 1-1/2 1950 1-1/2 3
1600 2-1/2 1-1/2 2000 1-1/2 3-1/2
1650 2 1-1/2 2100 1-1/2 4
1725 1-1/2 1-1/2 2200 1-1/2 4-1/2
1800 1 1-1/2 2300 1 4-1/2
1850 1/2 1-1/2
4
Figure 1
Figure 2
Figure 3
3/8” Bolts
Lock Nuts
Fan belt tension
adjusting bolts
3/8” Bolts
Fan belt tension
adjusting bolts