


9
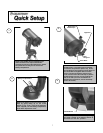
The NexStar comes completely pre-assembled and can be operational in a matter of minutes. The NexStar and
its accessories are conveniently packaged in one reusable shipping carton that contains the following
accessories:
• 25mm Plossl Eyepiece – 1¼"
• Star Diagonal - 1¼"
• Star Pointer Finderscope and Mounting Bracket
• Visual Back - 1¼" (attached to the optical tube)
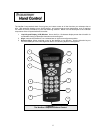
• Computerized Hand Control
A
A
s
s
s
s
e
e
m
m
b
b
l
l
i
i
n
n
g
g
t
t
h
h
e
e
N
N
e
e
x
x
S
S
t
t
a
a
r
r
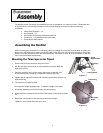
Start by removing the telescope from its shipping carton and setting the round base on a flat table or surface. It is
best to carry the telescope by holding it from the lower portion of the fork arm and from the bottom of the base.
Remove all of the accessories from their individual boxes. Remember to save all of the containers so that they
can be used to transport the telescope.
M
M
o
o
u
u
n
n
t
t
i
i
n
n
g
g
t
t
h
h
e
e
T
T
e
e
l
l
e
e
s
s
c
c
o
o
p
p
e
e
t
t
o
o
t
t
h
h
e
e
T
T
r
r
i
i
p
p
o
o
d
d
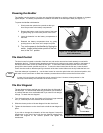
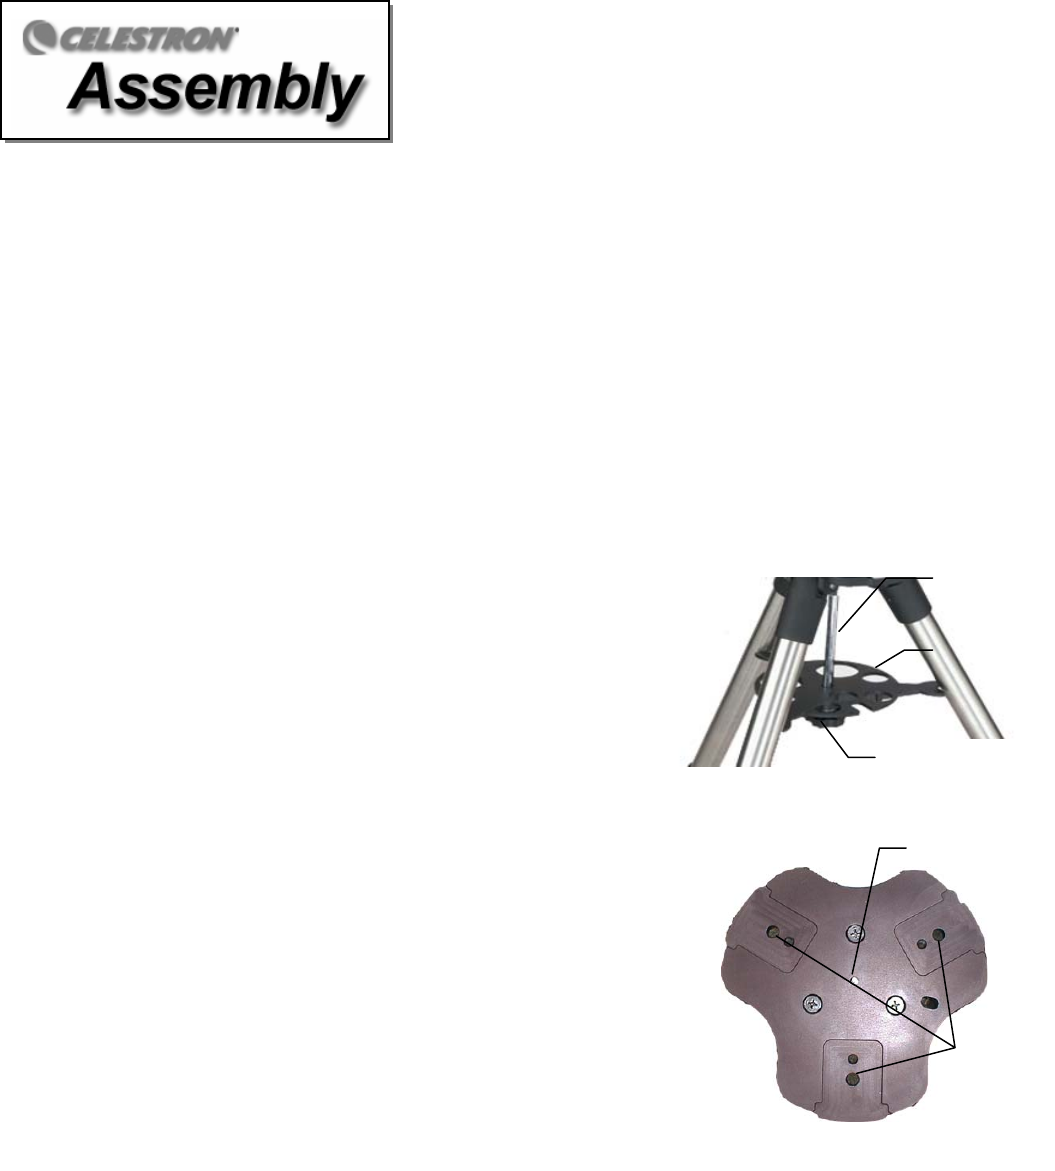
1. Remove the tripod and accessory tray from its box.
2. Pull the legs apart until the legs are fully extended and press it down flat
against the ground.
3. Place the accessory tray over the center support rod so that each arm
of the accessory tray is pushing out against the inside of each leg.
4. Tighten with the leg brace locking knob until the leg brace firmly presses out
against each leg.
5. The tripod will now stand by itself.
Your tripod has height adjustable legs. To adjust the height of the tripod:
1. Locate the tightening screw on the bottom of each tripod leg.
2. Rotate the knob counterclockwise until the inside portion of the tripod leg slides
out.
3. Extend the center portion of the tripod leg to the desired height.
Tighten the knob to hold the tripod leg in place.
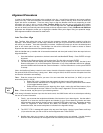
Positioning
Pin
Mounting
Holes
Accessory
Tray
Lockin
g
Knob
Center
Su
pp
ort Rod
Figure 1-1
Figure 1-2