


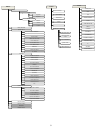


39
Polar Finderscope
Cover
Polar Axis
Cover
Figure 5-4
photography. This must be done in the dark when Polaris is visible and can be done using the hole in the polar axis or with
the help of the optional polar axis finderscope. See
Optional Accessory section.
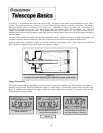
1. Set the telescope up so that the polar axis is pointing towards north (see figure 2-3).
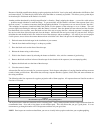
2. Remove the polar finderscope cover and the polar axis cover from both sides of the mount. The polar finderscope cover
unthreads from the rear of the mount and the polar axis cover simply press fits into the front of the mount. See figure 5-4
3. Loosen the DEC clutch knob and move the telescope so that the tube is perpendicular to the polar axis, ie, the tube should
be pointing either due west or east.
4. Look through the hole located underneath the polar finderscope cover (or through the eyepiece if using the optional polar
axis finderscope). You should be able to see the sky from the hole under the polar axis cover.
5. Adjust the mount in altitude and/or azimuth until Polaris is visible through the polar axis hole. Center Polaris as accurately
as possible.
Like the previous method, this gets you close to the pole but not directly on it. For help in identifying and locating Polaris,
read the section below.
Finding the North Celestial Pole
In each hemisphere, there is a point in the sky around which
all the other stars appear to rotate. These points are called the
celestial poles and are named for the hemisphere in which
they reside. For example, in the northern hemisphere all stars
move around the north celestial pole. When the telescope's
polar axis is pointed at the celestial pole, it is parallel to the
Earth's rotational axis.
Many methods of polar alignment require that you know how
to find the celestial pole by identifying stars in the area. For
those in the northern hemisphere, finding the celestial pole is
not too difficult. Fortunately, we have a naked eye star less
than a degree away. This star, Polaris, is the end star in the
handle of the Little Dipper. Since the Little Dipper (technically
called Ursa Minor) is not one of the brightest constellations in the
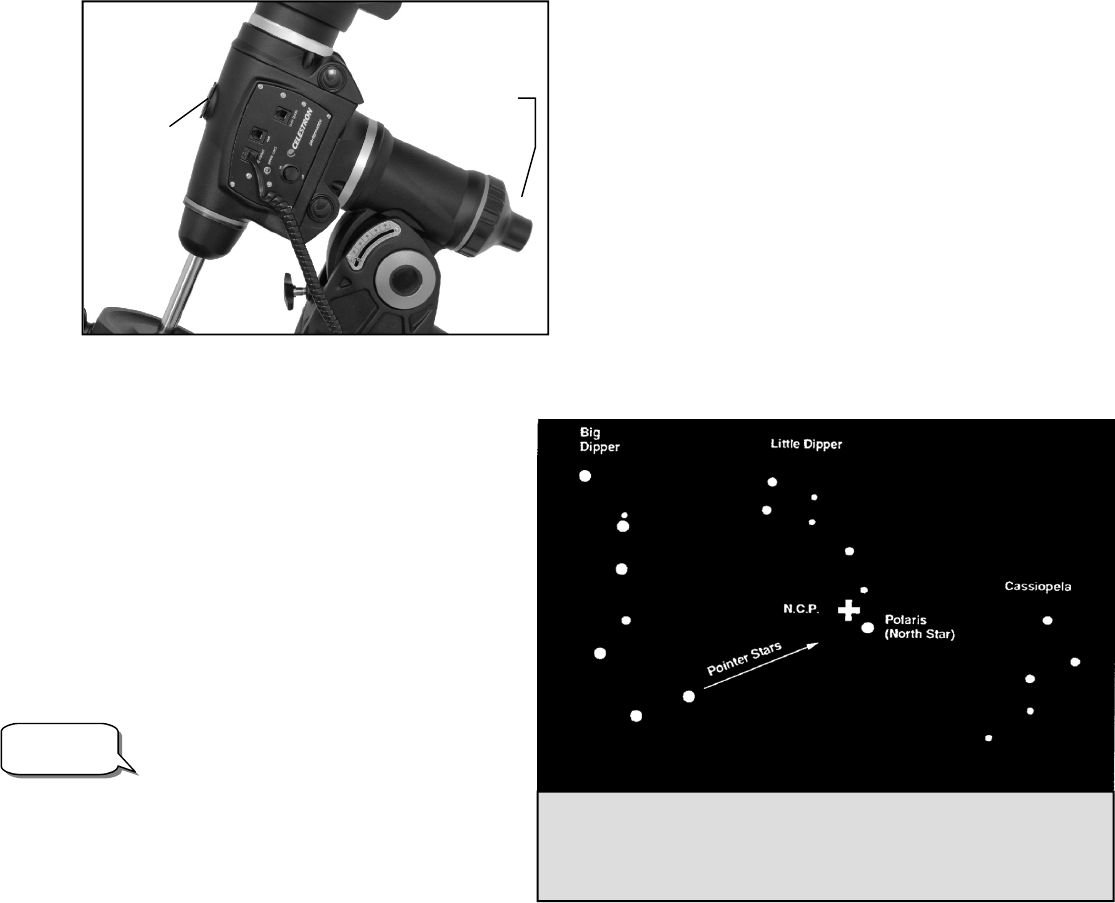
sky, it may be difficult to locate from urban areas. If this is the case, use the two end stars in the bowl of the Big Dipper (the
pointer stars). Draw an imaginary line through them
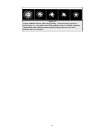
toward the Little Dipper. They point to Polaris (see
Figure 5-5). The position of the Big Dipper changes
during the year and throughout the course of the night
(see Figure 5-4). When the Big Dipper is low in the sky
(i.e., near the horizon), it may be difficult to locate.
During these times, look for Cassiopeia (see Figure 5-5).
Observers in the southern hemisphere are not as
fortunate as those in the northern hemisphere. The stars
around the south celestial pole are not nearly as bright as
those around the north. The closest star that is relatively
bright is Sigma Octantis. This star is just within naked
eye limit (magnitude 5.5) and lies about 59 arc minutes
from the pole.
The north celestial pole is the point in the
northern hemisphere around which all stars appear
to rotate. The counterpart in the southern
hemisphere is referred to as the south celestial pole.
Definition
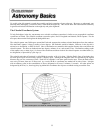
Figure 5-5
The two stars in the front of the bowl of the Big Dipper point to Polaris which is less
than one degree from the true (north) celestial pole. Cassiopeia, the “W” shaped
constellation, is on the opposite side of the pole from the Big Dipper. The North
Celestial Pole (N.C.P.) is marked by the “+” sign.