


11
I
I
n
n
s
s
t
t
a
a
l
l
l
l
i
i
n
n
g
g
t
t
h
h
e
e
F
F
i
i
n
n
d
d
e
e
r
r
s
s
c
c
o
o
p
p
e
e
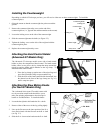
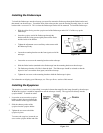
To install the finderscope onto the telescope you must first mount the finderscope through the finder bracket and
then attach it to the telescope. Toward the front of the telescope tube, near the focusing assembly, there is a small
bracket with a set screw in it. This is where the finderscope bracket will be mounted. To install the finderscope:
1. Slide the rubber O-ring over the eyepiece end of the finderscope and roll it 2/3 of the way up the
finderscope.
2. Insert the eyepiece end of the finderscope through the
bracket until the O-ring presses tightly between the finder
and the inside of the bracket.
3. Tighten the adjustment screws until they make contact with
the finderscope body.
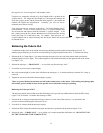
4. Locate the mounting bracket near the front (open) end of the
telescope.
5. Loosen the set screw on the mounting bracket on the telescope.
6. Slide the finder bracket (attached to the finderscope) into the mounting bracket on the telescope.
7. The finderscope bracket will slide in from the back. The finderscope should be oriented so that the
objective lens is toward the front (open) end of the telescope.
8. Tighten the set screw on the mounting bracket to hold the finderscope in place.
For information on aligning your finderscope, see Telescope Basics section of this manual.
I
I
n
n
s
s
t
t
a
a
l
l
l
l
i
i
n
n
g
g
t
t
h
h
e
e
E
E
y
y
e
e
p
p
i
i
e
e
c
c
e
e
s
s
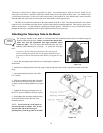
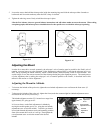
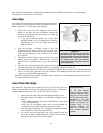
The eyepiece, or ocular as it is also called, is an optical element that magnifies the image focused by the telescope.
Without the eyepiece it would be impossible to use the telescope visually. The eyepiece fits directly into the
eyepiece holder. To attach an ocular:
1. Loosen the set screw on the eyepiece
holder so that it does not obstruct the
inner diameter of the eyepiece holder.
2. Slide the chrome portion of the
eyepiece into the eyepiece holder.
3. Tighten the set screw to hold the
eyepiece in place.
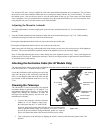
To remove the eyepiece, loosen the set
screw on the eyepiece holder and slide
Figure 2-10
Fi
g
ure 2-11