


T
T
H
H
E
E
P
P
O
O
W
W
E
E
R
R
S
S
E
E
E
E
K
K
E
E
R
R
1
1
2
2
7
7
R
R
e
e
f
f
l
l
e
e
c
c
t
t
o
o
r
r
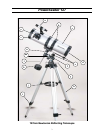
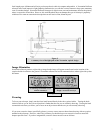
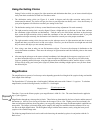
The PowerSeeker is a Newtonian reflecting telescope that comes on an equatorial mount. This section instructs you
on the proper assembly and use of your PowerSeeker telescope, which is shipped in one box, containing all the parts
you need to assemble it. Unpack and lay out all of the parts in a large, clear area where you’ll have room to work.
Use the list below and the telescope diagram to confirm you have, and can identify each part.
PowerSeeker 127
a. Finderscope i. Tripod Extension Screws
b
. Tube Rings j. Accessory Tray
c. Optical Tube k. Counterweight
d. Collimation Screws l. Counterweight Bar
e. Slow Motion Controls m. Right Ascension Setting Circle
f. Equatorial Mount n. Declination Setting Circle
g. Latitude Adjustment Screw o. Focuser
h. Tripod Leg p. Eyepiece
A
A
s
s
s
s
e
e
m
m
b
b
l
l
i
i
n
n
g
g
Y
Y
o
o
u
u
r
r
T
T
e
e
l
l
e
e
s
s
c
c
o
o
p
p
e
e
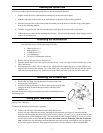
1. To set up the tripod, spread the legs outward until they are fully extended. Extend the center portion of each of the
three tripod legs down 6-8". Use the three tightening screws located at the bottom of each leg to secure the
extended legs in place.
2. Place the accessory tray on top of tripod's center leg brace. Thread the tray's threaded post into the threaded hole
in the center of the leg brace.
A
A
t
t
t
t
a
a
c
c
h
h
i
i
n
n
g
g
t
t
h
h
e
e
E
E
q
q
u
u
a
a
t
t
o
o
r
r
i
i
a
a
l
l
M
M
o
o
u
u
n
n
t
t
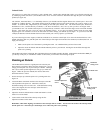
1. Locate the equatorial mount and place the base of the mount through the hole in the center of the tripod mounting
platform. From underneath the tripod mounting platform, thread the mounting bolt with washer into the threaded
hole on the bottom of the equatorial mount.
2. Thread the latitude adjustment screws into the equatorial mount until both screws are touching the inside of the
mount and the mount can no longer pivot up and down.
3. Locate the counterweight bar and counterweight. Thread the threaded end of the counterweight bar into the Dec
axis of the equatorial mount. Remove the safety screw and washer from the other end of the counterweight bar.
Loosen the counterweight locking bolt so that the screw is no longer obstructing the center hole of the
counterweight. Slide the counterweight half way up the counterweight bar and tighten the
locking screw to secure the counterweight in place. Thread the safety screw and washer
on to the end of the counterweight bar.
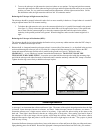
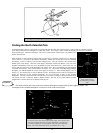
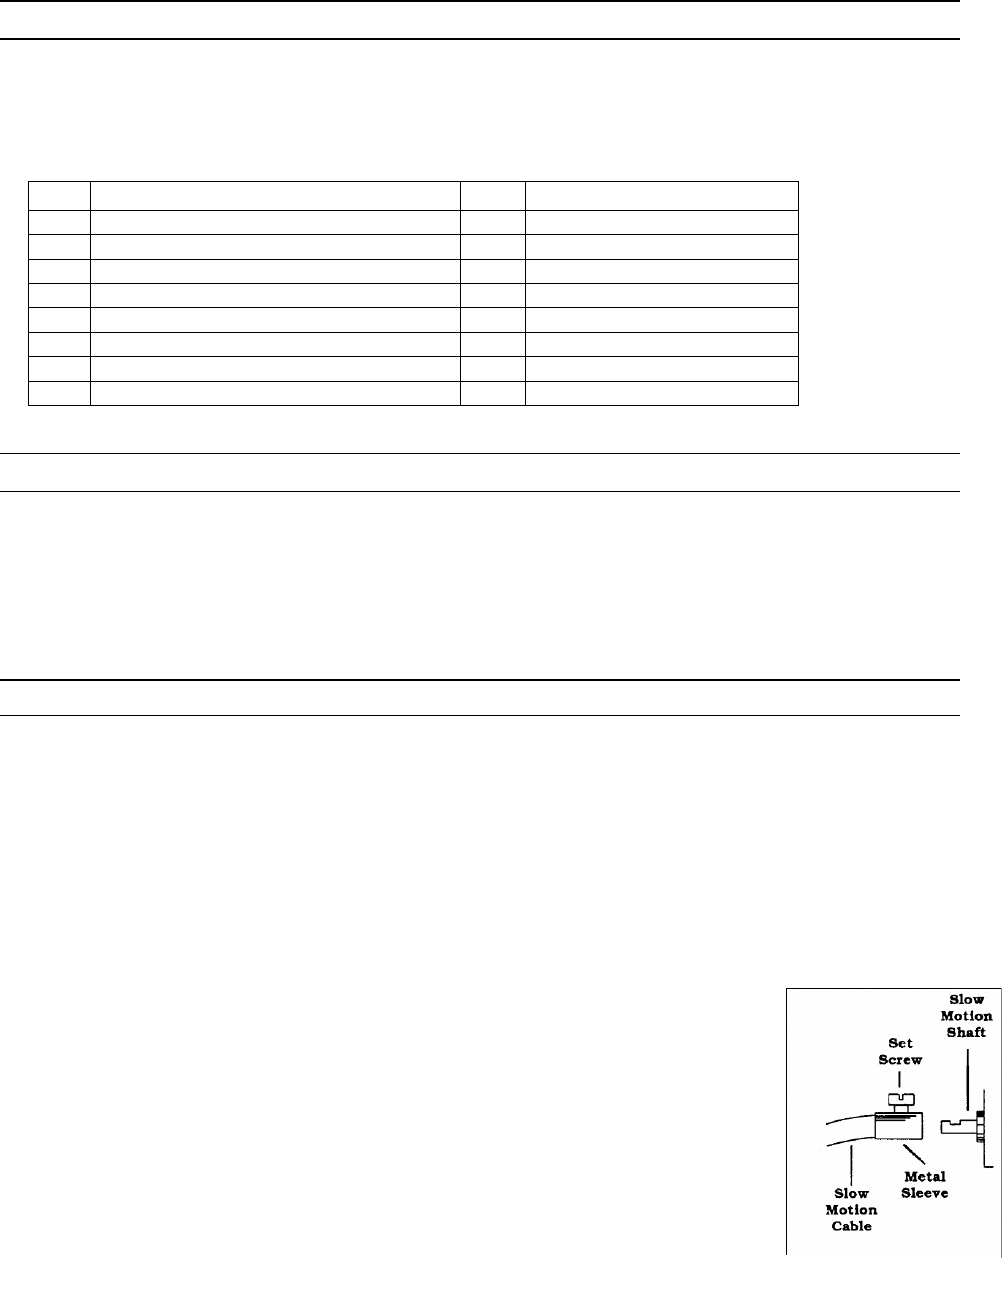
Figure 1
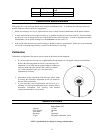
Before attaching the optical tube, the counterweight and slow motion controls should be added
to the mount:
4. Slide the chrome end of the slow motion control cables onto the equatorial mount gear
shaft. See Figure 1. The longer cable should attach to the Right Ascension axis and the
shorter cable attaches to the Declination axis.
4