9 REV 46578-20140521
ENGLISH 46578
ASSEMBLY
Install the Handles
1. Place the handle over the mounting channel on the
frame.
2. Secure the handle to the frame using the two handle
bolts (M8x45).
3. Place a flange lock nut (M8) on the end of each bolt
and fasten securely. DO NOT over tighten the flange
lock nuts.
Your generator requires some assembly. This unit ships
from our factory without oil. It must be properly serviced
with fuel and oil before operation.
If you have any questions regarding the assembly of your
generator, call our help line at 1-877-338-0999. Please
have your serial number and model number available.
Remove the Generator from the Shipping Carton
1. Set the shipping carton on a solid, flat surface.
2. Remove everything from the carton except the
generator.
3. Carefully cut each corner of the box from top to
bottom. Fold each side flat on the ground to provide a
surface area to install the wheel kit and support leg.
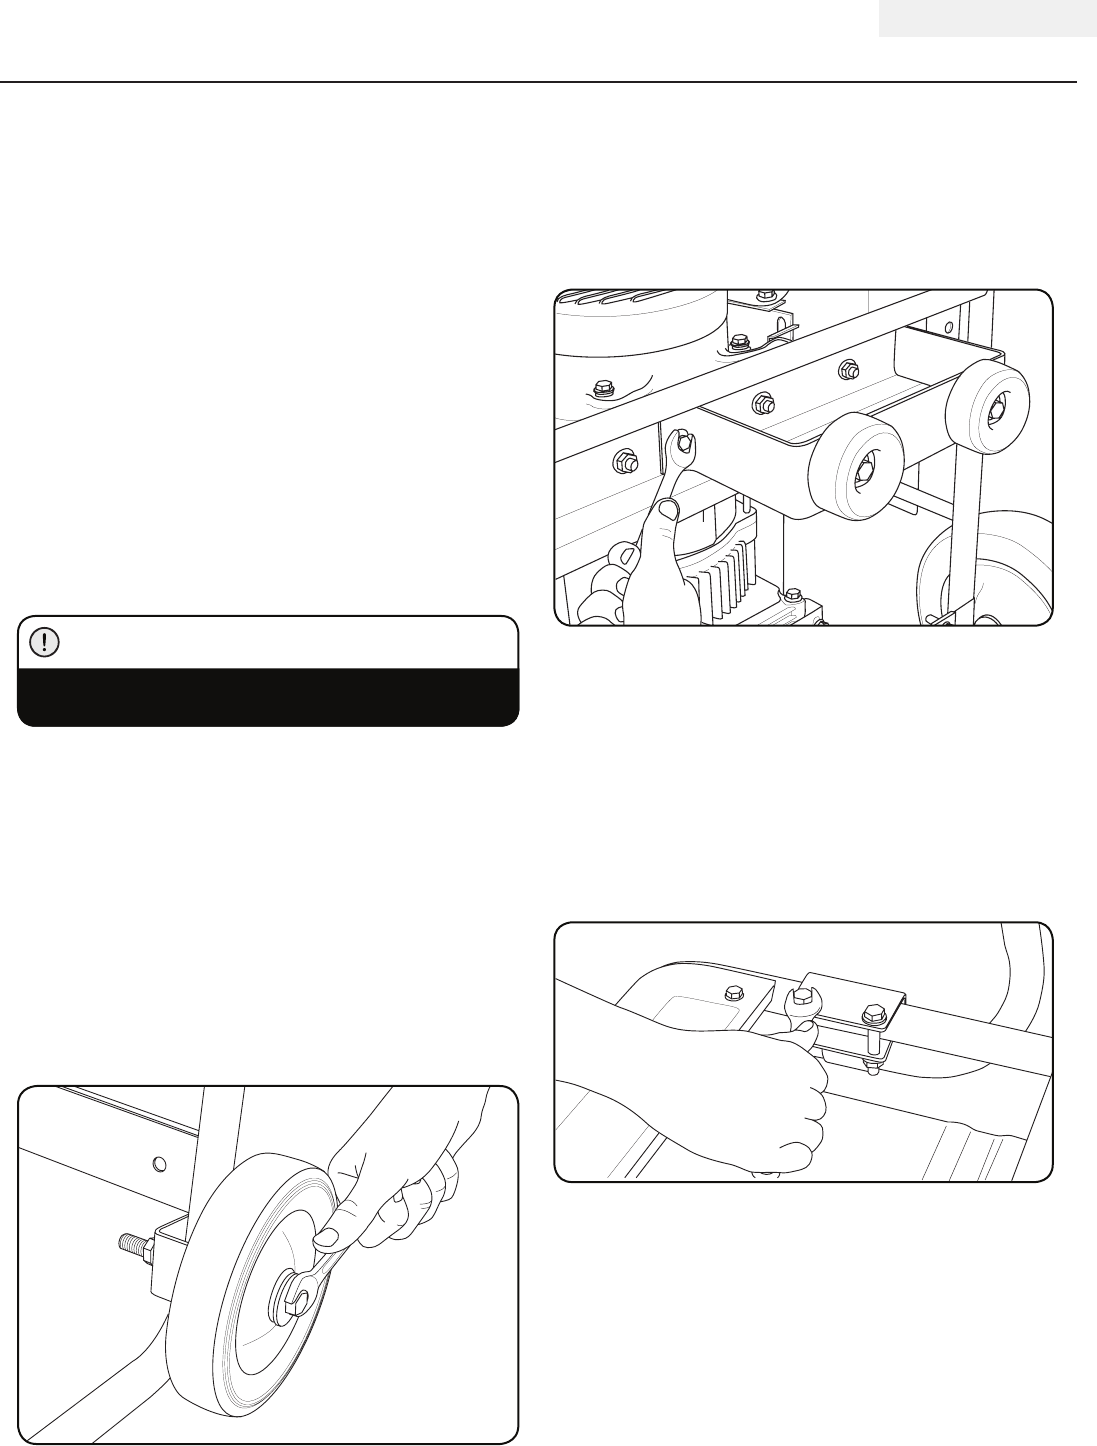
Install the Wheel Kit
You will need the following tools to install the wheels:
• 17 mm wrench OR adjustable wrench (not included)
• Socket wrench with a 16 mm socket (not included)
• Pliers (not included)
1. Before adding fuel and oil, tip the generator on it’s side.
2. Slide the M10x105 wheel bolt through the washer,
sleeve and wheel.
3. Slide the bolt through the mount point on the frame.
4. Fasten securely with the M10 loc nut.
5. Repeat steps 2-4 to attach the second wheel.
Install the Support Leg
1. Attach the support leg to the generator frame with
cap screws (M8x16) and flange lock nuts (M8).
2. Tip the generator slowly so that it rests on the
wheels and support leg.
The wheel kit is not intended for over-the-road use.
CAUTION
Connect the Battery
1. Remove the protective cover from the red (+) lead on
the battery.
2. Attach the red (+) lead to the red (+) terminal on the
battery with the cap screw and secure with the nut
already located in battery terminals.
3. Repeat steps 1-2 for the black (–) battery lead.


