


English - 3
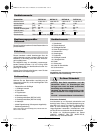
If you want to use an extension cable when operat-
ing your product, only the following cable dimen-
sions should be used:
– 1.0 mm
2
: max length 40 m
– 1.5 mm
2
: max length 60 m
– 2.5 mm
2
: max length 100 m
It is recommended for increased electrical safety to
use a Residual Current Device (RCD) with a tripping
current of not more than 30 mA. Always check your
RCD every time you use it.
If the supply cord is damaged, it must be replaced by
a Bosch Service Centre.
For products not sold in GB:
WARNING: For safety, it is essential that the mains
plug 5 attached to the product is fitted to the power
supply cable 15.
The couplings of connection leads must be pro-
tected against splashes and the coupling sockets on
the leads must be made of rubber or coated with
rubber.
Fixing means for the connection leads must be
used.
The connection lead must be inspected for signs of
damage at regular intervals and may only be used if
in perfect condition.
Products sold in GB only: Your mower is fitted with
an approved 13 A (BS 1363/A) electric plug and is
protected by a 13 A fuse (ASTA Approved to
BS 1362).
If the fitted plug is not suitable for your socket out-
lets, it should be cut off and an appropriate plug fit-
ted in its place by an authorized customer sercive
agent.
The severed plug must be disposed of to avoid a
possible shock hazard and should never be inserted
into a 13 A socket elsewhere.
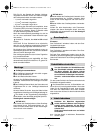
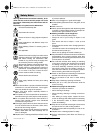
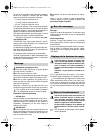
Handle assembly
➊ Insert the handle bottom 8 into the holes provided
and
➋ secure with the screws.
Note: The handle top 3 is height adjustable. Fix han-
dles in desired position I or II.
➌ Attach the handle top 3 with the bolts and wing
nuts 14 to the handle bottom 8.
Note: Ensure that the cable clips supplied are used
to fix the cable to the handle.
Attach cable to cable restraint 4 ensuring that
sufficient cable slack is available.
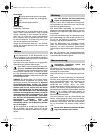
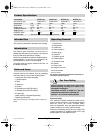
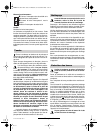
Snap together the grassbox
ROTAK 34/37
Snap the grassbox top on the grassbox bottom by
pushing all the “snap fits” together around the edges
starting at rear and working towards the front.
ROTAK 40/43
➊ Snap the grassbox bottom halves together by
pushing all the “snap fits” together around the edges
starting at rear and working towards the front.
➋ Snap together both top and bottom half of the
grassbox.
Ensure the cables are not trapped when folding/un-
folding top handles. Do not drop the handles.
Fitting
Lift the deflector guard 7 and hold up, fit the grass-
box 6.
Removing/Emptying
Lift the deflector guard 7 and hold up. Remove
grassbox 6.
For non grass collection the mower can be used
without the grassbox 6 in position, with the deflector
guard 7 in the down position.
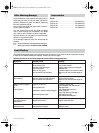
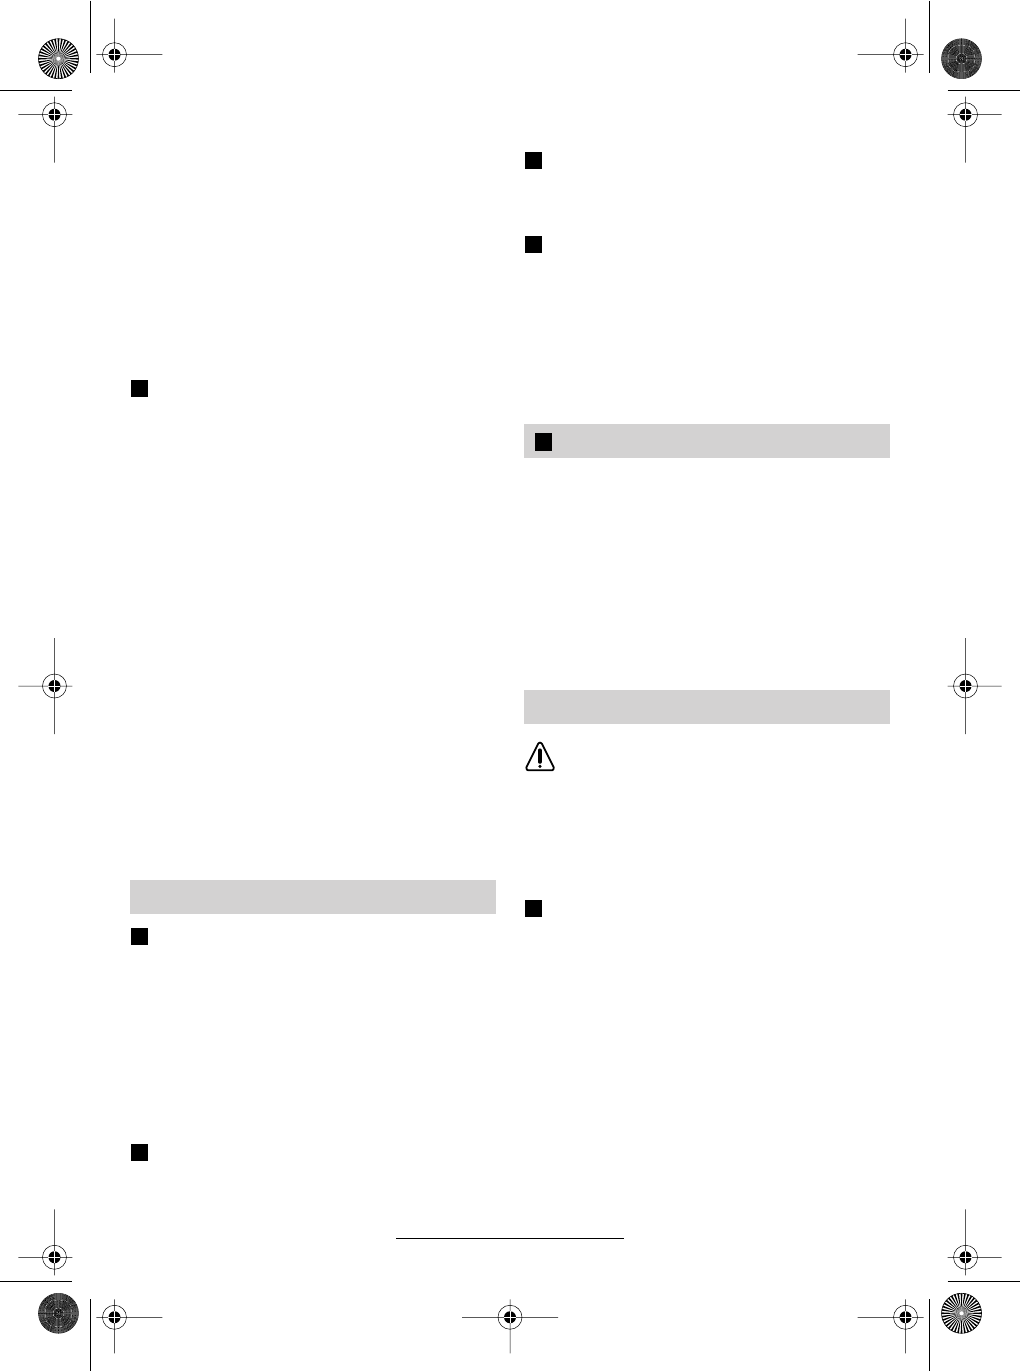
Stop, release switch lever and wait until
the motor stops before adjusting height.
The blades continue to rotate after the ma-
chine is switched off, a rotating blade can
cause injury.
Caution – do not touch rotating blades.
For the first cutting of the season, a high cutting ad-
justment should be selected.
The lawnmower can be set to 10 cutting heights
between 20 mm and 70 mm. For this purpose, press
the height of cut lever 12 inwards then lift or push
down the mower until required height is selected.
Assembly
B
A
B
Grassbox
Adjusting the Cutting Height
C
D
E
F
F016 L70 468 - Buch Seite 3 Mittwoch, 8. November 2006 4:13 16
14 • F016 L70 468 • 06.11